| |
| World(s) | Volcano |
| Type | Temple |
| Music Theme(s) | |
| Animal Buddies | None |
| Puzzle Pieces | 5 |
| Enemies Encountered | Tiki Zings, Screaming Pillars, and Buzzbites |
| Game(s) | Donkey Kong Country Returns, Donkey Kong Country Returns 3D |
| First Appearance | Donkey Kong Country Returns |
| Latest Appearance | Donkey Kong Country Returns 3D
|
Five Monkey Trial is the sixty-third stage in Donkey Kong Country Returns and Donkey Kong Country Returns 3D and is the eighth and final stage in the Volcano world. It is also the final stage before the final boss. As it is a secret stage, as all of the K-O-N-G Letters in Volcano must be collected to unlock it. It is preceded by Red Red Rising and followed by Tiki Tong Terror.
Overview[]
It is different than most stages because it is divided into five short parts. Each part of the stage features different enemies and different obstacles, and Donkey and Diddy Kong must collect five Banana Coins and a Puzzle Piece in each section to progress to the next. This makes it the only stage in the game that is impossible to complete without grabbing all five Puzzle Pieces, which unlock the Volcano diorama in the extras mode. There are no bananas found in the whole stage.
Walkthrough[]
The level begins with a straight pathway leading to a large switch on the floor. If the Kongs hit it a few times, a few statues appear, along with a Barrel Cannon. The barrel cannon shoots them to the first trial area.
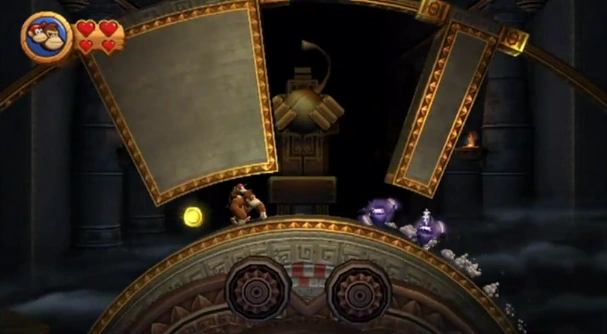
Trial 1[]
In this area, the primates must jump on trampolines while avoiding Tiki Zings to collect five Banana Coins. There are three trampolines placed next to each other; the middle trampoline holds one coin that is high above it, and the two platforms beside it have two Banana Coins. The fourth coin is high above both of them, and the fifth is placed only slightly above them. At the same time, two Tiki Zings vertically hover between the trampolines, while another two circle around the platforms next to the middle platform. Once all of the coins are collected, a Barrel Cannon appears above the middle platform to blast the primates to the second part.
Trial 2[]
This part is home to four small platforms. In the background, many Screaming Pillars appear and try to fall on the heroes. They must jump along all of the platforms to avoid them. As the pillars are destroyed from hitting the ground, Banana Coins appear, which can be followed to find a safe platform away from the Screaming Pillars. If all of the coins are collected, a Barrel Cannon appears in the center of the area to shoot the Kongs to the next area.
Trial 3[]
Here, the primates must use squid enemies that come from cannons in the walls to reach the top of the area. Once they bounce upwards on top of them and reach the highest possible point, they can find all five Banana Coins. Once they pick up all of them, a Barrel Cannon appears to lead the Kongs to the next area.
Trial 4[]
In this area, the Kongs are placed on a turning wheel. As they try to balance on the wheel, Buzzbites move towards them. Watching out for the low walls above them, the primates must jump over each of the enemies and collect Banana Coins on the way. Once all of the coins are collected and the wheel stops turning, a Barrel Cannon appears to blast the Kongs to the next area.
Trial 5[]
In the final area, the heroes must move around two platforms to avoid large, spiky boulders. The boulders fall towards them in different ways from the background, and every time one set of them is avoided, a Banana Coin shoots out of the gap between the platforms. If the coin is missed, the heroes must avoid an additional set of boulders. Once five Banana Coins are collected, a Barrel Cannon appears to take the heroes to the end of the stage where they collect the red Rare Orb.
Puzzle[]
The puzzle of Five Monkey Trial is of a strawberry on a light green background. When all the pieces are found after defeating Tiki Tong and completing the game, the Volcano Diorama is added to the Diorama Gallery.
Enemies[]
Time Attack Medals[]
- Gold: 1:54:00
- Silver: 1:57:00
- Bronze: 2:00:00
Gallery[]
")
")
")
")
")
Videos[]
 (16 KB)")
 (20 KB)")