| |
| World(s) | Cliff |
| Type | Cliff |
| Music Theme(s) | Sticky Situation |
| Animal Buddies | None |
| Bonus Room(s) | 1 |
| Puzzle Pieces | 9 |
| Notable Feature(s) | In this level, there are many tar pits and places where tar falls constantly. Over the tar, there are also floating bone platforms for the Kongs use to progress and sometimes tilt to reach high places. In case of the primates fall into tar pits, they will become covered in tar and unable to more freely. They must quickly keep jumping to not sink into the pit, reach a clean area and ground-pound three times to get rid of the tar. |
| Enemies Encountered | Skellirexes, Skullyrexes, Bonehead Jed, Firehead Neds, Tiki Zings |
| Game(s) | Donkey Kong Country Returns, Donkey Kong Country Returns 3D |
| First Appearance | Donkey Kong Country Returns (2010) |
| Latest Appearance | Donkey Kong Country Returns 3D (2013)
|
Sticky Situation is the fortieth-third level in the games Donkey Kong Country Returns and Donkey Kong Country Returns 3D, as well as the first level in the Cliff world of Donkey Kong Island. It is preceded by Mangoruby Run and followed by Prehistoric Path.
Overview[]
The level is full of tar pits and places where tar falls constantly. Together to the tar falling, there are also dropping bone platforms for the Kongs to progress. These platforms eventually loop around and some of them carry items. Floating above the tar pits, there are bone platforms that the primates can step on safely and tilt by weight to reach high areas. In the occasion of the heroes fall into the tar pits, they will become covered in tar and unable to more freely. They must quickly keep jumping to avoid sink into the pit, reach a clean area and ground-pound three times to get rid of the tar. The enemies in the level include Skellirexes, Skullyrexes, Bonehead Jed, Firehead Neds and Tiki Zings.
Walkthrough[]
Starting off, go right and jump across the dropping platforms, going past a Skellirex and a Skullyrex. From the third column of dropping platforms, jump to get the letter "K" at the top of the screen. To the right, there are bone platforms over a tar pit. If you fall into the tar, you will become slow and unable to jump very high. On solid ground, ground-pound three times to remove the tar. Going past another Skellirex, jump onto the second platform with Skullyrexes, defeat the enemies and stand at the right end to tilt it upward on the left side. Then run and jump up and left, towards a banana at the top of the screen and grabbing onto a turf-covered ceiling above. The ceiling can also be reached by bouncing from the Skellirex on the previous bone platform. Climb right and up to find the first Puzzle Piece over a platform. Go back down and head right while going past a Bonehead Jed and blowing on the dandelion at the end for a heart if needed. For the next section, jump across the dropping platforms, staying low to make it under the low-hanging walls. It is also possible to use Diddy Kong's rocket pack to delay the Kongs' fall and reach platforms. Just before the ledge with spikes at the top, jump up the small platforms to make it over to the other side. To the right, there is the checkpoint and a DK Barrel on the high ledge to the right.
Keep moving forward, jumping across and upward along more dropping platforms, avoiding Firehead Ned's fireballs and Skullyrexes. After that, in the section with two columns of dropping platforms parallel to each other, go up jumping between columns and avoiding Skellirexes. At the top, walk through the giant skull's mouth ahead. Go down the slope and past more Skullyrexes, then drop off the edge of the platform to find some solid ground below. Pound on the cracked rock three times to break through, reaching the second Puzzle Piece in the alcove. Next, go right and quickly jump through the tar pit. Ground-pound on the next solid platform to clean up. Go past the enemies, including Skullyrexes and another Firehead Ned above. Past that, drop into the tar below a wooden walkway and keep jumping to the right until reach the letter "O". After that, clean up and jump to the walkway, then continue right going past Skellirexes and another Firehead Ned. There will be two columns of dropping platforms here. Ride the platforms on the right side downward. Towards the bottom, stand at the right column to reach the third Puzzle Piece above the abyss and obscured by smoke. Then quickly jump up the bone platforms between columns to survive and progress. At the top, go through the second checkpoint and blow the dandelion next to it to reveal the fourth Puzzle Piece.
Next, jump into the barrel cannon and shoot upward and right along the banana arc and over the spikes while avoiding a Tiki Zing to reach the next barrel. Shoot upward from the next barrel, continue onto the middle platform with another Skullyrex and proceed to the next set of barrel cannons. Shoot upward and left via the first barrel to collect the letter "N" while avoiding more Tiki Zings with good timing. Back into the barrel cannon, continue to the right over more spikes and through more barrels until you reach a solid platform in front of another giant skull. Roll-jump to the left and over the previous barrel cannon to reach a high platform, and use the barrels there to get the fifth Puzzle Piece in the background. Diddy Kong's rocket pack can also help to reach the platform. After you land in front of the giant skull again, you will see a hole into wall behind it. There is also a zebra briefly seen inside the hole. Jump over the pit and into the right wall behind the skull to enter a Bonus Room. In the room, use the four barrel cannons to shoot around, collect all sixty-five bananas, three Banana Coins and an Extra Life Balloon within thirty seconds and make the sixth Puzzle Piece appears. After the Bonus Room, drop into the pit and slide down to another area full of dropping platforms.
Keep yourself afloat by jumping upward constantly. it is easiest to do this on the columns of small platforms that are more tightly bunched together. And similar to the previous sections, use Diddy Kong's rocket pack to delay the Kongs' fall if necessary. You will soon see the letter "G" on the third column. If the letter go down into abyss below, it will loop back around from the top after some time, so do not worry about missing it. Same thing with the seventh Puzzle Piece just to the right of here on the fifth column of platforms. Get across the spikes ahead and make it onto the solid platform with two Skullyrexes. Defeat them, then watch the last column of platforms you just crossed. When the platform with a cactus appears, jump onto it and ground-pound nearby the cactus to reveal the eighth Puzzle Piece. Now, jump into the barrel cannon to the right to shoot up to the final area. Defeat all Skullyrexes and jump onto the upper right ledge of the bone platform over the tar pit. When the left side rises enough, jump across to the left ledge and roll-jump to the high platform on the left. Collect the ninth and final Puzzle Piece there, behind the Kongs' heart containers at the screen. Go back down and tilt the bone platform to the opposite direction to the reach the Slot Machine Barrel above. Touch the barrel and complete the level.
Enemies[]
- Skellirex: 7 (regular type)
- Skullyrex: 16
- Bonehead Jed: 1
- Firehead Ned: 3
- Tiki Zing: 4
Items[]
- Hearts: 2
- DK Barrels: 1
- Banana Coins: 21 (counts 3 in the Bonus Room, does not count three or more consecutive jumps on enemies)
- Extra Life Balloons: 3 (counts 1 in the Bonus Room, does not count eight or more consecutive jumps on enemies)
K-O-N-G Letters[]
- K: At the beginning of the level, jump from one of the bone platforms in the third column where tar falls to reach the letter "K" at the top of the screen.
- O: After the second Puzzle Piece, you will reach a wooden walkway over a tar pit. Drop into the tar below, keep jumping to the right until reach the letter "O".
- N: After the second checkpoint and in the second set of barrel cannons, shoot upward and left from the first barrel cannon to reach the letter "N" at the top of the screen while avoiding Tiki Zings.
- G: After the Bonus Room and sliding down the pit beyond the second giant skull's mouth, there is another large section where tar falls with many columns of bone platforms. The letter "G" is on one of the platforms in the third column. If you miss the letter, just wait for the platforms to loop around and the letter will reappear.
Puzzle Pieces[]
- 1: After the letter "K", tilt the backbone platform with two Skullyrexes over the first tar pit so it ramps up to the left. Quickly run and jump to the left towards the banana you see floating at the top of the screen and cling on the turf-covered ceiling. It is also possible to reach the ceiling by bouncing on the Skellirex over the previous bone platform. Climb right and up to reach an alcove with the Puzzle Piece.
- 2: After go inside the first giant skull's mouth and past some Skullyrexes, drop off in the area just below the barrel cannon. If you fall into the tar pit, keep jumping to the left and pound on the cracked rock three times to reach the Puzzle Piece.
- 3: After the letter "O" and before the second checkpoint, there is a area where the tar falls with two columns of dropping platforms next to each other. The first column has large platforms and second one has small platforms. Step on the platforms of the right column and wait to reach close to the bottom of the abyss. Next to the right wall, there is a Puzzle Piece obscured by smoke. Jump to get the Puzzle Piece and quickly go up jumping between columns to not fall into the abyss.
- 4: Blow on the dandelion immediately after the Tutorial Pig's second checkpoint to reveal a Puzzle Piece.
- 5: After the letter "N" and before go inside the second giant skull's mouth, roll-jump to the left over a barrel cannon to reach a wooden platform. Use Diddy Kong's rocket pack to reach this platform safely. Go into the barrel cannon above the platform to be shoot towards the Puzzle Piece and some bananas in the background, and land back next to the giant skull.
- 6: Instead of fall down the pit inside the second giant skull's mouth, jump up towards the hole into the right wall (where you will briefly see a zebra) and you will reach a Bonus Room. There, use the four barrel cannons to collect all sixty-five bananas, three Banana Coins and an Extra Life Balloon within thirty seconds and reveal a Puzzle Piece.
- 7: In the same section of the letter "G", the Puzzle Piece is on one of the platforms in the fifth column. If you unable to get the Puzzle Piece before it goes down into the abyss, just wait for the platforms to loop around and the Puzzle Piece to appear again.
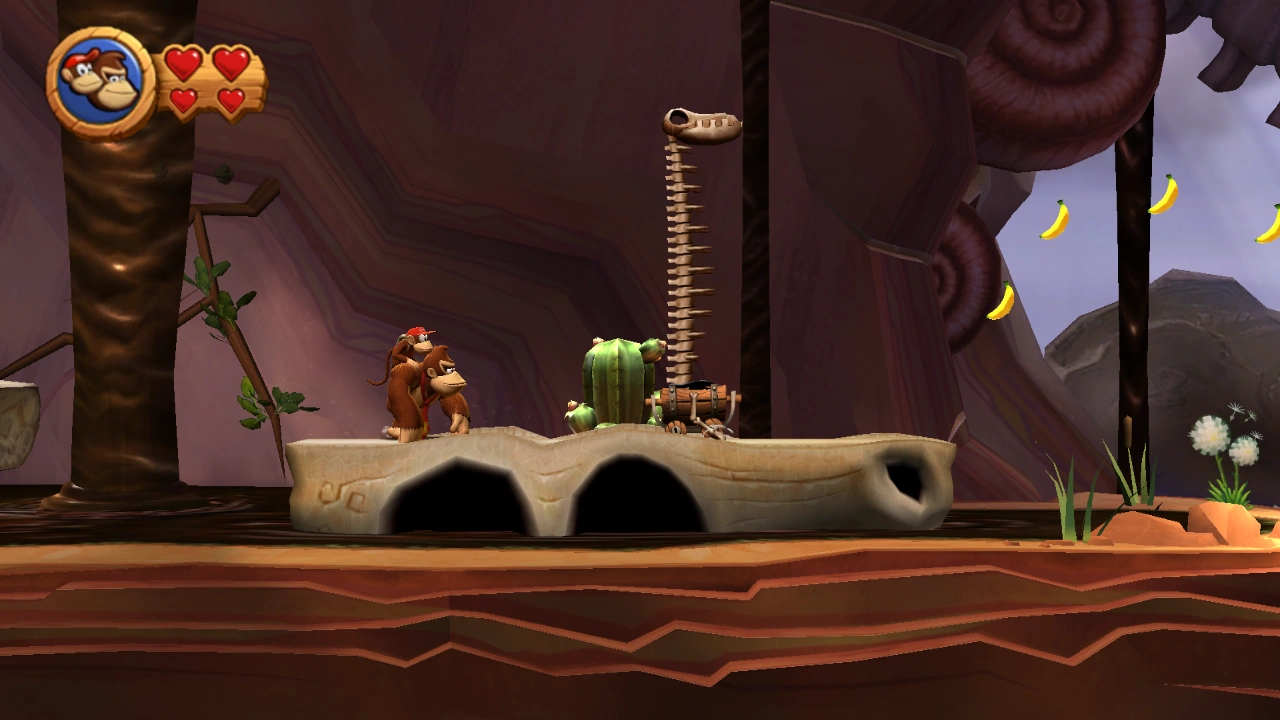
- 8: Next to the end of the last section where tar falls, in the last column of bone platforms, wait for the platform with a cactus over it. Step on the platform and ground-pound nearby the cactus to reveal the Puzzle Piece. If you miss the platform with the cactus, just wait for the platforms to loop around and the cactus will eventually reappear.
- 9: In the final area with the Slot Machine Barrel, defeat all Skullyrexes and tilt the bone platform over the tar pit to rise its left side by stepping on the right ledge. Quickly run to the left, jump to the high ledge on the left and roll-jump to reach the upper left platform. The Puzzle Piece is floating above the platform and partially hidden by the Kongs' heart containers at the screen.
Puzzle[]
The puzzle of Sticky Situation is of a pineapple against a light blue background. When all of the pieces are found, the Mangoruby artwork will be added to the Boss Gallery of the Image Gallery in the Extras menu.
Time Attack Medals[]
- Shiny Gold: 00:58.00
- Gold: 01:03.00 (01:13.00 in the Japanese version)
- Silver: 01:16.00 (01:26.00 in the Japanese version)
- Bronze: 02:03.00 (02:23.00 in the Japanese version)
Gallery[]
")
")
")
")
")
")
")
")
")
")
")
")
")
")
")
")
Videos[]
 (20 KB)")
 (18 KB)")