| |
| World(s) | Cliff |
| Type | Cliff |
| Music Theme(s) | Clifftop Concert |
| Animal Buddies | None |
| Bonus Room(s) | 1 |
| Puzzle Pieces | 9 |
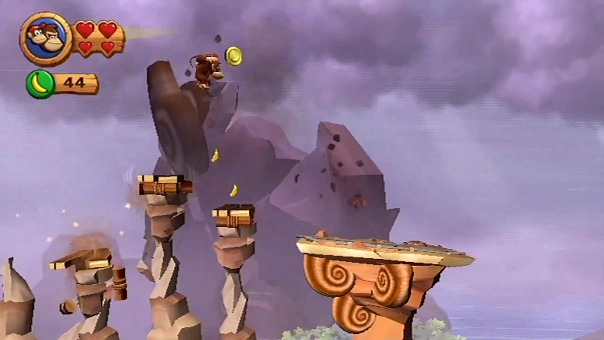
| Notable Feature(s) | The level possesses many crumbing platforms that will break apart or tilt. There are also some slopes for the Kongs to slide down and progress. At the final section of level, the primates must run away from a Tiki Boulder that will crush everything on its path. |
| Enemies Encountered | Skellirexes, Skullyrexes, Tiki Buzzes, Tiki Boulder |
| Game(s) | Donkey Kong Country Returns, Donkey Kong Country Returns 3D |
| First Appearance | Donkey Kong Country Returns (2010) |
| Latest Appearance | Donkey Kong Country Returns 3D (2013)
|
Precarious Plateau is the forty-eighth level in the games Donkey Kong Country Returns and Donkey Kong Country Returns 3D, as well as the sixth level in the Cliff world of Donkey Kong Island. It is preceded by Precarious Plateau and followed by Tippy Shippy.
Overview[]
The level contains many crumbling platforms that will fall apart or tilt, demanding the Kongs to go through them quickly and jump to the next platforms. The primates must also slide down some slopes, jumping over pits and into barrel cannons to progress. It is the only level to feature a Tiki Boulder. This giant tiki will wake up and pursue the heroes during the final section of the level. The Tiki Boulder will destroy everything on its path and defeat the Kongs instantly if it reaches them.
Walkthrough[]
As soon as you begin, go left and blow on the hidden blue flower to obtain the first Puzzle Piece. Head right from here and you will find that some of the platforms will fall apart as you proceed. Go past the gaps and the enemies, and at the end of the first section, shoot from the barrel cannon into the background. As soon as you land, go to the left end and ground-pound nearby the cactus to get the second Puzzle Piece. Moving on, go right and roll-jump back over the right gap to the tilting platform. Jump across the next several falling platforms as they tilt to the right. Slide down the slope on the last one and collect the letter "K" at the very bottom before jumping to the next set of tilting platforms ahead. Go past the DK Barrel and enemies along the way, and continue across three small crumbling platforms. You will see a partially hidden Puzzle Piece by a wooden structure above the next tilting platform with a Skellyrex. When the Skellirex tilts the platform upward to the left, jump from it to collect the third Puzzle Piece. It is also possible to bounce on the Skellirex or defeat the Skellirex and tilt the platform using only the Kongs' weight to reach the Puzzle Piece.
Moving forward, tilt the platform to reach the next platform to the right. Ride the next tilting platform as it falls to the right, and jump across the next few platforms, collecting the letter "O" along the way. On the tilting platform ahead of it, tilt it upward on the right side to reach the high ledge with the checkpoint. Defeat the Skellirexes and go past the DK Barrel to proceed downward along a series of crumbling platforms. At the bottom, jump into the barrel cannon and shoot to the foreground. Before sliding down the slope, go up, jump into another barrel cannon to the left and get shot into a Bonus Room. In the room, use the moving and bouncy platform to collect all forty-four bananas and four Banana Coins within thirty seconds and reveal the fourth Puzzle Piece. After the Bonus Room, go right and throw the wooden barrel ahead to clear the Skullyrexes on the bridge. Jump into the barrel cannon at the end to reach the background once more, and slide down the next couple of slopes and jump across the platforms. Be sure to collect the Extra Life Balloon here by bouncing on the Skellirex. Use the next barrel cannon to reach the foreground, where you will slide down a much longer slope filled with bananas. At the bottom, return to the background via another barrel cannon and go right past the enemies to reach another checkpoint.
To the right, jump onto the Tiki Boulder, and it will wake up and pursue you through the final section of the level. Fall off the right side of it and the first platform will fall, creating a slope. Go back and forth heading down the next few slopes, then as you fall to the right along the fourth slope, jump at the end to get the fifth Puzzle Piece hidden by the dinosaur skull above the gap. Continue across the next couple of gaps and over a Tiki Buzz, and jump over a wooden barrier in the way. Quickly blow on the blue flower to get the sixth Puzzle Piece, then keep going right as the Tiki Boulder chases you. To the far right, ignore the banana arc in the air and roll-jump to get the letter "N" floating next to the right wall. For this next section, stand on the wooden part of the platform below and to the left. The Tiki Boulder will crush the stone platform, causing the wooden part to fall out. Make your way downward in this manner, then continue going right along the upper path and avoid the tar pits. Use rolls and roll-jumps to progress quickly through this section. After the first big tar pit, you will find a wooden barrier in the way. Quickly jump from the top of it to collect the seventh Puzzle Piece directly above.
Jump over the next tar pit and go right, rolling through the Skellirex quickly to find the eighth Puzzle Piece between two hanging wooden boards above. Jump from below to collect the Puzzle Piece quickly, and continue going right by jumping over more wooden boards in the way. Get the letter "G" in the air above, then jump across the crumbling platforms at the end to escape the Tiki Boulder. At this point, drop into the tar pit below, keep jumping to avoid sinking and go to the right to find the ninth and final Puzzle Piece below the platform. With the final Puzzle Piece collected, jump into the barrel cannon to the right to get shot upward. Ground-pound thrice to clear the tar off, then jump into the Slot Machine Barrel to complete the level.
Enemies[]
- Skellirex: 11 (regular type)
- Skullyrex: 8
- Tiki Buzz: 5 (regular type)
- Tiki Boulder: 1
Items[]
- DK Barrels: 2
- Banana Coins: 9 (counts 4 in the Bonus Room, does not count three or more consecutive jumps on enemies)
- Extra Life Balloons: 1 (does not count eight or more consecutive jumps on enemies)
K-O-N-G Letters[]
- K: After the second Puzzle Piece and some falling platforms, the letter "K" is at the very end of a slope. Jump at the right moment to collect the letter and reach the next platform.
- O: Immediately after the third Puzzle Piece, the letter "O" is on the crumbling platform beneath a big banana bunch.
- N: After the sixth Puzzle Piece, ignore the arc of bananas and roll-jump off the edge of the platform to get the letter "N" at the right wall.
- G: Immediately after the eighth Puzzle Piece, the letter "G" is floating beside the last wooden barrier. Collect the letter by jumping towards it on your way out of the tunnel.
Puzzle Pieces[]
- 1: At the beginning of the level, go left and and blow on the partially hidden blue flower to reveal a Puzzle Piece.
- 2: Just after being shot through the first barrel cannon in the background, go left and ground-pound nearby a cactus to reveal a Puzzle Piece.
- 3: After the letter "K" and some crumbling platforms, the Kongs will reach a wooden structure above a tilting platform and a Skellirex. The Puzzle Piece is partially hidden by the wooden structure. You can reach the Puzzle Piece by bouncing off the Skellirex on the tilting platform. After defeating the Skullirex, it is also possible to tilt the platform to one side and jump from the high end to reach the Puzzle Piece.
- 4: After the first checkpoint and being shot on a slope in the foreground, climb back up the slope, going left and jump into the barrel cannon. Shoot the barrel to reach a Bonus Room. There, use the moving and bouncy platform to collect all forty-four bananas and four Banana Coins within thirty seconds and make a Puzzle Piece to appear.
- 5: After the second checkpoint, the fifth Puzzle Piece is floating above the gap in the slope that the Tiki Boulder is chasing you down. The Puzzle Piece is partially hidden by a dinosaur skull.
- 6: Just after the fifth Puzzle Piece, a Tiki Buzz and a wooden barrier, quickly blow on the blue flower on the slope to reveal and collect a Puzzle Piece, before the Tiki Boulder crushes you.
- 7: After the letter "N" and past a large tar pit, jump from the wooden barrier on the ground to get a Puzzle Piece above.
- 8: Immediatetly after the seventh Puzzle Piece, a tar pit and a Skellirex, the eighth Puzzle Piece is between two wooden barriers hanging from the ceiling. Quickly jump to collect the Puzzle Piece and move forward to avoid the Tiki Boulder.
- 9: After the letter "G", drop off the platform under the Slot Machine Barrel at the end of the level. The Puzzle Piece is in the tar pit below. Keep jumping to avoid sinking into the tar and collect the final Puzzle Piece. Use the barrel cannon on the right side to get back up the solid platform.
Puzzle[]
The puzzle of Crumble Canyon is of a pineapple against a light blue background. When all of the pieces are found, the Cliff Spires artwork will be added to the Worlds Gallery of the Image Gallery in the Extras menu.
Time Attack Medals[]
- Shiny Gold: 01:28.00
- Gold: 01:33.00 (01:35.00 in the Japanese version)
- Silver: 01:49.00 (01:53.00 in the Japanese version)
- Bronze: 02:26.00
Gallery[]
")
")
")
")
")
")
")
")
")
")
")
")
")
")
")
")
Videos[]
 (19 KB)")
 (20 KB)")