| |
| World(s) | Forest |
| Type | Forest |
| Music Theme(s) | Forest Frenzy Returns (or Vine Valley) |
| Animal Buddies | None |
| Bonus Room(s) | 1 |
| Puzzle Pieces | 7 |
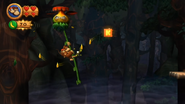
| Notable Feature(s) | In the level, the Kongs must grab on Wigglevines, flying plants, to progress. At some points, they must also ride these plants over large pits, avoiding enemies and collecting items. The Wigglevines appear only in this level. |
| Enemies Encountered | Tiki Goons, Wigglevines, Tiki Dooms, Green Chomps, Tiki Zings, Vine Chomp |
| Game(s) | Donkey Kong Country Returns, Donkey Kong Country Returns 3D |
| First Appearance | Donkey Kong Country Returns (2010) |
| Latest Appearance | Donkey Kong Country Returns 3D (2013)
|
Wigglevine Wonders is the thirtieth-ninth level in the games Donkey Kong Country Returns and Donkey Kong Country Returns 3D, as well as the seventh level in the Forest world of Donkey Kong Island. It is preceded by Springy Spores and followed by Muncher Marathon.
Overview[]
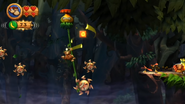
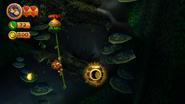
The level revolves around the use of the species called Wigglevines to move across the place. Aside from the Wigglevines, there are normal vines throughout the level as well. Some of big Wigglevines take the Kongs across the level, while the smaller versions slowly descend and drop the primates if they hang on for too long. In some sections of the level, the heroes are attacked by Tiki Zings as they ride through large gaps on the Wigglevines. On these occasions, they must climb up or down on the plants' vines to dodge the Tikis. Common enemies here include Tiki Goons, Tiki Dooms, Green Chomps and Vine Chomp.
Walkthrough[]
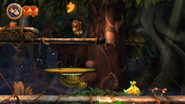
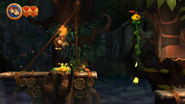
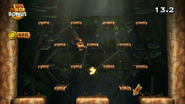
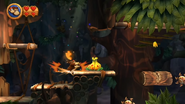
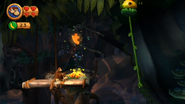
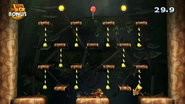
Starting off, go right and jump to the upper platform where the Tiki Goon is patroling around. Bounce off its head or jump up to reach a hidden ledge directly above. Collect the first Puzzle Piece, go past the DK Barrel, and pound on the cracked log three times to the left to fall back down, collecting a Banana Coin in the process. To the right, swing across from the normal vine to grab on a Wigglevine, which will start moving to the right as well. Collect the wavy line of flying bananas, making sure to get the letter "K" at the end. On the next platform, ground-pound close by the yellow plant to get the second Puzzle Piece. Grab the small Wigglevine and the plant will sink as you hold on. Jump off to the right and jump to the upper ledge ahead, then turn and jump to a hidden left ledge. Jump to the top and across the two small Wigglevines to reach a barrel cannon leading to a Bonus Room. In the room, collect all eighty bananas, two Banana Coins and an Extra Life Balloon along the platforms within thirty seconds to make the third Puzzle Piece appears.
After the Bonus Room, go right and past a Tiki Doom and bounce on the Green Chomp's red protuberance to a normal vine above. Swing across, going past a Tiki Goon and quickly continue ahead to grab an Extra Life Balloon, then use another Green Chomp to bounce and grab onto the next Wigglevine. As it moves to the right, maneuver around to avoid the Tiki Zings. When you see the third flying line of bananas along the lower area, be sure to carefully collect the letter "O" at the end of it. At the end, jump off to the next platform. You will find a cracked log below, but ignore it. Instead, swing from the normal vine ahead, then grab the Wigglevine to move along to the right. Collect the waves of bananas, as well as the letter "N" towards the end before jumping off at the checkpoint.
Now, go right and jump up a couple of ledges, then jump to a hidden ledge up and to the left, above a Tiki Goon. Pick up the DK Barrel and throw it at the hanging bag to bust it open, revealing the fourth Puzzle Piece. After collecting it, go to the right next, jump onto the cracked log hanging between two Tiki Zings. Pound on it three times to fall into a barrel cannon and shoot upward. Go all the way to the right to collect bananas, then take the fifth Puzzle Piece at the end. Pound on the cracked log three times to exit this upper section, and go right to the next Wigglevine. As it moves to the right, stay low on the Wigglevine and avoid the Tiki Zings while collecting the flying lines of bananas. The third and final line will have the letter "G" at the end, so climb up the Wigglevine as that line appears to get everything. Jump off at the end and ground-pound close by the next yellow plant to get the sixth Puzzle Piece, avoiding the Tiki Goon and Tiki Doom.
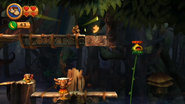
Swing across the next three normal vines and a small Wigglevine. Go past more Tiki Zings. Use the small Wigglevines and the Vine Chomp to swing and bounce on the Green Chomp and reach the platform above. Ground-pound close by the yellow plant to find the seventh and final Puzzle Piece. Beyond this point, go right and hang on to the final Wigglevine as it flies diagonally upward. Navigate around the Tiki Zings and collect the bananas and Banana Coins before jumping into the Slot Machine Barrel at the very end and finish the level.
Enemies[]
- Tiki Goon: 6
- Wigglevine: 12 (5 regular size & 7 small size)
- Tiki Doom: 3
- Green Chomp: 3
- Tiki Zing: 55 (50 regular size & 5 big size)
- Vine Chomp: 1
Items[]
- Hearts: 3
- DK Barrels: 2
- Banana Coins: 15 (counts 2 in the Bonus Room, does not count three or more consecutive jumps on enemies)
- Extra Life Balloons: 3 (counts 1 in the Bonus Room, does not count eight or more consecutive jumps on enemies)
K-O-N-G Letters[]
- K: When the Kongs ride over a large abyss with the first Wigglevine, the letter "K" flies up to them with a wavy trail of bananas during the ride.
- O: After the Bonus Room, when the primates use the second big Wigglevine to cross a large gap, they must climb between two Tiki Zings to grab the letter "O" that flies towards them at the third and final line of bananas.
- N: After collecting the letter "O" and land on a solid platform, the heroes must ignore the cracked log on the ground, go forward and ride the next Wigglevine, just before the checkpoint. The primates can find a large group of bananas with the letter "N" in it. They must maneuver along the vine to grab the letter.
- G: After the checkpoint where the Kongs must ride a big Wigglevine over another large gap, the letter "G" flies up to the primates just before the reach the other side of the pit.
Puzzle Pieces[]
- 1: At the beginning of the level, the Kongs must jump up from a solid mushroom platform with a Tiki Goon on it to find an area hidden in the canopy. The Puzzle Piece is in this area in plain sight above.
- 2: When the heroes land on the platform right after crossing an abyss with the first Wigglevine and collecting the letter "K", they must ground-pound nearby the next yellow plant to reveal a Puzzle Piece.
- 3: Shortly after the Kongs lower themselves with the small Wigglevine right after the second Puzzle Piece, the primates must jump on platforms hidden by a canopy and climb upwards to two small Wigglevines. They can jump across these creature's vines to reach a barrel cannon that shoots them into a Bonus Room. There, they must collect all eighty bananas, two Banana Coins and an Extra Life Balloon around several small platforms within thirty seconds. If they collect everything, a Puzzle Piece appears.
- 4: Just after the checkpoint, there is a DK Barrel on a platform hidden by a canopy and above a Tiki Goon. The Kongs must pick the barrel and throw it at the hanging bag nearby to reveal the fourth Puzzle Piece.
- 5: On the platform located after the checkpoint, between two Tiki Zings, the primates must pound on the cracked log on the ground. When it breaks, they fall downwards into a barrel cannon that shoots them up into a hidden area in the canopy. Above the exit to this hidden area is the fifth Puzzle Piece.
- 6: On the platform following the area with the letter "G", the Kongs must ground-pound nearby the yellow plant to reveal a Puzzle Piece.
- 7: After sixth Puzzle Piece, the Kongs use three small Wigglevines, a Vine Chomp and a Green Chomp to reach a solid platform. There, they must ground-pound close by the yellow plant to reveal the final Puzzle Piece.
Puzzle[]
The puzzle of Wigglevine Wonders is of a cherry against a light yellow background. When all of the pieces are found, the Ferndozer artwork will be added to the Worlds Gallery of the Image Gallery in the Extras menu.
Time Attack Medals[]
- Shiny Gold: 01:45.00
- Gold: 01:57.00
- Silver: 02:01.00 (02:08.00 in the Japanese version)
- Bronze: 02:22.00
