| |
| World(s) | Forest |
| Type | Forest |
| Music Theme(s) | Forest Frenzy Returns (or Vine Valley) |
| Animal Buddies | None |
| Bonus Room(s) | 2 |
| Puzzle Pieces | 7 |
| Notable Feature(s) | The level possesses many tilting and moving totem poles which the Kongs must use as platforms to traverse. There are also giant totems that can use their mouths to crush the primates. And this level debuts Bopapodamuses as enemies. |
| Enemies Encountered | Shooting Chomps, Blue Squeeklies, Tiki Goons, Bopapodamuses |
| Game(s) | Donkey Kong Country Returns, Donkey Kong Country Returns 3D |
| First Appearance | Donkey Kong Country Returns (2010) |
| Latest Appearance | Donkey Kong Country Returns 3D (2013)
|
Tippin' Totems is the thirtieth-sixth level in the games Donkey Kong Country Returns and Donkey Kong Country Returns 3D, as well as the fourth level in the Forest world of Donkey Kong Island. It is preceded by Flutter Flyaway and followed by Longshot Launch.
Overview[]
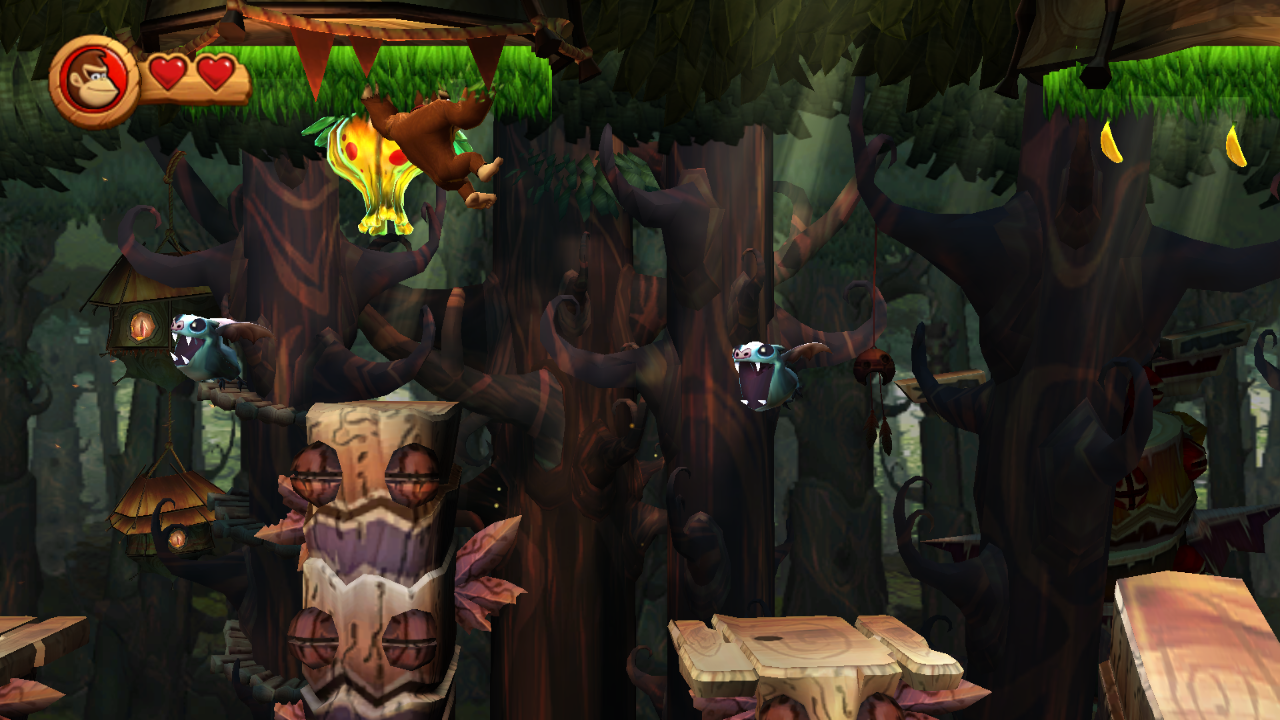
This level is set in a forest where moving totem poles are the main platforms. These totem poles move up and down in a diagonal fashion. However, they do not make a steep angle, so the Kongs cannot fall off them if stationary. Some of the totem poles travel from side to side and then fall down. There are a few giant totems that open their mouths and try to crush the Kongs too. The level itself also features a lush green background, which suits the deep forest. This level is the first one to feature Bopapodamuses, a hippopotamus-type enemy that must be jumped on four times to be defeated.
Walkthrough[]
The level begins on wooden platforms, surrounded by trees. In the tree trunk behind the Kongs is a hidden area with a Banana Coin, while ahead is a Shooting Chomp shooting spores at the edge of the platform. Three tilting totems are in a large abyss after this, being followed by a solid platform with a Blue Squeekly flying over it. Plants that hold items and a small and red mushroom that can sprout by pounding on it are on the platform. The bouncy mushroom can help them reach another platform hidden in the canopy with a Banana Coin on it. Another totem is tipping in a nearby gap, and ahead of it is a platform with three Blue Squeeklies flying towards it. Two totems are in the gap after this, helping the primates reach an area with two platforms separated by a small gap with some leaves in it. Going past a Tiki Goon, a Shooting Chomp and the letter "K" of the K-O-N-G Letters are above the gap. If the heroes jump in this gap, they land in a hidden area behind the canopy with banana bunches and the first Puzzle Piece at the left corner. The edge of the second platform has another Tiki Goon, who stands near a large abyss with more totems in it. The totems move across the wide gap, so the Kongs can ride on them to progress. Collecting all ten bananas in line above the totems will make the second Puzzle Piece to appear. When the totems begin to fall, they can find a tilting and large totem with some Blue Squeeklies flying around it. Three stationary pillars are placed in a gap nearby with Tiki Goons on each of them. The Tutorial Pig waits at the checkpoint on the following platform on the other side of this abyss. Just after the checkpoint, the Kongs must ground-pound the circular and flat panel to reach a hidden Bonus Room. There, they must use the moving barrel cannon to collect all fifty-seven bananas, two Banana Coins and an Extra Life Balloon within thirty seconds and make the third Puzzle Piece to appear.
After the Bonus Room, there is a large, tiki-like totem after here that opens and closes its mouth repeatedly. When it opens it, a passage is made to the next area for the primates to go through, but when it closes, they can get crushed if in it. The following platform is slightly longer than the previous platforms, although it holds nothing but a single helicopter plant that the Kongs can blow on. Another large abyss is farther ahead, with totems moving in it. The Kongs must jump along the totems, moving quickly so that they can travel forward, as the totems are moving the opposite way they want to go. Bananas and banana bunches are placed above the totems. A tilting and large totem stands at the end of the abyss, aiding Donkey and Diddy Kong in reaching a tunnel area full of small, pillar-shaped platforms and many Shooting Chomps. The letter "O" is near the beginning of this area above a thin platform with a hidden mushroom on it. The mushroom can only sprout from the ground of it is pounded on. Avoiding the Shooting Chomps, bounce on the red mushroom and collect the letter. Plants, some of which that contain items, are on some of the platforms as well. Another tilting totem is outside of the tunnel area with a Bopapodamus and two totems after it. Blue Squeeklies fly around here, and the two totems can help the Kongs access a solid platform with the Tutorial Pig and the second checkpoint on it.
An abyss with a tipping totem in it follows the checkpoint. A stationary platform is after this that is placed next to the ear of a giant upside-down totem that takes up almost half the screen. If the primates blow on the ear, the totem's mouth opens to create a passage for them to travel through quickly, before the totem closes it at regular intervals. Four totems tip in an abyss ahead of this pillar that are followed by some darker totems that can move across the rest of the wide abyss. They lead the two heroes to the letter "N" high in the air and a large and tilting totem that Blue Squeeklies fly past. The Kongs must use one of the Blue Squeeklies to bounce and reach the letter. More moving totems are ahead of this platform. They travel across a large abyss, bobbing up and down on the way. Ceilings covered in grassy turf are above the totems that have yellow plants growing on them that contain items. The heroes can grab onto the turf and pound nearby the plants to reveal items. The second yellow plant in this section possesses the fourth Puzzle Piece. Eventually, the primates reach a wide turf-covered ceiling that they can climb along to reach a platform with a DK Barrel on it. The Kongs must go left and drop in the abyss over a banana to find a barrel cannon that leads the heroes to the second Bonus Room. In the room, the primates must use many platforms to collect all seventy-eight bananas and two Banana Coins within thirty seconds and reveal the fifth Puzzle Piece.
After the Bonus Room, next to DK Barrel there is a yellow plant that contains an item, while above it around the canopy is the letter "G". A group of four bobbing totems follow this platforms. The heroes must defeat the first Tiki Goon and use its bobbing totem to roll-jump to the left, to collect the letter "G", land on a hidden platform behind the canopy and reveal the sixth Puzzle Piece. Moving on and after the bobbing totems with Tiki Goons, there is a large and tilting totem with Blue Squeeklies flying around it. Five Bopapodamuses that the Kongs can bounce on and many bananas are also ahead. The primates must bounce off the Bopapodamuses to collect all twenty-one bananas above to reveal the seventh and final Puzzle Piece above the following platform. After the last Bopapodamus, the solid platform has a DK Platform on it. Pounding on it three times makes a giant totem nearby open its mouth and reveal the Slot Machine Barrel above a hole. This totem will also close its mouth at regular intervals. The Kongs hitting the barrel, while avoiding to be crushed, will complete the level.
Enemies[]
- Shooting Chomp: 8
- Blue Squeekly: 24
- Tiki Goon: 8
- Bopapodamus: 6
Items[]
- Hearts: 1
- DK Barrels: 1
- Banana Coins: 11 (counts 2 in the first Bonus Room and 2 in the second Bonus Room, does not count three or more consecutive jumps on enemies)
- Extra Life Balloons: 1 (counts 1 in the first Bonus Room, does not count eight or more consecutive jumps on enemies)
K-O-N-G Letters[]
- K: The letter "K" is floating below the second Shooting Chomp in the level and above a small gap. The Kongs must avoid the Shooting Chomp's attacks and jump into the letter to collect it.
- O: In a tunnel area shortly after the first checkpoint, the primates can find the letter "O" high in the air around many Shooting Chomps. They must ground-pound below it to make a small and bouncy mushroom sprout that can help them reach the letter.
- N: After the second checkpoint, while the Kongs ride upwards on some totems, they can find the letter "N" in the air. If they bounce on a Blue Squeekly, they can reach it.
- G: The letter "G" is shortly after the first DK Barrel near the canopy. The Kongs can roll-jump off of the nearest bobbing totem pole with a Tiki Goon on it to reach the letter.
Puzzle Pieces[]
- 1: The Kongs must drop into the gap under the letter "K" to land in a hidden area behind the canopy with the first Puzzle Piece at the left corner.
- 2: After the letter "K", in the first area where the Kongs must ride on totems to cross a wide gap, the heroes must collect all ten bananas in line above the totems to make a Puzzle Piece appears.
- 3: The primates must pound on the circular and flat panel immediately after the first checkpoint to fall into a Bonus Room. There, they must shoot through a barrel cannon in order to collect all fifty-seven bananas, two Banana Coins and an Extra Life Balloon. If everything is collected within thirty seconds, a Puzzle Piece appears.
- 4: After the letter "N", the Kongs must grab onto the second turf-covered ceiling to reach the second yellow plant that they must pound nearby to reveal a Puzzle Piece.
- 5: After the letter "N" and immediately before the first and only DK Barrel in the level, Donkey and Diddy Kong must drop into the abyss to the left of the barrel, where a banana floats above. Below the banana, there is a barrel cannon that can shoot them through a wall and into a Bonus Room. In the room, they must collect all seventy-eight bananas and two Banana Coins while climbing on many stationary platforms. If they collect everything within thirty seconds, a Puzzle Piece appears.
- 6: The Kongs must roll off from the totem with a Tikig Goon on the left side after the first DK Barrel and jump towards the letter "G" while in mid-air. If they continue past the letter "G", they will land on a hidden platform behind the canopy, where a Puzzle Piece sits.
- 7: After the letter "G" and near the end of the level, the primates will reach the group of five Bopapodamuses. They must collect all twenty-one bananas above by bouncing on the enemies to make a Puzzle Piece to appear above the next platform.
Puzzle[]
The puzzle of Tippin' Totems is of a cherry against a light yellow background. When all of the pieces are found, the Bamboo Forest artwork will be added to the Worlds Gallery of the Image Gallery in the Extras menu.
Time Attack Medals[]
- Shiny Gold: 00:55.00
- Gold: 01:02.00 (01:13.00 in the Japanese version)
- Silver: 01:31.00 (01:40.00 in the Japanese version)
- Bronze: 02:11.00
Gallery[]
")
")
")
")
")
")
")
")
")
")
")
")
")
")
")
")
Videos[]
 (23 KB)")
 (21 KB)")