| |
| World(s) | Ruins |
| Type | Ruins |
| Music Theme(s) | Button Bash, Voices of the Temple Returns (or Temple Topple) |
| Animal Buddies | None |
| Bonus Room(s) | 2 |
| Puzzle Pieces | 7 |
| Notable Feature(s) | This level only features the enemies Toothberries and their variants. |
| Enemies Encountered | Toothberries, Cageberries, Acks, Ackstacks |
| Game(s) | Donkey Kong Country Returns, Donkey Kong Country Returns 3D |
| First Appearance | Donkey Kong Country Returns (2010) |
| Latest Appearance | Donkey Kong Country Returns 3D (2013)
|
Itty Bitty Biters is twentieth-second level in the games Donkey Kong Country Returns and Donkey Kong Country Returns 3D, as well as the fifth level in the Ruins world of the Donkey Kong Island. It is preceded by Damp Dungeon and followed by Temple Topple.
Overview[]
This level takes place in a strange temple infested with enemies known as Toothberries, who jump out of statues and the floor in an attempt to eat the Kongs. The level also features some Cageberries in their debut, who can be used to reach collectibles and other objects. The Ackstacks not only constantly try to defeat Donkey and Diddy Kong, but also try to get in their way on piling on top of each other, only to throw themselves when the primates get close by. This level also features some vine switches that can be pulled to open passages.
Walkthrough[]
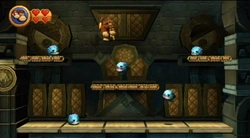
The level begins outside of a temple along a rock pathway with a few dandelions growing on it. The Kongs must go backwards, climb up the glassy turf on the wall and jump into the barrel cannon to access a Bonus Room. In the room, the primates must use two large and moving platforms to collect all forty-seven bananas, two Banana Coins and an Extra Life Balloon within thirty seconds and make the first Puzzle Piece to appear. After the Bonus Room and moving on, there is a vine switch out of a statue. After the switch is pulled, the temple's entrance opens. When the Kongs enter, they can find a DK Barrel between two sets of spikes. As they continue forward, Toothberries hide in the floors and behind structures. Eventually, two of the foes spring out of the ground when they walk between two other sets of spikes. If the primates head on, they can also find some Toothberry enemies hopping along a two platforms above more spikes. Two banana bunches are under the platforms. After passing a gap full of spikes, the Kongs can find a Cageberry on a small platform inside a dead end room. They must use it to pull a vine switch high above them, as well as collect the banana bunch and the letter "K" next to it. It can be done by stunning and turning upside-down the enemy's cage by rolling into it or ground-pounding nearby. Pounding over the cage thrice until bury it, it will make the Kongs be throw at high heights. When the switch is pulled, a pathway to the next room is open, where there are three platforms, two of which are elevated, infested with Toothberries. An abyss separates this area with a slightly larger platform, where another Toothberry pops out of the floor. Going all the way up these platforms and jumping to the left and towards the wall, the primates will reach a hidden alcove, containing the second Puzzle Piece.
Going forward, a bridge-like platform being supported by a thin column is just ahead, with two banana bunches under it. Along with red and blue Toothberries, a DK Barrel is on this platform. If the Kongs advance through the level by jumping across a few gaps, they can find another Cageberry. The heroes must also use this Cageberry to jump high and reach the barrel cannon above the screen, entering another Bonus Room. There, they must use the moving platforms to collect all eighty bananas and two Bananas Coins within thirty seconds and the third Puzzle Piece will appear. After the Bonus Room, a few small platforms are ahead of it, some of which that have bananas on them. There are many of these platforms in the area, and as the primates travel farther, more and more Toothberries begin to jump out at them. A banana bunch hovers above the last platforms here, while the letter "O" is only slightly below it. A well-timed roll-jump is necessary to collect the letter. A small section of a flat, rocky pathway is surrounded by some spikes after this area. A Cageberry is here, and it is required to reach the platforms above, as a wall is in the Kongs' way. When the primates spring off of the enemy and get over the wall. After dropping down, the primates must go towards the left wall to find another hidden area and the fourth Puzzle Piece. Moving on, the heroes come across a safe and flat pathway with the Tutorial Pig, who marks the checkpoint.
After crossing a small gap after the checkpoint, the Kongs are ambushed by some more Toothberries, who jump out of the statues in the background. The following platform is also infested with more Toothberries, who emerge from below it. If the primates continue, they can find a group of Acks piled on top of each other, creating an Ackstack. Once they are passed, the Kongs can progress across another gap, where there are some more of these enemies on top of each other followed by another group of them on the next platform. The letter "N" is next to the third set of these foes. Use the Toothberries nearby or fallen Ackstacks to bounce on and reach the letter. Farther ahead are two small, wooden platforms. When the heroes jump onto the second one, an Ack appears. The large area right after this holds another Cageberry surrounded by some spikes and a DK Barrel. The primates must turn the Cageberry upside-down when it is nearby the candles, step on it and blow on the two candles. A statue in the background will open and release the fifth Puzzle Piece. The Kongs must use the upside-down cageberry again as platform to reach the Puzzle Piece. Still in the same place, the heroes must use the Cageberry again as platform to roll-jump towards the high wall on the left and find a hidden alcove and the sixth Puzzle Piece. Following this area is another large platform. Though the platform seems empty at first, with only the letter "G" floating above it, regular Toothberries and some Acks jump out of the background as the heroes move across it. The primates must bounce on one of the Toothberries to collect the letter.
If the Kongs make it through here, they can access a small room, where they are ambushed by more Toothberries. They cannot exit this room, so they have to defeat two waves of Toothberries to progress. Once they are all defeated, a barrel cannon appears to shoot them through the ground to the bottom of the temple. Here, they are attacked by Acks. Luckily for the Kongs, a DK Barrel is here. Once all these foes are defeated, another barrel cannon appears. It can shoot them upwards to the outside of the temple. Finally outside, the primates can find a few dandelions holding items and a DK Platform on the ground covered in leaves. Going left and ground-pounding nearby a hole on the floor will reveal a small and bouncy mushroom. The red mushroom must be used to reach at the top of the left ledge and a dandelion. Blowing on the plant reveals the seventh and final Puzzle Piece. Going towards the DK Platform, the heroes must blow on the leaves to make them go away. The revealed DK Platform can now be pounded on. After it is hit three times, the level's Slot Machine Barrel comes out of a structure in the background. Hitting the barrel completes the level.
Enemies[]
- Toothberry: 33
- Cageberry: 4
- Ack: 11
- Ackstack: 3 (5 individuals by each stack)
Items[]
- Hearts: 4
- DK Barrels: 4
- Banana Coins: 14 (counts 2 in the first Bonus Room and 2 in the second Bonus Room, does not count three or more consecutive jumps on enemies)
- Extra Life Balloons: 1 (counts 1 in the first Bonus Room, does not count eight or more consecutive jumps on enemies)
K-O-N-G Letters[]
- K: When the primates reach the first Cageberry, they must roll into it or ground-pound nearby to turn it upside-down, and then pound it into the ground thrice while stand on it. It will throw them into the air, where there is the letter "K" alongside a vine switch and a banana bunch.
- O: Before the third Cageberry, the primates can find the letter "O" under a platform. It can be grabbed by roll-jumping carefully.
- N: After the checkpoint and near the third set of Ackstacks is the letter "N" high in the air. The Acks can be jumped on after they collapse to collect the letter.
- G: On the platform right after the fifth and sixth Puzzle Pieces, the heroes can find the letter "G" floating in the air. It is too high to jump to, so the Kongs must use any nearby Toothberries to bounce off and obtain it.
Puzzle Pieces[]
- 1: At the beginning of the level, the Kongs can head backwards to find some grassy turf to climb on in order to reach a barrel cannon. It shoots them to a Bonus Room, where they must collect all forty-seven bananas, two Banana Coins and an Extra Life Balloon while traveling around three platforms, two large of which are moving horizontally. Once they are all collected within thirty seconds, a Puzzle Piece appears.
- 2: In the room after the letter "K", the Kongs can climb up to the highest platform and jump into a hidden wall to find a hidden alcove with the Puzzle Piece.
- 3: Where the heroes encounter the second Cageberry, the can pound on it into the ground so it can throw them into the air. If they do this, they get into a barrel cannon that blasts them into a Bonus Room. There, they must collect all eighty bananas and two Banana Coins along several moving platforms. When everything is collected within thirty seconds, the third Puzzle Piece appears.
- 4: After passing the third Cageberry, the Kongs climb over a large wall. They can find a hidden alcove at the bottom of the left side of the wall containing a Puzzle Piece.
- 5: After the letter "N", in order to obtain the fifth Puzzle Piece, located inside a statue in the background, the Kongs must posicionate the fourth Cageberry to blow out the two candles around it. The candles cannot be reached unless the Kongs are standing on the Cageberry as it is turned over. Once the candles are blown out, the Puzzle Piece is released in the foreground by the statue. Use the Cageberry again as platform to collect the Puzzle Piece.
- 6: In the same place of the fifth Puzzle Piece, the Kongs must stand on the fourth Cageberry as it is turned over. If they roll-jump into the left wall in the corner of the screen they can find a Puzzle Piece inside a hidden area.
- 7: After the primates exit the temple at the end of the level, they can find a spot in the floor that causes a small mushroom to sprout out of the ground when pounded on. The red mushroom can help them reach a high ledge with a dandelion. Blowing on the dandelion reveals the final Puzzle Piece.
Puzzle[]
The puzzle of Itty Bitty Biters is of a cherry against a light yellow background. When all of the pieces are found, the Cageberry & Pals artwork will be added to the Critters 2 Gallery of the Image Gallery in the Extras menu.
Time Attack Medals[]
- Shiny Gold: 01:33.00
- Gold: 01:35.00
- Silver: 02:29.00
- Bronze: 03:18.00
Gallery[]
")
")
")
")
")
")
")
")
")
")
")
")
")
")
")
")
")
Videos[]
 (14 KB)")
 (13 KB)")
Trivia[]
- The exterior of the level Shifty Smashers, the Key Temple level of this world, can be seen in the background at the beginning of this level.