| |
| World(s) | Ruins |
| Type | Ruins |
| Music Theme(s) | Damp Dungeon |
| Animal Buddies | None |
| Bonus Room(s) | 2 |
| Puzzle Pieces | 9 |
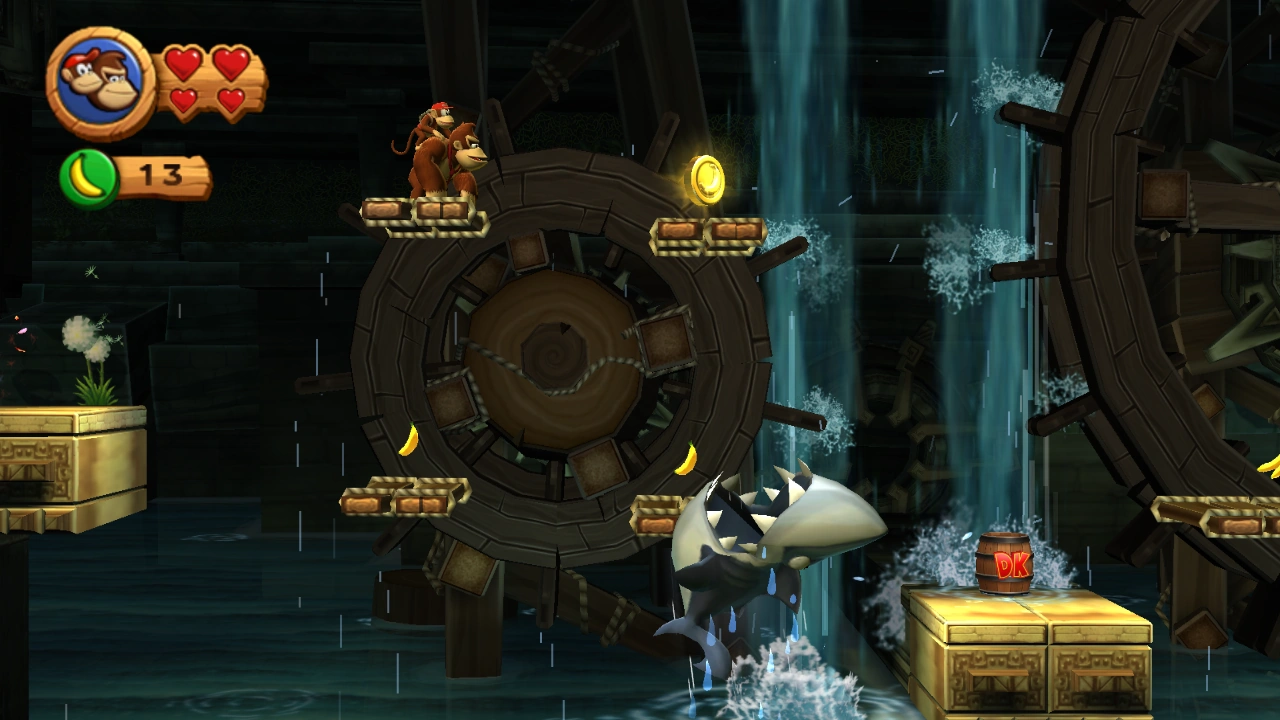
| Notable Feature(s) | This level is a locked one. This level also features many platforms on water wheels. And it is the only level to feature the "Mega" Snaggles. |
| Enemies Encountered | Rawks, Snaggles, Tiki Bombers, Golden Snaggles, Stilts, Screaming Pillars |
| Game(s) | Donkey Kong Country Returns, Donkey Kong Country Returns 3D |
| First Appearance | Donkey Kong Country Returns (2010) |
| Latest Appearance | Donkey Kong Country Returns 3D (2013)
|
Damp Dungeon is the twentieth-first level in the games Donkey Kong Country Returns and Donkey Kong Country Returns 3D, as well as the fourth level in the Ruins world of Donkey Kong Island. This level is unlocked by buying the Map Key from Cranky Kong's Shop in this world. It is preceded by Mast Blast and followed by Itty Bitty Biters.
Overview[]
The level features many platforms on water wheels operating at different rotations. There are also some crumbling stone platforms. And the level features many Rawks and the only "Mega" Snaggles in both games.
Walkthrough[]
Move right past the stone pillars and into the ruins. Jump onto the water wheel avoiding the Snaggles and Tiki Bomber's fireballs. Jump onto the small stone platform and grab the DK Barrel. Jump onto the second water wheel and move around to the top right. Break the hanging bag with the barrel and reveal the first Puzzle Piece that comes out. Jump onto the right platform, go past the Rawks and follow the path down to a section with a grassy turf. Use the turf to travel past the Golden Snaggles and then fall down onto the letter "K", floating above a crumbling ledge. Quickly jump onto the next ledge to the right and then onto the solid platform on the right. Pound on the cracked floor next to the urn thrice to reach the second Puzzle Piece below it.
Moving on, jump over to the platform with the Stilts and then onto the next water wheel. Jump onto the middle platform. The Screaming Pillar will fall down so avoid it by jumping to the bottom section with a urn. Ground-pound close by the urn to reveal the third Puzzle Piece. Jump back to the left water wheel and over to the top platform again. This time jump onto the right water wheel and jump onto the platform to the right of it. Stay to either the left or right of the platform as the Screaming Pillar will fall in the middle. Pound on this fallen pillar to break it and collect the fourth Puzzle Piece. Move over to the next water wheel. Use the two platforms to either jump up or down to the next platform collecting the letter "O" in the process.
Jump to the platform and onto the next water wheel. Jump below this water wheel and blow on the dandelions to reveal the fifth Puzzle Piece. Jump to the right and move downward collecting the many Banana Coins and going past many Rawks along the way. Eventually you will reach a checkpoint. Dropping down to a lower platform, use the grassy turf to the right to cling to the ceiling and travel to the right into a Ronus Room. In the room, use the bouncy and moving platform to collect all ninety-nine bananas and three Banana Coins within thirty seconds and get the sixth Puzzle Piece. After the Bonus Room, jump to the upper platform and keep going right. Go past the Stilts and down to a small platform. Keep blowing on the pinwheel to reveal a platform in the background. Use the autofire barrel to get to the background and then quickly roll-jump to the left to reach the revealed platform. Collect the seventh Puzzle Piece, break the urn and jump into the barrel cannon to be blasted to the other side of the background. Going forward, jump across the water wheels, avoid enemies and use one of the available wooden barrels to break the hanging bag between water wheels, revealing the eighth Puzzle Piece.
Moving on, use the most right platform of the third water wheel to reach the letter "N" and jump into the nearby barrel cannon. Blast to the right platform and use the grassy turf on the ceiling to cross over the spikes. Stay on the ceiling and avoid and defeat the Stilts. Collect the letter "G" and jump down to the flat stone platform. Ground-pound the platform to fall through into another Bonus Room. There, use the four barrel cannons to collect all sixty-five bananas, three Banana Coins and an Extra Life Balloon within thirty seconds and make the ninth and final Puzzle Piece to appear. After the Bonus Room, continue to use the grassy turf to make it to the other end of this section, go past more Rawks and run right to the last water wheel. Stay to the left of the platform to avoid the "Mega" Snaggles, and then once at the top, jump into the Slot Machine Barrel to finish the level.
Enemies[]
- Rawk: 15
- Snaggles: 7 (6 regular size & 1 big size)
- Tiki Bomber: 3
- Golden Snaggles: 3
- Stilts: 2 (regular type)
- Screaming Pillar: 3 (regular size)
Items[]
- Hearts: 6
- DK Barrels: 2
- Banana Coins: 25 (counts 3 in the first Bonus Room and 3 in the second Bonus Room, does not count three or more consecutive jumps on enemies)
- Extra Life Balloons: 2 (counts 1 in the second Bonus Room, does not count eight or more consecutive jumps on enemies)
K-O-N-G Letters[]
- K: After the first Puzzle Piece, at the section with Golden Snaggles, the letter "K" is on a crumbling stone ledge close by these enemies.
- O: After the second Screaming Pillar, the letter "O" can be found in the center of a small water wheel.
- N: After the water wheel immediately after the eighth Puzzle Piece, the heroes can find the letter "N" floating in the air just before a barrel cannon and above a Golden Snaggles.
- G: After the letter "N", when the Kongs arrive on the last section of grassy turf at the end of the level, they can find the letter "G" near a Stilts.
Puzzle Pieces[]
- 1: When the Kongs find the first DK Barrel, they must pick it up and ride on the following water wheel. As they approach the top of the wheel, they can find a hanging bag, which they can break by throwing the barrel at it. The Puzzle Piece is inside the bag.
- 2: After the letter "K", the Kongs can find a cracked floor section near an urn. If they break the part of the floor by ground-pounding thrice, they can find a hidden alcove with the second Puzzle Piece.
- 3: After the second Puzzle Piece, when the primates meet the first Screaming Pillar, they must drop down to the platform below it to find an urn. They must break the urn open by ground-pounding nearby and a Puzzle Piece is revealed.
- 4: After the third Puzzle Piece, When the Kongs reach the second Screaming Pillar, they must pound on it after it falls to find another Puzzle Piece.
- 5: After the letter "O", at the platform with a wooden barrel and below a small water wheel, the Kongs can find a dandelion. They must blow on it to a Puzzle Piece appear.
- 6: Right after the checkpoint, the Kongs can find a low platform. A grassy turf is on the platform above this smaller platform that they can climb on to reach the entrance to a Ronus Room. There, the Kongs must jump on a bouncy and moving platform to collect ninety-nine bananas and three Banana Coins spinning in circles. Once all of the items are collected within thirty seconds, a Puzzle Piece appears.
- 7: Before the Kongs enter the barrel cannon that shoots them to the background shortly after the checkpoint, they must drop down to the small platform below it and blow on a pinwheel. If they keep blowing on it, a platform emerges from the water in the background. They must then shoot to background area and quickly roll-jump left to the platform and find the seventh Puzzle Piece on it.
- 8: Soon after the seventh Puzzle Piece, the Kongs can find a wooden barrel on a small platform. They must carry it across the water wheels farther ahead while avoiding enemies. If they ride up the second wheel, they can find a hanging bag. Using the barrel, they can break it open to reveal another Puzzle Piece.
- 9: The Kongs must ground-pound a flat platform below the letter "G". When it flips, they fall into another Bonus Room, where they must shoot through four different barrels to collect all sixty-five bananas, three Banana Coins and an Extra Life Balloon. When all of the items are collected within thirty seconds, the final Puzzle Piece appears.
Puzzle[]
The puzzle of Damp Dungeon is of a pineapple against a light blue background. When all of the pieces are found, the Ruins artwork will be added to the Worlds Gallery of the Image Gallery in the Extras menu.
Time Attack Medals[]
- Shiny Gold: 00:51.00
- Gold: 00:56.00
- Silver: 01:30.00
- Bronze: 01:51.00
Gallery[]
")
")
")
")
")
")
")
")
")
")
")
")
")
")
")
")
")
Videos[]
 (19 KB)")
 (16 KB)")