| |
| World(s) | Ruins |
| Type | Beach |
| Music Theme(s) | Mast Blast |
| Animal Buddies | None |
| Bonus Room(s) | 1 |
| Puzzle Pieces | 7 |
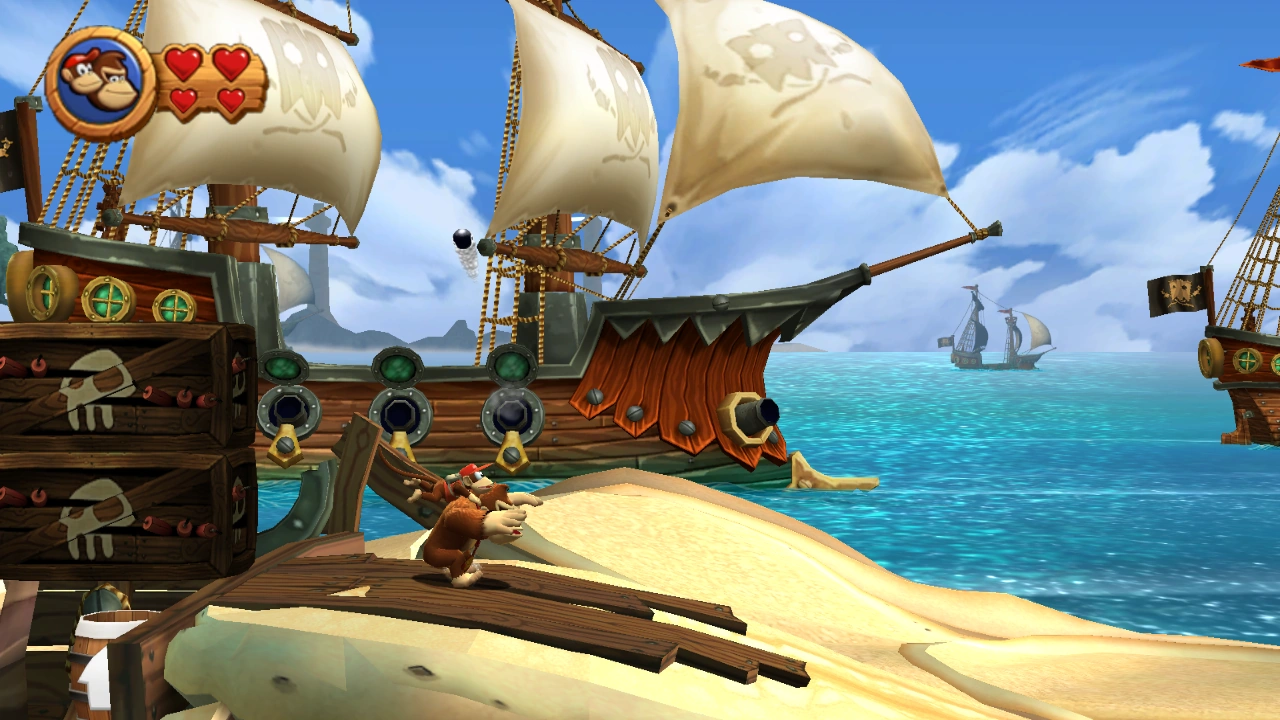
| Notable Feature(s) | This level takes place mainly on ships. Explosive cannonballs fired at the Kongs are hazards but can be used to progress by blowing explosive crates and obstacles. |
| Enemies Encountered | Tiki Torches, Tiki Goons, Snaps, Pinchlies |
| Game(s) | Donkey Kong Country Returns, Donkey Kong Country Returns 3D |
| First Appearance | Donkey Kong Country Returns (2010) |
| Latest Appearance | Donkey Kong Country Returns 3D (2013)
|
Mast Blast is the twentieth level in the games Donkey Kong Country Returns and Donkey Kong Country Returns 3D, as well as the third level in the Ruins world of Donkey Kong Island. It is preceded by Button Bash and followed by Damp Dungeon.
Overview[]
When Donkey and Diddy Kong find a barrel cannon it will blast them to a shore being taken by crabs. This area is where the Kongs will find even more barrels that will blast them to pirate ships and they then will need to advance through it to complete the level. At some sections, these pirate ships will shot explosive cannonballs aimming the Kongs, harming the primates and enemies, and destroying explosive crates and obstacles.
Walkthrough[]
At the beginning of the level, the Kongs come up to a straight pathway in a ruins area. Just after passing a DK Barrel, the heroes can find a barrel cannon that can shoot them to an autofire barrel and then onto another platform. This stone bridge-like platform curves downwards and leads the primates to a few small platforms with Tiki Goons on them. After treading up a tilted platform, the Kongs can reach another barrel cannon that shoots them farther into the background, where a Tiki Torch can be found. Going left and behind the Kongs, there is also a small platform with a dandelion on it. The plant reveals the first Puzzle Piece if blown on. Farther ahead are some tilted platforms with Tiki Goons on them that the Kongs can slide down and get the letter "K" of the K-O-N-G Letters by jumping over pits. Another barrel cannon is at the end of this area, and it blasts the primates closer to the foreground, where they find another slanted platform leading to a barrel cannon. This cannon shoots them to the final stone platform, which is tilted down towards a barrel cannon that blasts the heroes to a beach area. At the Kongs arrival in this area, they pass the Tutorial Pig who marks the checkpoint.
There are some Snaps, spikes, and crates full of explosives farther ahead. The Kongs must go left of the checkpoint while allowing some Snaps pursue them. After reaching three stacked crates, the primates must bounce high on one of the Snaps to reach the top of the crates. Pounding on all crates, including the bottom one, will reveal the second Puzzle Piece. Going forward and beyond the checkpoint, the heroes will see a large crate covering a small gap on the sand and the third Puzzle Piece. The Kongs must pound on the crate to able collect the Puzzle Piece. Moving on and going over some spikes, the letter "O" can be found above the first explosive crate. These explosive crates must not be pounded or the primates will be harmed. Next to right of the crate, a heart and a peg are located. Here, a pirate ship starts firing explosive cannonballs directly at the Kongs. A raised piece of land with some crates on it is also just up ahead, and a Snaps and a Pinchly are nearby. Immediately after these foes are a few large and explosive crates covering a pit with a barrel cannon in it. If the Kongs use the cannonballs shooting from the ship in the background here to destroy the crates, they can find their way into the cannon, which blasts them into the hull of the ship. Inside the ship, they find themselves inside a small room. A red gate is in front of the room's exit, but the primates can break it away with two roll attacks. Four Snaps are lined up just after this on the tilted ship, followed by a few crates. Another red gate is right in front of another crate, so the primates can roll into it twice to move it out of the way. When they hit it, the gate is locked in place on the wall, so they can use it as a platform to travel up a narrow area. As the Kongs continue up the slanted area, they encounter some stray cannonballs that roll towards them. A suspended platform is above them to use in order to access the outside areas of the ship, where the Kongs come up to some crab enemies. Just before they get to the stern, a red gate attached to the ship's mast blocks their way. After two roll attacks, the mast breaks off and falls into the sea. On the stern past the foes, they can find the letter "N" in a small room that can only be accessed by pounding on a red gate again. Right after this is a Tutorial Pig who marks the checkpoint.
After the Tutorial Pig is a barrel cannon that shoots the primates to what appears to be the fleet's command ship and into a pirate Pinchly. Here, the heroes need to avoid more fired cannonballs. After the Kongs smash through this ship's helm that is in their way by rolling into it twice, they can advance to a sail covered in grassy turf. The primates can climb on the turf on the first sail to reach an autofire barrel that blasts them to a yard. This yard tilts with their weight on it, so they can tilt it to a side to be able to reach the turf on the above sail to grab the letter "G". After this, They can also tilt it to reach the neighboring yard, which is slightly longer. This mast features a Pinchly and some Banana Coins, as well as a barrel cannon that shoots the primates to the mast above when entered. Here, the Kongs must avoid the Snaps and roll-jump all the way to the left to reach the back section of the ship. This section can be also reached by using the platform above the ship's bell. Going left, the fourth Puzzle Piece can be found floating at the top of the edge. Going back and falling down to the middle and bottom section of the ship, there are more Snaps and two stacked explosive crates over a pit with a banana inside. These crates can be destroyed by cannonballs being shot by the ship in the background to access a Bonus Room. In the room, the Kongs must use two large and moving platforms to collect all forty-seven bananas, two Banana Coins and an Extra Life Balloon within thirty seconds and make the fifth Puzzle Piece to appear.
After the Bonus Room, the primates must use one of the Snaps to go into the barrel cannon and reach the tilting yard, where previously the letter "G" was located. The heroes must roll-jump to the right and reach a section with two stacked explosive crates and a Snaps. Jumping over the crates and using them as platforms, the heroes can roll-jump again and reach the front section of the ship. Above the edge of the section, the sixth Puzzle Piece can be found. Going back to the middle section and going all the way up the masts, the left mast will appear broken after be strucked by a cannonball. This allows the Kongs to reach some hanging platforms on the ship, which they can jump onto to progress. Below the large hanging platform is another yard with a crate full of explosives on it. By using a cannonball to destroy the explosive crate, the seventh and final Puzzle Piece will be revealed. Making the way back and using the hanging platforms, the heroes can reach a rope that can be used to climb up and reach a barrel cannon. The barrel cannon blasts them to other cannons, and when they reach the final barrel cannon, the cannon begins to fall with the damaged ship. After the barrel shoots them into the air, part of the ship smashes into the ship in the background, causing it to sink as well. The primates end up landing on the sunken ship's floating crow's nest, where the Slot Machine Barrel is located. Hitting the barrel completes the level.
Enemies[]
- Tiki Torch: 2
- Tiki Goon: 3
- Snaps: 20
- Pinchly: 7
Items[]
- Hearts: 7
- DK Barrels: 1
- Banana Coins: 9 (counts 2 in the Bonus Room, does not count three or more consecutive jumps on enemies)
- Extra Life Balloons: 1 (counts 1 in the Bonus Room, does not count eight or more consecutive jumps on enemies)
K-O-N-G Letters[]
- K: Shortly after the second Tiki Torch, the primates begin to slide down a slanted pathway. As they come up to a pit here, they can jump and reach the letter "K".
- O: After the first checkpoint, the third Puzzle Piece and some spikes, the heroes can find the letter "O" above a small crate full of explosives.
- N: Immediately before the second checkpoint, the primates must pound on the red gate under them to reach a small room with the letter "N".
- G: After the second checkpoint, when the Kongs reach the first yard on the second ship, they must cling onto the grassy turf on top of the above sail to collect the letter "G".
Puzzle Pieces[]
- 1: Near the start of the level when the Kongs are shot to the background a second time and see the second Tiki Torch, they can travel backwards to find a dandelion on a small platform. They must blow on it and a Puzzle Piece appears.
- 2: Immediately after the Kongs reach the first checkpoint, they must head backwards to find three crates stacked up on each other. Since they are too high to simply jump over, the Kongs must bounce on top of some nearby Snaps to get an extra boost on their jump. The primates must allow at least one of the Snaps to follow them until reach the crates. There, they must pound on all of the crates down to find the second Puzzle Piece inside the one at the bottom.
- 3: After the first checkpoint and going right, the Kongs can find a large crate on top of a small gap. They must pound on the crate to reach a Puzzle Piece in the gap.
- 4: After the second checkpoint, the fourth Puzzle Piece is located at the end of the second ship, which can be seen just as the Kongs are shooting to the ship. To reach it, the primates must travel all the way to the top of the first sail, with two Snaps walking on it. There, the heroes must use a long roll-jump to reach the back area of the ship. Diddy Kong's rocket pack can help to reach the location. They must travel down the area to find the Puzzle Piece floating above the edge of the ship.
- 5: After the second checkpoint, the primates must drop to the bottom section of the second ship. There, they can find two explosive crates on top of each other over a small pit. The Kongs must make the ship in the background shoot its cannonballs at the crates by standing on them. When the crates are gone, they can enter the pit to access a Bonus Room. In the room, they must collect all forty-seven bananas, two Banana Coins and an Extra Life Balloon around two moving platforms. If everything is collected within thirty seconds, the fifth Puzzle Piece appears.
- 6: After the second checkpoint, on the second ship's yard under the letter "G", the Kongs must roll-jump to the right to reach two explosive crates. They must jump off of the crates to reach the front area of the ship, where a Puzzle Piece can be found floating above the edge.
- 7: After the second checkpoint, when the Kongs reach the two hanging platforms on the top of the second ship, they must jump down to a hidden yard, where a crate full of explosives can be found. They must draw the cannonballs from the third ship towards it to make it explode. When the crate is gone, a Puzzle Piece appears.
Puzzle[]
The puzzle of Mast Blast is of a cherry against a light yellow background. When all of the pieces are found, the Humzee artwork will be added to the Critters 1 Gallery of the Image Gallery in the Extras menu.
Time Attack Medals[]
- Shiny Gold: 01:25.00
- Gold: 01:37.00
- Silver: 02:06.00
- Bronze: 02:40.00
Gallery[]
")
")
")
")
")
")
")
")
")
")
")
")
")
")
")
Videos[]
 (26 KB)")
 (22 KB)")
Trivia[]
- The level seems to be more suitable for the Beach world, due to its ambientation in the sea and the presence of pirate crabs. It is unknown why it was put in the Ruins world, maybe for space reasons. However the start of the leval does start in a ruins like atmoshpere.
- The presence of other pirate crab captain with his ships (see Gallery section above) demonstrates that the Captain Greenbeard from the Scurvy Crew was not the only pirate crab to be leader of a pirate fleet.
- It is unknown if this was the last fleet of pirate crabs' ships or there are more.