| |
| World(s) | Beach |
| Type | Beach |
| Music Theme(s) | Mast Blast |
| Animal Buddies | None |
| Bonus Room(s) | 2 |
| Puzzle Pieces | 7 |
| Notable Feature(s) | This level features pirate ships shooting cannonballs from the background as hazards to both Kongs and enemies alike. |
| Enemies Encountered | Snaps, Jellybobs, Tiki Buzzes, Pinchlies |
| Game(s) | Donkey Kong Country Returns, Donkey Kong Country Returns 3D |
| First Appearance | Donkey Kong Country Returns (2010) |
| Latest Appearance | Donkey Kong Country Returns 3D (2013)
|
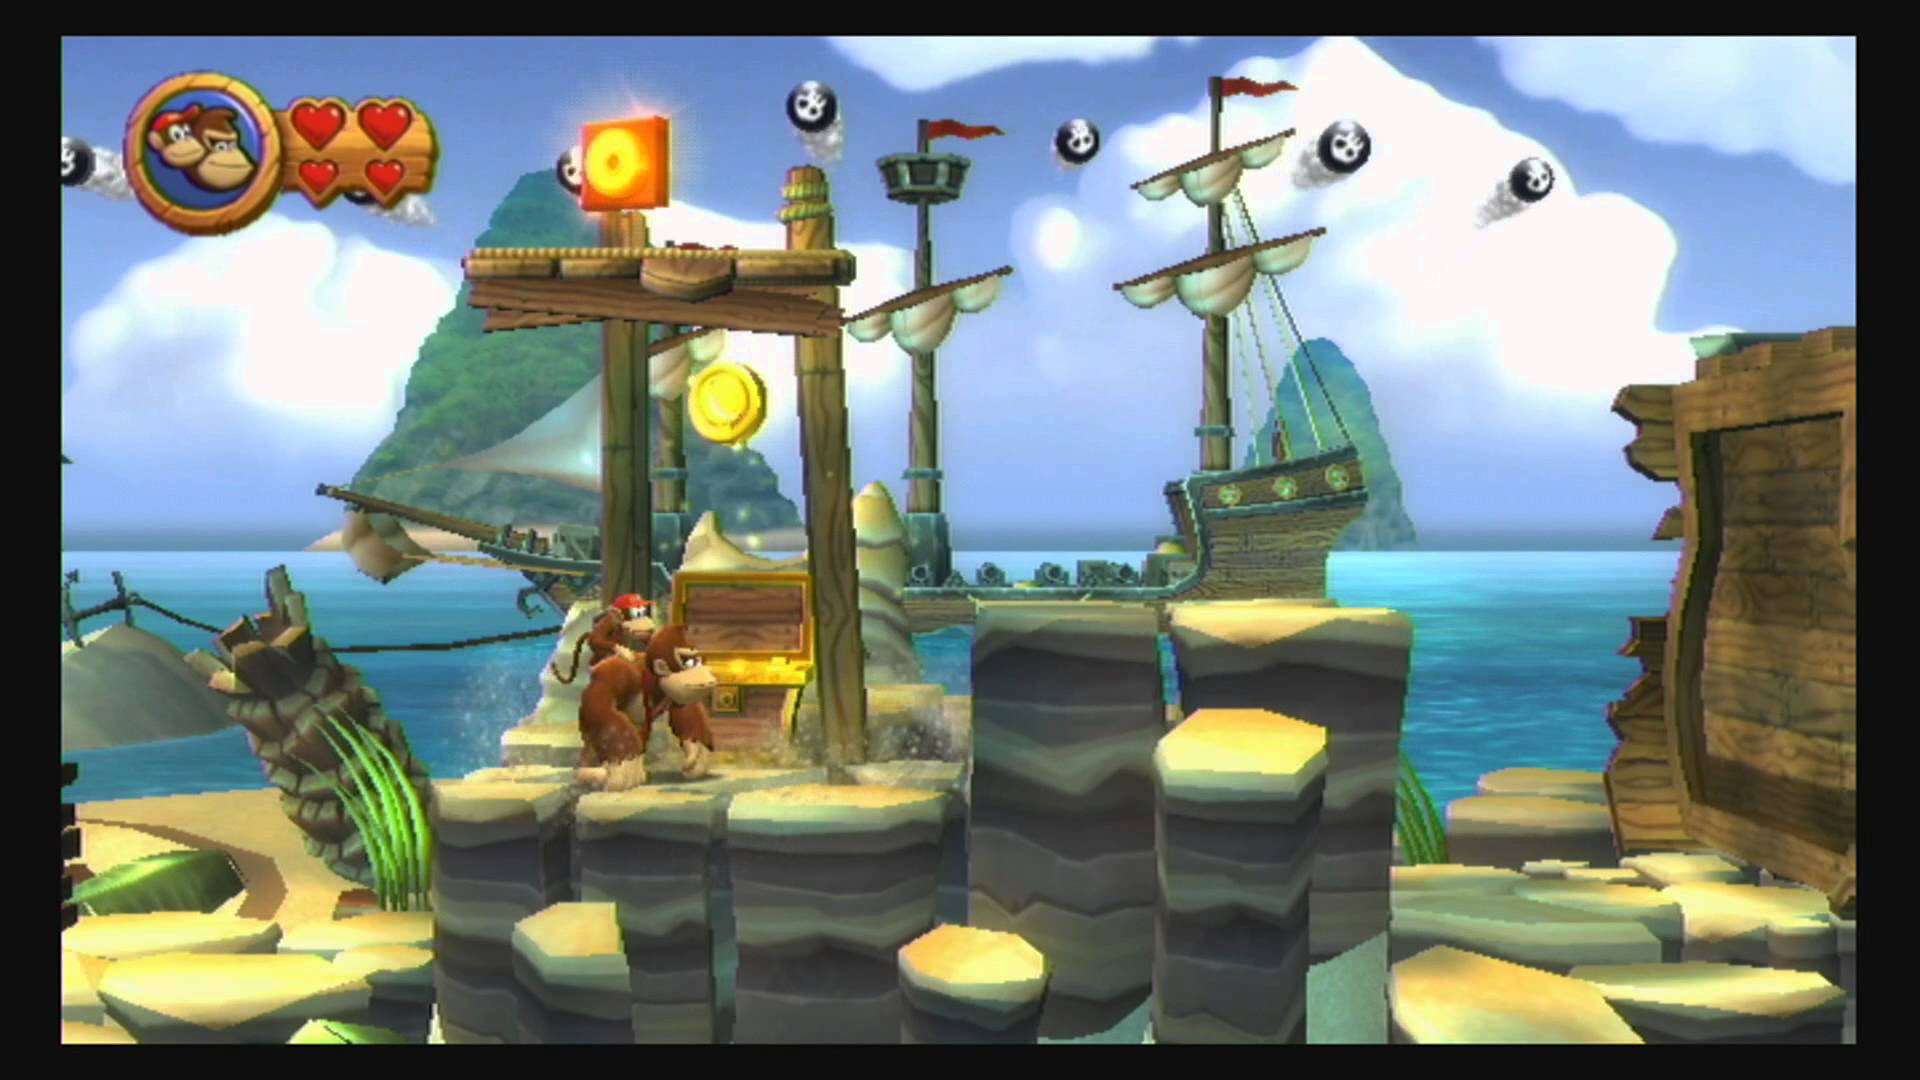
Cannon Cluster is the twelfth level in the games Donkey Kong Country Returns and Donkey Kong Country Returns 3D, as well as the fourth level in the Beach world of Donkey Kong Island. It is preceded by Peaceful Pier and followed by Stormy Shore.
Overview[]
Located on the ocean shore of Donkey Kong island, this level features many ships that shoot cannonballs at Donkey and Diddy Kong. In many areas of the level, the Kongs must dodge the cannonballs by simply running past them or taking shelter under large boards. Additionally, many wooden cages appear around the level, some of which block the Kongs' path or contain collectibles. Pinchlies and Snaps serve as common enemies in this level, along with some electric jellyfish enemies known as Jellybobs and Tiki Buzzes.
Walkthrough[]
Start the level by moving right until you reach a wooden peg. Pound it down to reveal another one to the right. Pound on the newly revealed peg to bring the first one back up with the first Puzzle Piece. Start moving right again until you see a pirate ship in the background. At this point, your best bet is to roll past all the cannon fire when you have both Donkey and Diddy Kong. Otherwise, you might have to just try your best to avoid the cannon fire making it across to the right. You will reach a treasure chest with a Banana Coin. Jump over the Jellybob just like you would a Snaggles and then blow the flower to reveal the second Puzzle Piece. You will soon reach the letter "K". Roll-jump onto the letter when the Tiki Buzz is hovering over it and then bounce of the tiki to reach the platform above. Diddy Kong's rocket pack can help to collect the letter safely.
Moving on, you will reach another dock with cannon fire coming your way. Do you best to avoid the fire and then fall off the dock onto the ground. You will be right in front of a wooden peg. Pound on it to reveal another on the dock. Use the peg on the dock to jump off to the right collecting the third Puzzle Piece floating above the screen. Move past the treasure chest and pound on the wooden peg right next to it to reveal a Pinchly and another peg next to the windmill on the dock. Go past the enemy, stand on the new peg and keep blowing on the windmill to raise the ground to the left. Jump on the raised ground and into the barrel cannon to a Bonus Room. In the room, use the two large and moving platforms to collect all forty-seven bananas, two Banana Coins and an Extra Life Balloon within thirty seconds and the fourth Puzzle Piece will appear.
After the Bonus Room, jump over the Jellybob to the right and quickly pound on the crate on the ground three times to reveal the fifth Puzzle Piece. Quickly jump back to the wooden platform to the left before you are hit by cannon fire. When you are given a clear shot at making it across, go for it and then stop underneath the elevated platform so you are shielded from the cannon fire. Jump on the raised ground to the right and then onto the wooden platform to the left to collect the letter "O". Quickly jump back down below the wooden platform.
Quickly run toward the right and down to the wooden section near the checkpoint. Run past the checkpoint and grab the wooden barrel. Run back to the left and throw the barrel to break the wooden target on the ship hull. Roll-jump inside of it and collect the sixth Puzzle Piece. Start going right again jumping on the floating ship parts and over Jellybobs. You will eventually reach a small wooden crate on the second floating ship part. Do not break the crate yet and use it to jump to the letter "N". Keep moving forward until you reach the next section of cannon fire. Quickly avoid the cannon fire each time in order to get onto the wooden cages. Do not break the cages yet, use them to jump to the left and collect the letter "G". Once the cannon finishes hitting the the cages to the right, you must pound on each set of cages as fast as you can and then immediately roll to the right for safety. Each set of cages requires three pounds to break. It is possible to do this all without getting harmed. After breaking the cages, run under the ship parts and into a new area.
Grab the wooden barrel and carry it past the Pinchlies. You are now going to have to avoid all the cannon fire here in order to protect the barrel you are carrying at all costs. As soon as you are clear in front of you, move to the right and keep doing so until you reach the other side. Staying at the right spot between cannonballs and jumping over explosions can help to keep the barrel intact. At the end, use the barrel to break the wooden target on the ship hull. Walk in to reach another Bonus Room. In the room, use the bouncy and moving platform to collect all forty bananas and four Banana Coins within thirty seconds and reveal the seventh and final Puzzle Piece. After the Bonus Room, jump over the ship hull you went into and touch the Slot Machine Barrel to finish the level.
Enemies[]
Items[]
- Hearts: 2
- DK Barrels: 1
- Banana Coins: 12 (counts 2 in the first Bonus Room and 4 in the second Bonus Room, does not count three or more consecutive jumps on enemies)
- Extra Life Balloons: 1 (counts 1 in the first Bonus Room, does not count eight or more consecutive jumps on enemies)
K-O-N-G Letters[]
- K: After the second Puzzle Piece and Jellybobs, in the section with a pit and a Tiki Buzz, roll-jump or use the flying enemy to bounce at the right moment and collect the letter "K". Use Diddy Kong's rocket pack if necessary.
- O: Just after the fifth Puzzle Piece, in the third cannonball section, the letter "O" is on the elevated platform that can be used as shelter and above a treasure chest.
- N: After the checkpoint, do not break the small wooden crate on the second floating ship part. Use the crate to jump to the letter "N".
- G: In the fourth cannonball section, dodge the cannonballs, do not break the wooden cages initially and jump from them to get the letter "G" to the left.
Puzzle Pieces[]
- 1: Pound on the first peg you see and another peg will pop up. Pound on the new peg and the Puzzle Piece will appear over the first peg.
- 2: Just after the first cannoball section, blow on the flower between two Jellybobs to reveal the second Puzzle Piece.
- 3: After the letter "K" and the second cannonball section, pound on the peg and a new one will pop up on the wooden walkway behind you. Use it to get the Puzzle Piece floating above the screen by roll-jumping.
- 4: After the third Puzzle Piece and a treasure chest, pound on the peg to reveal a Pinchly and a new peg near the windmill. Go past the enemy, stand on the peg and keep blowing on the windmill to raise the ground platform behind you. Jump from the raised platform to the barrel cannon at the top of the screen. It will take you to a Bonus Room. There, using the two large and moving platforms, collect all forty-seven bananas, two Banana Coins and an Extra Life Balloon within thirty seconds to make the Puzzle Piece appears.
- 5: After the first Bonus Room, in the start of third cannoball section, pound on the wooden cages three times to reveal the Puzzle Piece.
- 6: After the letter "O", grab the wooden barrel by the Tutorial Pig's checkpoint and carry it back to the ship hull to the left. Throw the barrel at the target and roll-jump inside to get the Puzzle Piece.
- 7: After the letter "G", grab the wooden barrel, go past some Pinchlies and carefully carry it through the last and longest cannonball section avoiding any damage to it. Staying at the right spots between cannoballs and jumping over the explosions can help to keep the barrel intact. At the end, throw the barrel at the wall with the target to find another entrance to a Bonus Room. In the room, use the bouncy and moving platform to collect all forty bananas and four Banana Coins within thirty seconds and make the Puzzle Piece appears.
Puzzle[]
The puzzle of Cannon Cluster is of a cherry against a light yellow background. When all of the pieces are found, the Ship Attack! artwork will be added to the Worlds Gallery of the Image Gallery in the Extras menu.
Time Attack Medals[]
- Shiny Gold: 00:44.00
- Gold: 00:50.00 (00:51.00 in the Japanese version)
- Silver: 01:01.00 (01:05.00 in the Japanese version)
- Bronze: 01:23.00
Gallery[]
")
")
")
")
")
")
")
")
")
")
")
")
")
")
")
Videos[]
 (25 KB)")
 (23 KB)")