No edit summary |
No edit summary Tags: Visual edit Mobile edit Mobile web edit |
||
| (166 intermediate revisions by 15 users not shown) | |||
| Line 1: | Line 1: | ||
| − | {{Game |
+ | {{Infobox Game |
| ⚫ | |||
| − | |image = [[File:Pic.jpg |
+ | |image = [[File:Pic.jpg|300px]] |
| − | |caption = North American boxart of ''Donkey Kong Country Returns'' for [[Nintendo Wii|Wii]]. |
+ | |caption = North American boxart of the game ''Donkey Kong Country Returns'' for [[Nintendo Wii|Wii]]. |
| − | |developer = [[Retro Studios]] (Wii) <br/>Monster Games, Inc.<ref>[[wikipedia:Monster Games|''Monster Games, Inc.'' on Wikipedia]]</ref> (3DS) |
+ | |developer = [[Retro Studios]] (Wii version) <br/>Monster Games, Inc.<ref name="Monster Games, Inc. on Wikipedia">[[wikipedia:Monster Games|''Monster Games, Inc.'' on Wikipedia]]</ref> (3DS version) |
|publisher = [[Nintendo]] |
|publisher = [[Nintendo]] |
||
| − | |platforms = [[Nintendo Wii]], [[Nintendo 3DS]], Nvidia Shield TV<ref>[[wikipedia:Nvidia Shield TV|''Nvidia Shield TV'' on Wikipedia]]</ref> |
+ | |platforms = [[Nintendo Wii]], <br/>[[Nintendo 3DS]], <br/>[[Nintendo Wii U]], <br/>Nvidia Shield TV<ref name="Nvidia Shield TV">[[wikipedia:Nvidia Shield TV|''Nvidia Shield TV'' on Wikipedia]]</ref> |
| − | |released = '''Nintendo Wii''' <br/>{{release|USA|November 21, 2010|Australia|December 2, 2010|Europe|December 3, 2010|Japan|December 9, 2010}} <br/>'''Nintendo 3DS''' <br/>{{release|USA|May 24, 2013| |
+ | |released = '''Nintendo Wii''' <br/>{{release|USA|November 21, 2010|Australia|December 2, 2010|Europe|December 3, 2010|Japan|December 9, 2010}} <br/>'''Nintendo 3DS''' <br/>{{release|USA|May 24, 2013|Europe|May 24, 2013|Australia|May 25, 2013|Japan|June 13, 2013|Korea|December 7, 2013}} <br/>'''Nintendo Wii U (Nintendo eShop<ref name="Nintendo eShop on Wikipedia">[[wikipedia:Nintendo eShop|''Nintendo eShop'' on Wikipedia]]</ref>) (Wii version)''' <br/> {{release|Japan|January 21, 2015|Europe|January 22, 2015|Australia|January 23, 2015|USA|September 22, 2016}} <br/>'''Nvidia Shield TV (Wii version)''' <br/>{{release|China|July 4, 2019}} |
|genre = Platformer |
|genre = Platformer |
||
| − | |ratings = [[Entertainment Software Rating Board (ESRB)|ESRB]]: [[ |
+ | |ratings = [[Entertainment Software Rating Board (ESRB)|ESRB]]: [[File:ESRB E.png|12px]] Everyone |
| − | |modes = Single player, Multiplayer (2) |
+ | |modes = Single player, <br/>Multiplayer (2) |
| − | |media = Wii Optical Disc, 3DS Game Card, Downloadable Media (Nvidia Shield TV) |
+ | |media = Wii Optical Disc, <br/>3DS Game Card, <br/>Downloadable Media (Nintendo eShop and Nvidia Shield TV) |
| − | |input = Wii Remote (and Nunchuk)<ref>[[wikipedia:Wii Remote|''Wii Remote'' on Wikipedia]]</ref>, 3DS Buttons (and Touch Screen), Nvidia Shield Controller}} |
+ | |input = Wii Remote (and Nunchuk)<ref>[[wikipedia:Wii Remote|''Wii Remote'' on Wikipedia]]</ref>, <br/>3DS Buttons (and Touch Screen), <br/>Nvidia Shield TV Controller}} |
| − | '''Donkey Kong Country Returns''' is the fourth game in the '' |
+ | '''''Donkey Kong Country Returns''''' is a platformer game developed by [[Retro Studios]] and released for the [[Nintendo Wii]] by [[Nintendo]] in 2010. It is the fourth game in the ''Donkey Kong Country'' series. It is the sequel to ''[[Donkey Kong Country 3: Dixie Kong's Double Trouble!|Donkey Kong Country 3]]'' and it is also the first ''Donkey Kong Country''-line game in over a decade. The game was announced at the E3 2010<ref name="E3 2010">[[wikipedia:E3 2010|''E3 2010'' on Wikipedia]]</ref>. |
| − | A |
+ | A new version of the game, called '''''Donkey Kong Country Returns 3D''''', was developed by Monster Games<ref name="Monster Games, Inc. on Wikipedia"/>, and released for the [[Nintendo 3DS]] by Nintendo in 2013. |
| + | By using the backward compatibility<ref>[[wikipedia:Backward compatibility|''Backward compatibility'' on Wikipedia]]</ref> between controllers and media of the Nintendo Wii and [[Nintendo Wii U]], ''Donkey Kong Country Returns'' was re-released for the latter via the Nintendo eShop<ref name="Nintendo eShop on Wikipedia"/> in 2015-2016. |
||
| ⚫ | |||
| ⚫ | |||
| ⚫ | On July |
||
| ⚫ | On July 4, 2019, an emulated version of ''Donkey Kong Country Returns'', known as '''''Donkey Kong Returns''''', was officially released on Nvidia Shield TV<ref name="Nvidia Shield TV"/>, exclusively for the Chinese region.<ref>[https://www.nintendolife.com/news/2019/07/wiis_donkey_kong_country_returns_is_now_playable_at_1080p_and_60fps_on_nvidia_shield ''Wii's Donkey Kong Country Returns Is Now Playable At 1080p And 60fps On Nvidia Shield'' on Nintendo Life]</ref> |
||
| + | |||
| + | {{Clr}} |
||
==Story== |
==Story== |
||
| − | [[File: |
+ | [[File:Emerging from the volcano.png|250px|thumb|The [[Tiki Tak Tribe]] and [[Tiki Tong Tower]] emerging from the volcano.]] |
| + | The story begins as the camera locks at a volcano. After a few seconds of observing it, the volcano erupts. Lava and molten rocks shoot out into the sky. The [[Tiki Tak Tribe]] awakes and they emerge from the molten rocks that are still airborne. The eruption continues until [[Tiki Tong Tower]] bursts out of the volcano and roars. |
||
| ⚫ | |||
| + | [[File:That's not gonna work, buddy.png|200px|left|thumb|Krazy Kalimba trying to hypnotize Donkey Kong.]] |
||
| ⚫ | The members of the Tiki Tak Tribe then go down to [[Donkey Kong Island]] to hypnotize the animals there by playing music (namely elephants, giraffes, zebras, and squirrels). The animals start stealing every banana from Donkey Kong Island, only to come across Donkey Kong and Diddy Kong's [[Donkey Kong and Diddy Kong's Treehouse|hut]]. Diddy Kong jumps out the window and swings down to the ground. He immediately notices that his and Donkey Kong's [[Donkey Kong and Diddy Kong's Banana Hoard|banana hoard]] has been stolen once again, and he scowls before chasing after the animals that stole it. Donkey Kong finally steps out of the treehouse just in time to see the banana hoard being taken away by the native animals just before a tiki, known as [[Krazy Kalimba]], comes along a few seconds later and pushes him back into his hut. The tiki uses its music, trying to hypnotize the ape, but he seems to be immune against the hypnosis. The tiki tries again as Donkey Kong squints his eyes at him and smiles before the cutscene ends. |
||
| − | + | Donkey Kong punches Krazy Kalimba out of his hut and walks outside (in the multiplayer mode, Diddy Kong can double kick the tiki out instead). The Kongs then begin their quest to take back their banana hoard and rid the tikis of Donkey Kong Island. |
|
| − | [[File:DKCR World Map.png |
+ | [[File:DKCR World Map.png|250px|thumb|View of [[Donkey Kong Island]] from a distance via hacking tools used in the Wii version.]] |
| + | After exploring the [[Jungle]] and moving over some obstacles, Donkey and Diddy Kong come across an ancient coliseum arena at the edge of it where [[Mugly]], a large monster, is busy eating some bananas. Kalimba reappears, hypnotizes and possesses the creature in order to fight against the heroes. However, the primates are victorious and are able to push away the Tiki Tak Tribe leader. |
||
| − | Donkey Kong and Diddy Kong journey through eight different worlds to regain their stolen banana hoard: the [[Jungle]], the [[Beach]], the [[Ruins]], the [[Cave]], the [[Forest]], the [[Cliff]], the [[Factory]] and (finally) the Volcano. As they go through the eight worlds, they battle several members of the Tiki Tak Tribe and the possessed wildlife, including animals, plants, skeletons, and robots. The Kongs occasionally visit [[Cranky Kong]] in his several [[Cranky Kong's Shop|shops]] scattered around the island. He comments about the items he has in stock and sells them to the Kongs, in exchange for [[Banana Coin]]s. |
||
| + | Later on in the [[Beach]], the Kongs evade hazards, such as large waves, and many aquatic creatures, including a giant squid called [[Squiddicus]]. Eventually, the primates then take on the [[Maraca Gang]], a group of tikis controlling the pirate members of the [[Scurvy Crew]], in order to move past the location, which they succeed in doing. |
||
| ⚫ | |||
| − | At the end of each world, they must defeat a Tiki Tak Tribe leader. The leaders are Krazy Kalimba, the [[Maraca Gang]], [[Gong-Oh]], [[Banjo Bottom]], [[Wacky Pipes]], [[Xylobone]], [[Cordian]] and [[Tiki Tong]] - the Tiki Tak Tribe's leader. The first seven bosses are not fought directly as Tikis possess the bodies of animals to do their dirty work: [[Mugly]] (possessed by Kalimba), the [[Scurvy Crew]] (possessed by the Maraca Gang), [[Stu]] (possessed by Gong-Oh), [[Mole Miner Max]] (possessed by Banjo Bottom), [[Mangoruby]] (possessed by Wacky Pipes), [[Thugly]] (possessed by Xylobone), and [[Colonel Pluck]] (possessed by Cordian). |
||
| + | Donkey and Diddy Kong then follow the Tiki Tak Tribe across the [[Ruins]], where they explore ancient temples full of traps and go through a battle at the sea. At the end of the current world, they discover a big egg sitting next to a golden gong. However, [[Gong-Oh]], other Tiki Tak Tribe leader, also meets them and uses its powers to throw down the primates inside an arena and put the egg inside a golden cauldron. The egg hatches, revealing the large bird [[Stu]] which gets possessed by Gong-Oh. The heroes are successful in besting the boss and repelling the tiki. |
||
| − | Boss battles usually begin with a boss animal eating bananas. One of the tribe leaders then possesses it to fight the Kongs. After the Kongs beat the boss, the boss animal lays down in defeat as the Tiki Tak Tribe leader possessing it emerges from the body, dazed. One of the Kongs then runs up to the tribe leader and KOs it with a total of one or more punches, knocking it into the distance (after defeating a boss, if the player wait some seconds the Tiki Tak Tribe's leader will just fly away towards the screen in ominous way, ending the level). |
||
| + | The Kongs then make their way to the [[Cave]], where they traverse crystal mines by usually riding on [[Mine Cart]]s while also avoiding bats and mole miners. It is followed by the heroes finding [[Mole Miner Max]] and his subordinates loading a steam train with bananas. [[Banjo Bottom]] then notices the primates and possesses the large mole boss. After a battle above Mine Carts pulled by the same train on movement, Donkey and Diddy stop Mole Miner Max and defeat the Tiki Tak Tribe leader. |
||
| − | In the Factory, the Kongs realize why the Tiki Tak Tribe are stealing bananas. They observe machines that mash bananas and put them into wooden statues to form new Tikis, possibly to take over more than just Donkey Kong Island. After they pass seventh world and shut down the factory, they proceed to the volcano to finish the Tiki Tak Tribe's rein once and for all. |
||
| + | Moving to the [[Forest]], the Kongs traverse over large structures and totems made out of wood. The location also houses flying tikis, carnivorous plants and spiders, including a large swarm of the latter. At the edge of the Forest, the heroes reach a small body of water next to giant wooden wheels. Here, [[Mangoruby]], a large plant-like caterpillar, is rudely awaken and it also becomes another victim of possession by the tiki [[Wacky Pipes]]. By avoiding Mangoruby's bites and electric attacks, the primates are able to take down the boss and the Tiki Tak Tribe leader. |
||
| ⚫ | At the |
||
| + | At the next location, the [[Cliff]], containing canyons, crumbling terrain and many ancient fossils, Donkey and Diddy face reanimated skeletons of dinosaurs and avoid to sink into tar pits. They are also attacked by cannonballs shot by airships. After a small detour in the way, the Kongs are blasted into [[Thugly]]'s lair, where the monster is also eating bananas. Then some airships piloted by the Tiki Tak Tribe arrive, and [[Xylobone]] uses the opportunity to hypnotize and possess the boss. The heroes are able to defeat Thugly and stop the Tiki Tak Tribe leader. |
||
| ⚫ | |||
| + | In the Factory, Donkey and Diddy traverse industrial-themed locations containing smog, many mechanical contraptions and robots. Eventually, they also find three hidden rooms where there are large electric plugs, and the primates activate them in order to reveal a large rocket. In the launch pad, the Kongs ride a [[Rocket Barrel]] towards high atmosphere while avoiding colisions against airships, and they reach the final area of the Factory. Here, the heroes realize why the Tiki Tak Tribe are stealing bananas. They witness a bipedal robot, controlled by the chicken [[Colonel Pluck]], mashing bananas and putting them into wooden statues to create new tikis instantly. While the robot ceases of operating briefly, [[Cordian]] appears and possesses the pilot. After a battle where the Kongs damage the robot and force a flying vehicle to crash down, Colonel Pluck and Cordian are both bested by the heroes. |
||
| ⚫ | |||
| ⚫ | |||
| − | ==Overview== |
||
| ⚫ | At the next world, the Volcano, Donkey and Diddy move across many dangerous hazards involving lava, sinking platforms and fiery enemies. Eventually, after a vertical travel by Rocket Barrel, the heroes are able to reach the top of the Tiki Tong Tower. Upon arriving inside the location, they come face-to-face with [[Tiki Tong]], the ruler of the Tiki Tak Tribe, alongside the tiki leaders defeated previously. The large boss takes and eats some of the Donkey Kong's banana hoard, spins it around himself like a blender, and spits it on to the tribe leaders, much to the Kongs' disgust and confusion. The tribe leaders then merge together to turn into two giant hands for Tiki Tong to use. During the final boss battle, the primates destroy the hands by breaking the gems on the back of each hand, while dodging his slap and chop attacks. Tiki Tong then proceeds to try crushing the heroes with his head and spit fireballs at them. The heroes eventually defeat him by smashing his head, causing the large tiki to explode. |
||
| − | This game takes inspiration from the basics of ''Donkey Kong Country'' series for the [[Super Nintendo Entertainment System]]. |
||
| ⚫ | Donkey and Diddy Kong are then blasted to the moon due to Tiki Tong exploding. As all hope seems lost (for a brief moment), Donkey Kong then sees the moon below him, grins and uses his incredible strength to punch the moon towards Tiki Tong Tower (alternatively in the multiplayer mode, by Diddy Kong standing alone, he will headbutt the moon instead). It will smash the tower back into the volcano, causing it to disappear. The moon is comically throw back into orbit as bananas erupt from the volcano, bringing an end to the Tiki Tak Tribe's reign. All the animals on the island are also freed from their mind control, and Donkey and Diddy Kong later celebrate their victory over reclaiming their banana hoard. |
||
| ⚫ | |||
| ⚫ | Donkey Kong and Diddy Kong both keep their moves from previous games, but their roll attacks lack the continuous momentum for hitting multiple enemies in succession. They can also both use the [[Hand Slap|ground-pound]] ability and the blow ability to reveal secret items and open paths. In the Nintendo Wii version, these mentioned abilities can only be activated by motion controls moves<ref>[[wikipedia:Motion controller|''Motion controller'' on Wikipedia]]</ref> on the Wii Remote (and Nunchuk). |
||
| ⚫ | |||
| ⚫ | For the first time in the ''Donkey Kong Country'' series, both Kongs are seen to be working together simultaneously. Diddy Kong can climb on Donkey Kong's back, a throwback to the "team-up" ability since ''[[Donkey Kong Country 2: Diddy's Kong Quest|Donkey Kong Country 2]]'' (ironically the official artwork of the Japanese boxart of ''Donkey Kong Country'' for |
||
| ⚫ | |||
| ⚫ | |||
| ⚫ | |||
| ⚫ | The game uses many of the familiar elements from the previous ''Donkey Kong Country'' games and even the ''[[Donkey Kong Land|Donkey]] [[Donkey Kong Land 2|Kong]] [[Donkey Kong Land III|Land]]'' trilogy. As the main playable characters, Donkey and Diddy Kong both keep their moves from previous games, but their roll attacks lack the continuous momentum for hitting multiple enemies in succession. They can also both use the [[Hand Slap|ground-pound]] ability and the blow ability to reveal secret items and open paths, as well as make some enemies on fire become vulnerable. In the Nintendo Wii version, these mentioned abilities can only be activated by motion controls moves<ref name="Motion controller">[[wikipedia:Motion controller|''Motion controller'' on Wikipedia]]</ref> on the Wii Remote (and Nunchuk). |
||
| ⚫ | For the first time in the ''Donkey Kong Country'' series, both Kongs are seen to be working together simultaneously. Diddy Kong can climb on Donkey Kong's back, a throwback to the "team-up" ability since ''[[Donkey Kong Country 2: Diddy's Kong Quest|Donkey Kong Country 2]]'' (ironically the official artwork of the Japanese boxart of ''Donkey Kong Country'' for Super Famicom showed Diddy Kong riding Donkey Kong's back). Diddy can use his [[Rocketbarrel Boost|rocket pack]] to give him a jump boost, however the player cannot switch between them like in previous ''Donkey Kong Country'' games. Both main characters can also perform the "roll-jump" move to collect items inside pits or jump across large gaps safely. |
||
| ⚫ | After |
||
| + | |||
| + | The two characters can cling to turf-covered walls and ceilings to get around. Also, there are two heart containers for Donkey Kong, and two more heart containers for Diddy Kong (both characters have three heart containers each in the ''New Mode'' of the 3DS game version). The heroes can also pick up [[Barrel|barrels]] and throw at enemies, however, it is no longer possible to put the barrels back on the ground safely after they are grabbed, like in the previous games. |
||
| + | |||
| + | In the multiplayer mode, two players can participate in a level at the same time, with the first player controlling Donkey Kong and the second one controlling Diddy Kong. If both characters are defeated, two extra lives will be always spent, instead of one, when they reappear at the beginning of the level or latest active checkpoint. If a player's Kong moves off screen while it is focused on the other one, after a countdown of three seconds, the character outside will be instantly teleported back next to the current one at the screen. It is possible for the second player's character (Diddy) mount the first player's character (Donkey) and let the first player to control most of the game. The second player controlling Diddy can assist by firing his [[Peanut Popgun]]s. This way, both players' characters can share effects from items, such as [[Heart Boost]]s and [[Banana Juice]]s. Any player also has the option of summoning their defeated character inside a dropping [[DK Barrel]] by spending one [[Extra Life Balloon]] at any moment. But the present player's Kong must touch the barrel before it falls below the screen. The dropping DK Barrel will be instantly draw towards the present character by pointing the Wii Remote at the direction of the barrel or by holding the "Y" or "X" button on the 3DS. |
||
| + | |||
| ⚫ | After cleared once, every level can also be played in ''[[Time Attack (Donkey Kong Country Returns)|Time Attack]]'' mode. In this mode, Donkey and Diddy Kong do not spend extra lives, there are no important items to collect, and [[Bonus Stage|Bonus Rooms]] are inaccessible. Donkey Kong always starts the level without Diddy Kong, but he can find his little friend inside DK Barrels during most of the levels. There are four time rating medals the player can get for each level: Bronze, Silver, Gold, and the elusive Shiny Gold. The times needed for the first three are shown after the the player clears the level, but the time required for the Shiny Gold medal is unknown and can vary as much as one second faster than Gold up to more than twenty seconds faster. It is impossible to play the ''Time Attack'' mode in multiplayer. |
||
| + | |||
| ⚫ | Collecting [[Puzzle Piece]]s and [[K-O-N-G Letters]] gives the player bonuses. The Puzzle Pieces unlock game development artwork and dioramas in the ''Extras'' menu of the game. After getting all the K-O-N-G letters in each regular level of a world, the player unlocks one secret level in that world called [[Key Temple]]. By completing a Key Temple, the player gets a Rare Orb. After all eight Rare Orbs are obtained, the Kongs will able to enter the Golden Temple. Once the Golden Temple level is completed, a mode called ''[[Mirror Mode]]'' will be unlocked. The ''Mirror Mode'' is a harder game mode by allowing to play only with Donkey Kong, having a single heart container, in mirrored versions of the levels and without equippable items. In the same mode, DK Barrels only work as throwable weapons, and hearts inside levels are missing or replaced by bananas. If all the levels in the games are cleared again in the ''Mirror Mode'', the player will unlock more artwork in the gallery. It is impossible to play the ''Mirror Mode'' in multiplayer. |
||
| + | |||
| + | The percentage rate of completion of the games displayed in the save files is not affected by collecting Puzzle Pieces nor obtaining ''Time Attack'' medals. The rate rises by clearing every single level in the games, including levels locked by [[Map Key]]s, and the Key Temple levels, making to collect K-O-N-G Letters in regular levels indirectly required. In all game versions, being in multiplayer or not, by clearing every single level once in the regular difficulty, the percentage rate will reach one hundred percent. By clearing every single level again in the ''Mirror Mode'' in single player, the percentage rate will reach two hundred percent. |
||
==Characters== |
==Characters== |
||
===Kongs and Allies=== |
===Kongs and Allies=== |
||
| ⚫ | |||
| ⚫ | |||
| ⚫ | |||
| ⚫ | |||
| ⚫ | |||
| ⚫ | *[[Tutorial Pig]]: is a very intelligent pig (much like how pigs are said to be intelligent). He is another supporting character, as he, along his family, are responsible for giving tutorial of game controls for the Kongs in the background during levels. The Tutorial Pig also uses multiple stalls as checkpoint markers inside levels, and he marks the starting and finishing lines during the ''[[Time Attack (Donkey Kong Country Returns)|Time Attack]]'' mode. After losing multiple extra lives in the same level, the Tutorial Pig can activate the ''[[Super Guide]]'' mode if the player prompts it. |
||
| ⚫ | *[[Super Kong]]s: are counterparts of Donkey and Diddy Kong, with white fur and wearing blue clothes. They only appear in the ''Super Guide'' mode after the player loses eight extra lives, or five lives in the ''New Mode'' of the 3DS game version, in the same level if the player prompts the mode at any Tutorial Pig's checkpoint stalls. The Super Kongs proceed to complete the current level always from the beginning while the player watches and receives no items collected by the characters. It allows the player to skip levels, including boss levels and Key Temples. Pausing the game also allows the player to take control of the Super Kongs. This mode cannot be activated in the multiplayer. |
||
| ⚫ | |||
| ⚫ | |||
| ⚫ | |||
| ⚫ | |||
| ⚫ | *[[Tutorial Pig]]: is a very intelligent pig. He |
||
| ⚫ | *[[Super Kong]]s: are |
||
| − | |||
| ⚫ | |||
===Animal Buddies=== |
===Animal Buddies=== |
||
| − | *[[Rambi the Rhinoceros]]: makes his return as the one of the only two animal buddies of the game. He is found in a large wooden crate that requires pounding or roll attacks to break open. Rambi is very destructive |
+ | *[[Rambi the Rhinoceros]]: makes his return as the one of the only two animal buddies of the game. He is found in a large wooden crate that requires pounding or roll attacks to break open. Rambi is very destructive, as he can smash down blocks with his symbol on them and can charge through hordes of enemies and even break wooden spikes. His weakness is fire, which causes him to dismount Donkey Kong and/or Diddy Kong and walk around, waiting to ride again. When it happens, the heroes will also lose a heart by damage. |
| − | [[File: |
+ | [[File:Pic dk 2.jpg|150px|thumb|Artwork of Squawks the Parrot.]] |
| − | *[[Squawks the Parrot]]: makes an appearance in the Cranky Kong's Shop |
+ | *[[Squawks the Parrot]]: makes an appearance in the Cranky Kong's Shop, where the player can purchase him for fifteen Banana Coins or five coins in the ''New Mode'' of the 3DS game version. After he is equipped, Squawks sits on a branch at the lower left corner of the screen during a level. If the Kongs get close to a Puzzle Piece or entrance to a Bonus Room, the parrot will get agitated. The closer the heroes get to a Puzzle Piece or Bonus Room, the more he will get agitated and start to squawk. Squawks also serves as world selection marker in the overworld map. |
===Enemies=== |
===Enemies=== |
||
| + | ====Hypnotized/Domestic Enemies==== |
||
| − | All of the animal enemies and bosses are under control of the Tiki Tak Tribe. The enemies are listed below. |
||
| ⚫ | |||
| − | *[[Ack]]stack |
||
| + | It is assumed that at least most of the non-tiki enemy types have been hypnotized by the Tiki Tak Tribe into serving them. These enemies are listed below, in alphabetical order. |
||
| ⚫ | |||
| − | *[[ |
+ | *[[Ack]]s |
| + | *[[Ackstack]]s |
||
| ⚫ | |||
| ⚫ | |||
| ⚫ | |||
| ⚫ | |||
| ⚫ | |||
| ⚫ | |||
| ⚫ | |||
*[[Bopapodamus]] |
*[[Bopapodamus]] |
||
| − | *[[ |
+ | *[[Bowling Bird]]s |
| − | *[[ |
+ | *[[Buckbot]]s |
| − | *[[ |
+ | *[[Buckbomb]]s |
| − | *[[ |
+ | *[[Buzzbite]]s |
| − | *[[ |
+ | *[[Buzzsaw]]s |
| + | *[[Cageberry|Cageberries]] |
||
| ⚫ | |||
| − | *[[Chomp ( |
+ | *[[Chomp (Species)|Chomps]] |
| − | *[[Cling Cobra]] |
+ | *[[Cling Cobra]]s |
| − | *[[ |
+ | *[[Electrasquid]]s |
| − | *[[ |
+ | *[[Electroid]]s |
| − | *[[ |
+ | *[[Firehead Ned]]s |
| − | *[[ |
+ | *[[Fire Snake]]s |
| − | *[[ |
+ | *[[Frogoon]]s |
| − | *[[ |
+ | *[[Green Chomp]]s |
| − | *[[ |
+ | *[[Hopgoon]]s |
| − | *[[ |
+ | *[[Humzee]]s |
| − | *[[ |
+ | *[[Jellybob]]s |
| − | *[[ |
+ | *[[Kowalee]]s |
| − | *[[Humzee]] |
||
| − | *[[Jellybob]] |
||
| − | *[[Kowalee]] |
||
*[[Squeekly#Mega Squeekly|Mega Squeekly]] |
*[[Squeekly#Mega Squeekly|Mega Squeekly]] |
||
| − | *[[Mimic]] |
+ | *[[Mimic]]s |
| − | *[[Mole Guard]] |
+ | *[[Mole Guard]]s |
| − | *[[Mole Miner]] |
+ | *[[Mole Miner]]s |
| − | *[[Muncher]] |
+ | *[[Muncher]]s |
| − | *[[Pinchly]] |
+ | *[[Pinchly|Pinchlies]] |
| − | *[[Pogobot]] |
+ | *[[Pogobot]]s |
| − | *[[Squeekly#Purple Squeekly|Purple |
+ | *[[Squeekly#Purple Squeekly|Purple Squeeklies]] |
| − | *[[Pyrobot]] |
+ | *[[Pyrobot]]s |
| − | *[[Rawk]] |
+ | *[[Rawk]]s |
| − | *[[ |
+ | *[[Robobī]] |
| − | *[[ |
+ | *[[Shooting Chomp]]s |
| − | *[[ |
+ | *[[Skellirex]]es |
| − | *[[ |
+ | *[[Skittler]]s |
| − | *[[ |
+ | *[[Skullyrex]]es |
| − | *[[Skullyrex]] |
||
*[[Snaggles]] |
*[[Snaggles]] |
||
*[[Snaps]] |
*[[Snaps]] |
||
| − | *[[Spore Chomp]] |
||
*[[Squiddicus]] |
*[[Squiddicus]] |
||
| − | *[[Squidly]] |
+ | *[[Squidly|Squidlies]] |
*[[Stilts]] |
*[[Stilts]] |
||
| + | *[[Toothberry|Toothberries]] |
||
| ⚫ | |||
| − | *[[ |
+ | *[[Vine Chomp]]s |
| ⚫ | |||
| + | *[[Yellow Snaggles]] |
||
| + | |||
| + | ====Tiki Enemies==== |
||
| ⚫ | |||
| + | All the regular tiki enemies in the Tik Tak Tribe are listed here, in alphabetical order. |
||
| ⚫ | |||
| + | *[[Flaming Tiki Buzz]]es- A blackened Tiki Buzz set on fire. While burning, it can only be defeated with a thrown barrel; touching one in this state is harmful. However, a blow will dissolve its flames, leaving it dizzy and as vulnerable as a standard Tiki Buzz. |
||
| ⚫ | |||
| + | *[[Screaming Pillar]]s- A stone totem, initially found sleeping. As soon as it hears the Kongs, it wakes up and screams, toppling on the path. Screaming Pillars can crush the protagonists, as well as any other creature standing right below them. However, after collapsing on the ground, they become harmless and can be jumped on and cracked open with a ground pound. |
||
| ⚫ | |||
| ⚫ | |||
*[[Tiki Boulder]] |
*[[Tiki Boulder]] |
||
| − | *[[Tiki Buzz]] |
+ | *[[Tiki Buzz]]es |
| − | *[[Tiki Doom]] |
+ | *[[Tiki Doom]]s |
| + | *[[Tiki Goon]]s- Grunt-level enemies, slowly moving back and forth on platforms. Although harmful if simply touched from one side, as they bite, Tiki Goons can be destroyed using any form of attack, such as stomping, rolling, barrel throwing, or Rambi's strike. |
||
| ⚫ | |||
| + | *[[Tiki Pop]]s- A Tiki with a bowl-shaped head, carrying a flashing bomb. Tiki Bombs walk slowly in one direction on the ground; they will self-destruct moments after spawning from Stu's cauldron. They will explode earlier if the Kongs make contact with them, and their combustion is dangerous. |
||
| ⚫ | |||
| − | *[[Tiki Seeker]] |
+ | *[[Tiki Seeker]]s |
| + | *[[Tiki Tank]]s- A sturdy Tiki reinforced with stone. Roll attacks and normal stomps do not have effect on it. Instead, the Kongs can pound the ground near a Tiki Tank to flip it over, uncovering its bottom side and allowing them to destroy the enemy with a stomp. Alternatively, a Tiki Tank can be immediately defeated with a barrel or with Rambi. |
||
| − | *[[Tiki Tank]] |
||
| − | *[[Tiki Torch]] |
+ | *[[Tiki Torch]]es |
| − | *[[Tiki Tork]] |
+ | *[[Tiki Tork]]s |
| − | *[[Tiki Zing]] |
+ | *[[Tiki Zing]]s |
| − | *[[ |
+ | *[[Ultra Char-Char]]s |
| − | *[[Ultra Char-Char]] |
||
| − | *[[Vine Chomp]] |
||
| ⚫ | |||
===Bosses=== |
===Bosses=== |
||
| + | In a similar way to non-tiki enemies, most of the bosses are creatures hypnotized and controlled by the Tik Tak Tribe leaders. After Donkey and Diddy Kong have defeated a boss, the creature will pass out and the Tik Tak Tribe leader controlling the boss will leave its body, and the tiki will stay dizzy for a few seconds. The player has the opportunity to jump towards the Tiki Tak Tribe leader, wait for a prompt to appear at the left bottom of the screen, and hit the tiki multiple times (about twenty-two times) by using the pounding move (by shaking the Wii Remote (and Nunchuk) vertically in the Wii version, pressing the "X" and "Y" buttons in the 3DS version or pressing the "X" button in the Nvidia Shield TV version). However, it is entirely optional. The player can allow the Tiki Tak Tribe leader to leave, because the number of hit points does not amount for anything beyond their self-achievement. |
||
*[[Mugly]] (controlled by [[Krazy Kalimba]]) |
*[[Mugly]] (controlled by [[Krazy Kalimba]]) |
||
*The [[Scurvy Crew]] (controlled by the [[Maraca Gang]]) |
*The [[Scurvy Crew]] (controlled by the [[Maraca Gang]]) |
||
| Line 149: | Line 171: | ||
==Items== |
==Items== |
||
| ⚫ | *Background Elements: Background Elements can often contain collectable items in the game, such as Puzzle Pieces, Bananas, Extra Life Balloons and Banana Coins, or hidden means of transportation, such as barrel cannons. The player must ground-pound or blow nearby the elements to reveal their secret contents. |
||
| − | *[[Banana]]s: serve their previous purpose, being items commonly found. 100 bananas must be collected for one extra life. |
||
| + | *[[Banana]]s: Bananas serve the same purpose they have had in previous games, being items commonly found. One hundred bananas must be collected for earning one extra life. There are also banana bunches, with regular ones that have five bananas, as well as the big variant that has twenty. There are also mysterious flying bananas that trail up to regular floating bananas. |
||
| − | *[[Banana#Banana Bunches|Banana Bunches]]: are worth five bananas. The bigger bunches are very rare and worth twenty bananas. |
||
| − | *[[Banana Coin]]s: reappear from ''Donkey Kong Country 2'', and are used to purchase extra lives and other items that Cranky Kong sells in his shops. During levels, it is possible to receive Banana Coins by jumping and bouncing off three or more consecutive enemies. |
+ | *[[Banana Coin]]s: Banana Coins reappear from ''Donkey Kong Country 2'', and are used to purchase extra lives and other items that Cranky Kong sells in his shops. During levels, it is possible to receive Banana Coins by jumping and bouncing off three or more consecutive enemies. The player can collect a maximum total of 999 Banana Coins in the game. |
| ⚫ | *[[Extra Life Balloon]]s: Extra Life Balloons (or Red Balloons) are the game's main life counters. Oddly, extra life balloons do not have a face on them unlike previous ''Donkey Kong Country'' games. There are only red colored balloons that can be collected in levels. If both primates are defeated during a level, Donkey Kong will be dropped by a red balloon at the start or checkpoint. If the player loses all their extra lives, the game will send them to the [[Game Over Screen|Game Over]] screen, where they can pick the option to continue the game from the last saved point or quit the game back to the main title screen. During levels, it is possible to receive extra life balloons by jumping and bouncing off eight or more consecutive enemies. At the Cranky Kong's Shop, the player can also buy one, three or even seven extra life baloons per time. The player can collect a maximum total of ninety-nine extra lives in the game. |
||
| ⚫ | * |
||
| ⚫ | *Green Balloons: Green Balloons save the heroes after they fall into a pit once by making them float up temporarily. The player can steer the balloon to reach safe ground. Green Ballons are exclusive items to purchase for three Banana Coins in the ''New Mode'' from 3DS game version and they cannot be used in levels with vehicle sections, such as mine carts and Rocket Barrels. |
||
| ⚫ | |||
| ⚫ | *[[Heart]]s: Hearts measure Donkey's and Diddy's health. Each Kong has two heart containers or three in the ''New Mode'' of the 3DS version. Once all hearts are lost, an extra life is lost. However, if the player uses a Heart Boost, the Kongs gain a temporary extra heart container during a level. Leaving or completing a level will always restore all Kongs' regular heart containers. |
||
| ⚫ | |||
| ⚫ | |||
| ⚫ | *[[Extra Life Balloon]]s: are the game's main life counters. Oddly |
||
| ⚫ | *[[K-O-N-G Letters]]: K-O-N-G Letters make a more important reappearance, being unseen since the game ''[[DK: Jungle Climber]]''. However, unlike in previous games, they do not give the player an extra life. They unlock additional Key Temple levels in most worlds. Collecting all K-O-N-G letters from a level grants a ''Red Star Emblem'' to the player. |
||
| ⚫ | |||
| ⚫ | |||
| ⚫ | |||
| + | *[[Banana Juice]]: Banana Juice makes the Kongs golden and provides some invincibility in the form of extra hits during a single level. This invincibility being ten extra hits in ''Donkey Kong Country Returns'' and the ''Original Mode'' of ''Donkey Kong Country Returns 3D'', or five hits in the ''New Mode'' of ''Donkey Kong Country Returns 3D''. The effects are instantly lost if both main characters fall into a pit in both game versions, except during the ''New Mode'' of ''Donkey Kong Country Returns 3D''. |
||
| − | [[File:MinecartReturns.png|thumb|150px|Artwork of Mine Cart.]] |
||
| ⚫ | *Crash Guard: Crash Guard lets a mine cart or Rocket Barrel take two extra hits, instead of it exploding after a single hit. It is an exclusive item to purchase at the Cranky Kong's Shop for ten Banana Coins in the ''New Mode'' from 3DS version, and it cannot be used in levels without vehicles, such as Rocket Barrels and mine carts. |
||
| ⚫ | |||
| ⚫ | |||
| ⚫ | |||
| − | *[[Puzzle Piece]]s: are a new type of |
+ | *[[Puzzle Piece]]s: Puzzle Pieces are a new type of collectable item that unlocks game development artwork and dioramas in the ''Extras'' menu. Sometimes, they are hidden inside objects in the background of levels and they are always the reward for collecting all items within thirty seconds inside Bonus Rooms. These items can be well-hidden inside levels, in secret pathways and in the paths of Barrel Cannons. If the player collects a Puzzle Piece, but after, they lose an extra life, the game still will consider it as collected, even without reaching a checkpoint. However, the player must clear the current level and cannot leave it early, or the piece will not be considered as collected either. Puzzle Pieces are entirely optional items to collect. They are not necessary to rise up the percentage rate of completion in the games. |
| ⚫ | |||
| ⚫ | |||
| ⚫ | |||
| − | *[[Banana Juice]]: makes the Kongs golden and lets them take extra hits (ten hits in the Wii version, and five hits in the 3DS version) during a single level. The effects are instantly lost if both main characters fall into a pit. |
||
| ⚫ | |||
| ⚫ | |||
| + | *DK Platforms: DK Platforms are large circular platforms displaying a DK insignia on them and found between sections inside most of the levels. These platforms are used to open paths, connect foreground and background areas or reveal new structures. The player must use the ground-pound move to activate the platforms and able to progress. There are two types of DK Platforms in the games. The first type resembles a large button. When the Kongs are positionated over it, the player must keep ground-pounding it until the main structure is completely pushed down. The second type is composed by a large suspended plate, resembling a gong. Each time that the primates pound on it, the plate will make a loud echoing sound, throwing the heroes up and affecting the enviroment. This plate must be pounded by the Kongs for a total of three times to be activated, and after they are finished, the center of the plate will become red. |
||
| ⚫ | |||
===Barrels=== |
===Barrels=== |
||
| − | [[File:DKBarrelReturns.png |
+ | [[File:DKBarrelReturns.png|150px|thumb|Artwork of [[DK Barrel]].]] |
| − | *[[DK Barrel]]s: retain their original purpose, summoning a lost Kong, but its usage is different. In multiplayer mode, once a Kong is out and the player confirms, a DK Barrel will float down from above and the other Kong must jump on it to free the lost character. |
+ | *[[DK Barrel]]s: retain their original purpose, summoning a lost Kong, but its usage is different. In the multiplayer mode, once a Kong is out and the player in control confirms to spend an extra life, a DK Barrel will float down from above and the other player's Kong must jump on it to free the lost character. Pointing the Wii Remote at the direction of the dropping barrel or holding the "Y" or "X" button on the 3DS will draw the barrel towards the present player's Kong, even if the barrel is already below the character. DK Barrels can be used as weapons when they are thrown, and they also restore the both Kongs' lost hearts, even in multiplayer. In the ''New Mode'' of the 3DS version, portable DK Barrels can be purchased at the Cranky Kong's Shop for five Banana Coins. After losing a character, they can be thrown by touching the 3DS second screen. In the ''Mirror Mode'', DK Barrels do not restore hearts nor summon an assist character. In this mode, they can only be used as throwable weapons. |
| − | *[[Wooden Barrel]]s: are basic weapons, throwable against most enemies. They are few and far between compared to previous games, however. They are necessary to open secret entrances for Bonus Rooms and hanging bags holding items. After they are |
+ | *[[Wooden Barrel]]s: are basic weapons, throwable against most enemies. They are few and far between compared to previous games, however. They are necessary to open secret entrances for Bonus Rooms and break hanging bags holding items. After they are thrown, wooden barrels will roll across the ground. Defeating multiple enemies in succession will earn Banana Coins and Extra Life Balloons. Unlike the previous ''Donkey Kong Country'' games, it is no longer possible to put barrels back on the ground after they are pick up by the Kongs. |
| + | *[[Barrel Cannon]]s: make their prominent reimagination being used exactly as before, as transportation methods. They demand the player's input to shoot the Kongs. In most of the occasions, the player must use good timing to avoid shoot the heroes at obstacles and enemies, which would make the primates to fall down into pits below, losing an extra life. Barrel cannons displaying skull signs on them explode as soon as the primates are shot, making these barrels for one time use, and the heroes usually unable to return to the section of the levels before the same barrel type. If the player also misses the intended target when shooting, they will not have a second chance to use the barrel cannon again, and the Kongs will probably drop inside some abyss. |
||
| − | *[[Barrel Cannon]]s: make their prominent re-imagination being used exactly as before, as transportation methods. |
||
| − | **[[Barrel Cannon#Autofire Barrels/Blast Barrels|Autofire Barrels]]: automatically launch the Kongs at certain direction like regular barrel cannons, but they are capable of launch the heroes in the background and foreground environments. |
+ | **[[Barrel Cannon#Autofire Barrels/Blast Barrels|Autofire Barrels]]: automatically launch the Kongs at certain direction like regular barrel cannons, but they are capable of launch the heroes in the background and foreground environments. Some autofire barrels will also allow the primates to reach Bonus Rooms. |
| − | *[[Slot Machine Barrel]]s: are located at the end of regular levels and must be hit to complete the said levels. Similar to ''Donkey Kong Country 2''<nowiki>'</nowiki>s [[End of Stage Target]], the barrels will circle through multiple prizes to player get. The prizes are: banana bunch, Extra Life Balloon, Banana Coin or "DK". In case of picking "DK", the player will get a random prize and can also pound the barrel to multiply |
+ | *[[Slot Machine Barrel]]s: are located at the end of regular levels and must be hit to complete the said levels. Similar to ''Donkey Kong Country 2''<nowiki>'</nowiki>s [[End of Stage Target]], the barrels will circle through multiple prizes to the player get. The prizes are: banana bunch, Extra Life Balloon, Banana Coin or "DK". In case of picking "DK", the player will get a random prize and can also pound the barrel quickly to multiply their prize until fifteen times. |
| + | *[[Rocket Barrel]]s: Rocket Barrels are also vehicles used by the heroes to traverse specific levels while avoiding enemies and obstacles. Usually, by hitting any obstacle, the Rocket Barrel will instantly explode and the player will lose an extra life. In horizontal levels, the player can press the "Jump" button to make the rocket to ascend or release the button to make it to descend. In vertical levels, the player can also control the rocket's movement by pressing the "Left" and "Right" buttons, and holding the "Jump" button will make the Rocket Barrel to quickly ascend. |
||
==Worlds and Levels== |
==Worlds and Levels== |
||
| + | [[File:DKCR WorldMap.png|400px|thumb|Freelook view of the overworld map of Donkey Kong Island, without depicting the Tiki Tong Tower, as seen in the Wii version.]] |
||
| − | There are nine worlds at total in this game including an extra world featuring only one level (in the Wii and Nvidia versions), the Golden Temple, which is unlocked after Donkey and Diddy Kong have gotten all of the eight rare orbs from the Key Temple levels. The 3DS version also features the Cloud world and extra eight exclusive levels. |
||
| + | In ''Donkey Kong Country Returns'', there are eight worlds in total, and one extra world with one level, the Golden Temple, which is unlocked after completing the main game once and collecting all eight Rare Orbs from the Key Temple levels. ''Donkey Kong Country Returns 3D'' features the Cloud world, an extra world including eight exclusive levels and the Golden Temple level. This final world is also unlocked by completing the main game once and collecting all eight Rare Orbs. In the world maps of both games, locations are marked by buttons. Red buttons with glowing effects indicate uncleared levels. Blue buttons indicate cleared levels. Hexagonal-shaped buttons indicate the initial level in a world. Star-shaped buttons indicate the boss level in a world. Red flags with the "DK" insignia next to the boss level indicate cleared worlds, except in the Cloud world. |
||
| − | [[File:JungleWorld.png| |
+ | [[File:JungleWorld.png|300px|thumb|Map of the [[Jungle]] in the Wii version.]] |
===[[Jungle]]=== |
===[[Jungle]]=== |
||
*1-1 [[Jungle Hijinxs (Donkey Kong Country Returns)|Jungle Hijinxs]] |
*1-1 [[Jungle Hijinxs (Donkey Kong Country Returns)|Jungle Hijinxs]] |
||
*1-2 [[King of Cling]] |
*1-2 [[King of Cling]] |
||
*1-3 [[Tree Top Bop]] |
*1-3 [[Tree Top Bop]] |
||
| − | *1-4 [[Sunset Shore]] (level unlocked by buying the |
+ | *1-4 [[Sunset Shore]] (level unlocked by buying the Map Key from Cranky Kong's Shop in this world for twenty Banana Coins) |
*1-5 [[Canopy Cannons]] |
*1-5 [[Canopy Cannons]] |
||
*1-6 [[Crazy Cart]] |
*1-6 [[Crazy Cart]] |
||
*1-B [[Mugly|Mugly's Mound]] |
*1-B [[Mugly|Mugly's Mound]] |
||
| − | *1-K [[Platform Panic]] (secret level unlocked by collecting all |
+ | *1-K [[Platform Panic]] (secret level unlocked by collecting all K-O-N-G Letters in this world) |
| − | [[File:BeachWorld.png| |
+ | [[File:BeachWorld.png|300px|thumb|Map of the [[Beach]] in the Wii version.]] |
===[[Beach]]=== |
===[[Beach]]=== |
||
*2-1 [[Poppin' Planks]] |
*2-1 [[Poppin' Planks]] |
||
| Line 196: | Line 220: | ||
*2-4 [[Cannon Cluster]] |
*2-4 [[Cannon Cluster]] |
||
*2-5 [[Stormy Shore]] |
*2-5 [[Stormy Shore]] |
||
| − | *2-6 [[Blowhole Bound]] (level unlocked by buying the |
+ | *2-6 [[Blowhole Bound]] (level unlocked by buying the Map Key from Cranky Kong's Shop in this world for twenty Banana Coins) |
*2-7 [[Tidal Terror]] |
*2-7 [[Tidal Terror]] |
||
*2-B [[Scurvy Crew|Pinchin' Pirates]] |
*2-B [[Scurvy Crew|Pinchin' Pirates]] |
||
| − | *2-K [[Tumblin' Temple]] (secret level unlocked by collecting all |
+ | *2-K [[Tumblin' Temple]] (secret level unlocked by collecting all K-O-N-G Letters in this world) |
| − | [[File:RuinsWorld.png| |
+ | [[File:RuinsWorld.png|300px|thumb|Map of the [[Ruins]] in the Wii version.]] |
===[[Ruins]]=== |
===[[Ruins]]=== |
||
*3-1 [[Wonky Waterway]] |
*3-1 [[Wonky Waterway]] |
||
*3-2 [[Button Bash]] |
*3-2 [[Button Bash]] |
||
*3-3 [[Mast Blast]] |
*3-3 [[Mast Blast]] |
||
| − | *3-4 [[Damp Dungeon]] (level unlocked by buying the |
+ | *3-4 [[Damp Dungeon]] (level unlocked by buying the Map Key from Cranky Kong's Shop in this world for twenty Banana Coins) |
*3-5 [[Itty Bitty Biters]] |
*3-5 [[Itty Bitty Biters]] |
||
*3-6 [[Temple Topple]] |
*3-6 [[Temple Topple]] |
||
*3-B [[Stu|Ruined Roost]] |
*3-B [[Stu|Ruined Roost]] |
||
| − | *3-K [[Shifty Smashers]] (secret level unlocked by collecting all |
+ | *3-K [[Shifty Smashers]] (secret level unlocked by collecting all K-O-N-G Letters in this world) |
| − | [[File:CaveWorld.png| |
+ | [[File:CaveWorld.png|300px|thumb|Map of the [[Cave]] in the Wii version.]] |
===[[Cave]]=== |
===[[Cave]]=== |
||
*4-1 [[Rickety Rails]] |
*4-1 [[Rickety Rails]] |
||
*4-2 [[Grip 'n' Trip]] |
*4-2 [[Grip 'n' Trip]] |
||
*4-3 [[Bombs Away]] |
*4-3 [[Bombs Away]] |
||
| − | *4-4 [[Mole Patrol]] (level unlocked by buying the |
+ | *4-4 [[Mole Patrol]] (level unlocked by buying the Map Key from Cranky Kong's Shop in this world for twenty Banana Coins) |
*4-5 [[Crowded Cavern]] |
*4-5 [[Crowded Cavern]] |
||
*4-B [[Mole Miner Max|The Mole Train]] |
*4-B [[Mole Miner Max|The Mole Train]] |
||
| − | *4-K [[Jagged Jewels]] (secret level unlocked by collecting all |
+ | *4-K [[Jagged Jewels]] (secret level unlocked by collecting all K-O-N-G Letters in this world) |
| − | [[File:ForestWorld.png| |
+ | [[File:ForestWorld.png|300px|thumb|Map of the [[Forest]] in the Wii version.]] |
===[[Forest]]=== |
===[[Forest]]=== |
||
*5-1 [[Vine Valley (Donkey Kong Country Returns)|Vine Valley]] |
*5-1 [[Vine Valley (Donkey Kong Country Returns)|Vine Valley]] |
||
| Line 229: | Line 253: | ||
*5-4 [[Tippin' Totems]] |
*5-4 [[Tippin' Totems]] |
||
*5-5 [[Longshot Launch]] |
*5-5 [[Longshot Launch]] |
||
| − | *5-6 [[Springy Spores]] (level unlocked by buying the |
+ | *5-6 [[Springy Spores]] (level unlocked by buying the Map Key from Cranky Kong's Shop in this world for twenty Banana Coins) |
*5-7 [[Wigglevine Wonders]] |
*5-7 [[Wigglevine Wonders]] |
||
*5-8 [[Muncher Marathon]] |
*5-8 [[Muncher Marathon]] |
||
*5-B [[Mangoruby|Mangoruby Run]] |
*5-B [[Mangoruby|Mangoruby Run]] |
||
| − | *5-K [[Blast 'n' Bounce]] (secret level unlocked by collecting all |
+ | *5-K [[Blast 'n' Bounce]] (secret level unlocked by collecting all K-O-N-G Letters in this world) |
| − | [[File:CliffWorld.png| |
+ | [[File:CliffWorld.png|300px|thumb|Map of the [[Cliff]] in the Wii version.]] |
===[[Cliff]]=== |
===[[Cliff]]=== |
||
*6-1 [[Sticky Situation]] |
*6-1 [[Sticky Situation]] |
||
| Line 241: | Line 265: | ||
*6-3 [[Weighty Way]] |
*6-3 [[Weighty Way]] |
||
*6-4 [[Boulder Roller]] |
*6-4 [[Boulder Roller]] |
||
| − | *6-5 [[Precarious Plateau]] (level unlocked by buying the |
+ | *6-5 [[Precarious Plateau]] (level unlocked by buying the Map Key from Cranky Kong's Shop in this world for twenty Banana Coins) |
*6-6 [[Crumble Canyon]] |
*6-6 [[Crumble Canyon]] |
||
*6-7 [[Tippy Shippy]] |
*6-7 [[Tippy Shippy]] |
||
*6-8 [[Clifftop Climb]] |
*6-8 [[Clifftop Climb]] |
||
*6-B [[Thugly|Thugly's Highrise]] |
*6-B [[Thugly|Thugly's Highrise]] |
||
| − | *6-K [[Perilous Passage]] (secret level unlocked by collecting all |
+ | *6-K [[Perilous Passage]] (secret level unlocked by collecting all K-O-N-G Letters in this world) |
| − | [[File:FactoryWorld.png| |
+ | [[File:FactoryWorld.png|300px|thumb|Map of the [[Factory]] in the Wii version.]] |
===[[Factory]]=== |
===[[Factory]]=== |
||
*7-1 [[Foggy Fumes]] |
*7-1 [[Foggy Fumes]] |
||
*7-2 [[Slammin' Steel]] |
*7-2 [[Slammin' Steel]] |
||
| − | *7-3 [[Handy Hazards]] (level unlocked by buying the |
+ | *7-3 [[Handy Hazards]] (level unlocked by buying the Map Key from Cranky Kong's Shop in this world for twenty Banana Coins) |
*7-4 [[Gear Getaway]] |
*7-4 [[Gear Getaway]] |
||
*7-5 [[Cog Jog]] |
*7-5 [[Cog Jog]] |
||
*7-6 [[Switcheroo]] |
*7-6 [[Switcheroo]] |
||
*7-7 [[Music Madness]] |
*7-7 [[Music Madness]] |
||
| − | *7-R [[Lift- |
+ | *7-R [[Lift-Off Launch]] |
| − | *7-B [[Feather Fiend]] |
+ | *7-B [[Colonel Pluck|Feather Fiend]] |
| − | *7-K [[Treacherous Track]] (secret level unlocked by collecting all |
+ | *7-K [[Treacherous Track]] (secret level unlocked by collecting all K-O-N-G Letters in this world) |
| − | [[File:VolcanoWorld.png| |
+ | [[File:VolcanoWorld.png|300px|thumb|Map of the [[Volcano]] in the Wii version.]] |
===[[Volcano]]=== |
===[[Volcano]]=== |
||
*8-1 [[Furious Fire]] |
*8-1 [[Furious Fire]] |
||
*8-2 [[Hot Rocket]] |
*8-2 [[Hot Rocket]] |
||
*8-3 [[Roasting Rails]] |
*8-3 [[Roasting Rails]] |
||
| − | *8-4 [[Smokey Peak]] (level unlocked by buying the |
+ | *8-4 [[Smokey Peak]] (level unlocked by buying the Map Key from Cranky Kong's Shop in this world for twenty Banana Coins) |
*8-5 [[Bobbing Basalt]] |
*8-5 [[Bobbing Basalt]] |
||
*8-6 [[Moving Melters]] |
*8-6 [[Moving Melters]] |
||
*8-7 [[Red Red Rising]] |
*8-7 [[Red Red Rising]] |
||
| − | *8-B [[ |
+ | *8-B [[Tiki Tong Terror]] |
| − | *8-K [[Five Monkey Trial]] (secret level unlocked by collecting all |
+ | *8-K [[Five Monkey Trial]] (secret level unlocked by collecting all K-O-N-G Letters in this world) |
| − | [[File:5.png| |
+ | [[File:5.png|300px|thumb|Map of the [[Cloud]] in the [[Nintendo 3DS|3DS]] version.]] |
===[[Cloud]] (3DS version only)=== |
===[[Cloud]] (3DS version only)=== |
||
| + | *9-1 [[Crushin' Columns]] (level unlocked by completing the game once and collecting all eight Rare Orbs in the previous worlds of the 3DS version) |
||
| − | *9-1 [[Crushin' Columns]] |
||
*9-2 [[Gushin' Geysers]] |
*9-2 [[Gushin' Geysers]] |
||
*9-3 [[Spiky Surprise]] |
*9-3 [[Spiky Surprise]] |
||
| Line 283: | Line 307: | ||
*9-7 [[Robo Factory]] |
*9-7 [[Robo Factory]] |
||
*9-8 [[Lavawheel Volcano]] |
*9-8 [[Lavawheel Volcano]] |
||
| − | *9-9 (or 9-1) [[Golden Temple]] (level present in the Wii, 3DS and Nvidia versions) |
+ | *9-9 (or 9-1) [[Golden Temple]] (level unlocked by completing the game once and collecting all eight Rare Orbs in the previous worlds of the Wii and Nvidia versions) (level present in the Wii, 3DS and Nvidia versions) |
==Differences between the Nintendo Wii, 3DS and Nvidia versions== |
==Differences between the Nintendo Wii, 3DS and Nvidia versions== |
||
===Nintendo 3DS=== |
===Nintendo 3DS=== |
||
| − | *All game inputs are made through 3DS buttons (and touch screen). There is |
+ | *All game inputs are made through 3DS buttons (and touch screen). There is no support to motion controls<ref name="Motion controller"/>. |
| − | **To characters' movement, the player has the option of |
+ | **To characters' movement, the player has the option of using the 3DS circle pad or control pad. |
| − | **Similar to Wii Remote and Nunchuk control scheme (but different to horizontal Wii Remote), there is |
+ | **Similar to Wii Remote and Nunchuk control scheme (but different to horizontal Wii Remote), there is no dedicated run button. Both Donkey and Diddy Kong always move themselves at running speed. |
| − | *This version possesses two difficulty modes: ''Original'' and ''New''. After starting a new game and picking a difficulty mode, the player cannot change it. |
+ | *This version possesses two difficulty modes: ''Original Mode'' and ''New Mode''. After starting a new game and picking a difficulty mode, the player cannot change it. |
**The ''Original Mode'' is not different from the Wii version. |
**The ''Original Mode'' is not different from the Wii version. |
||
| + | **The ''New Mode'' adds one permanent extra heart container (to the two original ones from the ''Original Mode'', resulting in three in total) for each character (Donkey and Diddy Kong). |
||
| − | ** |
+ | ***In single player or multiplayer, each player can equip until three items per level. It also makes prices cheaper and adds new exclusive items to purchase at the Cranky Kong's Shop: Green Balloons, Crash Guards and portable DK Barrels (see ''Items'' and ''Barrels'' sections above) (see ''Trailers'' in the ''Videos'' section below). |
| ⚫ | |||
| + | ***The ''Super Guide'' mode can be activated after the player loses five extra lives (rather than eight) in the same level. And all game menus are highlighted in green color instead of yellow. |
||
| − | *After each thirty minutes of gameplay and completing any level, the player will receive a message advising to take a break. |
||
| ⚫ | |||
| ⚫ | |||
| + | *After each thirty minutes of gameplay and clearing any level, the player will receive a message at the result screen advising to take a break. It is due to health concerns regarding the prolonged use of stereoscopic 3D effects<ref>[[wikipedia:Autostereoscopy|''Autostereoscopy'' on Wikipedia]]</ref>. In fact, the operations manual of the Nintendo 3DS states that the player must to take breaks of ten or fifteen minutes for each hour of gameplay sessions even if they do not feel tired.<ref>[https://www.nintendo.com/consumer/downloads/CTR_ops_eng.pdf#page=6 ''Nintendo 3DS Operations Manual, pages 8-9'' on Nintendo America]</ref> |
||
| − | *At Cranky Kong's Shop, in the ''Original Mode'', the Banana Juice item costs only ten Banana Coins (instead of twenty Banana Coins in the Wii version). The Banana Juice also allows the characters to take only five hits instead of ten hits (like in the Wii version). |
||
| + | *The Nintendo 3DS lower screen has some dedicated functions: |
||
| ⚫ | |||
| + | **At the game files screen, the menu ''Options'' appears at the lower screen and they can also be accessed by using touch controls, including the multiple galleries of the ''Extras'' menu. |
||
| + | **In the world maps of the game, the lower screen displays the player's current number of extra life balloons and Banana Coins, and some game controls to interact with the maps. |
||
| ⚫ | |||
| + | **And by the player pausing the game, inside or outside levels, the lower screen will display menu options which the player can also use touch controls to interact with them. |
||
| + | *At the Cranky Kong's Shop, in the ''Original Mode'' of the 3DS version, the Banana Juice item costs only ten Banana Coins, instead of twenty coins like in the Wii version. During the ''New Mode'', the Banana Juice allows the characters to take only five extra hits of damage, instead of ten hits, but its effects will now last even if the Kongs fall into pits. In the same mode, unused Banana Juices equipped during a level are not wasted, and they return to the ''Inventory'' menu after the primates leaving the said level. When the item is used inside a level, the Kongs will start to blink between their golden and regular forms after taking three hits of damage in the ''New Mode'', instead of five hits in the Wii version or the ''Original Mode'' of the 3DS version. |
||
| ⚫ | |||
*After defeating Tiki Tong, it is possible to rewatch the game credits in the ''Options'' menu. |
*After defeating Tiki Tong, it is possible to rewatch the game credits in the ''Options'' menu. |
||
| − | *There is the Cloud world, an extra world with eight exclusive levels, all based in the previous worlds (see |
+ | *There is the Cloud world, an extra world with eight exclusive levels, all based in the previous worlds (see Cloud world in the ''Worlds and Levels'' section above) (see ''3DS Exclusive Levels'' in the ''Videos'' section below). |
| − | **The Cloud world exclusive levels now precede the |
+ | **The Cloud world exclusive levels now precede the Golden Temple level. |
| − | *After |
+ | *After going through the door of the Golden Temple and accessing the Cloud world once, the exterior area of the Golden Temple can no longer be revisited. |
*In the ''Extras'' menu, there is a ''Movie Gallery'' section containing all movie cutscenes (in lower definition compared to the Wii version): game opening, prebattle with Tiki Tong, ending, Golden Temple rising and access to the temple, including all different versions featuring Donkey Kong and/or Diddy Kong. |
*In the ''Extras'' menu, there is a ''Movie Gallery'' section containing all movie cutscenes (in lower definition compared to the Wii version): game opening, prebattle with Tiki Tong, ending, Golden Temple rising and access to the temple, including all different versions featuring Donkey Kong and/or Diddy Kong. |
||
| − | **These movie cutscenes are unlocked by collecting Puzzle Pieces in the |
+ | **These movie cutscenes are unlocked by collecting Puzzle Pieces in the exclusive levels of the 3DS version. |
| − | *In ''Mirror Mode'', if the player |
+ | *In the ''Mirror Mode'', if the player collected all K-O-N-G Letters again in any level, they will receive a ''Blue Star Emblem'' replacing the red one. |
| + | *Music is rearranged, and game graphics and sound effects are scaled down due to the Nintendo 3DS' hardware limitations, when compared to the Nintendo Wii. This game version also runs at thirty frames per second<ref>[[wikipedia:Frame rate|''Frame rate'' on Wikipedia]]</ref>, instead of sixty frames per second like in the Wii version. |
||
| + | *This version can display three-dimensional effects during gameplay which the player can adjust the depth or turn off on the Nintendo 3DS itself. |
||
| + | *There is a new animation for the puzzle emblem at the result screens of levels. After the player collecting all Puzzle Pieces inside a level once and clearing it, all pieces will assemble at the result screen forming a fruit emblem. The fruit emblem will soon jump, spin twice, return to its original place and turn into a green puzzle emblem. In the Wii version, after all puzzle pieces are assembled at the result screens, the fruit emblems just instantly turn into the green puzzle emblems, instead. |
||
*Some animations were cut. |
*Some animations were cut. |
||
| − | **The loading screen to |
+ | **The loading screen to start or continue a game file from the main menu screen mostly features static clouds. |
| − | ** |
+ | **At the loading screen when entering or getting out levels, the background does not have a scrolling effect. There are also five circles that light up, signifying that the next location is loading. |
| − | **Donkey and Diddy Kong |
+ | **Donkey and Diddy Kong no longer stare at interest points and incoming hazards above and below the screen or in the background. |
| − | **The Kongs |
+ | **The Kongs no longer have idle animations: Diddy, by himself, stretching and yawning or Donkey playing his [[Nintendo DS]] while Diddy watches when mounted on his back. |
| − | **Rambi the Rhinoceros |
+ | **Rambi the Rhinoceros no longer tries to catch his breath after being dismounted by the primates. |
| + | **There is no shaking effects on the wooden planks of suspended bridges when the heroes are rolling over or pounding on them, but the weight effects when the Kongs are standing on them remain. The same shaking effects are also missing during the second phase of the battle against Thugly, when the boss moves over similar planks in his arena. However, the shaking effects mentioned are still present on platforms made of wooden planks attached to the background in some levels. |
||
| − | ===Nvidia Shield TV=== |
+ | ===Nvidia Shield TV<ref name="Nvidia Shield TV"/>=== |
| + | *This version is known in China as ''Donkey Kong Returns'', the same name used in Japan. |
||
*The emulated version is very similar to the original Wii version, but the game resolution is upscaled to 1080 pixels (see ''Nvidia Shield TV Version Gameplay'' in the ''Videos'' section below). |
*The emulated version is very similar to the original Wii version, but the game resolution is upscaled to 1080 pixels (see ''Nvidia Shield TV Version Gameplay'' in the ''Videos'' section below). |
||
| − | *The game inputs are made through Nvidia Shield controller. There is |
+ | *The game inputs are made through Nvidia Shield TV controller. There is no motion controls. |
| − | *This version is available only in Chinese language. |
+ | *This version is available only in the Chinese language. |
| − | *Donkey Kong's idle animation displays him playing an iQue DS Lite.<ref>[https://www.youtube.com/watch?v=-bqbRpvsSnk ''Donkey Kong playing the iQue DS Lite but in 1080P 60FPS'' on YouTube]</ref> |
+ | *Donkey Kong's idle animation displays him playing an iQue DS Lite, instead of a Nintendo DS.<ref name="iQue DS Animation">[https://www.youtube.com/watch?v=-bqbRpvsSnk ''Donkey Kong playing the iQue DS Lite but in 1080P 60FPS'' on YouTube]</ref> |
==Gallery== |
==Gallery== |
||
| Line 324: | Line 359: | ||
File:DiddyReturns.png|Artwork of [[Diddy Kong]]. |
File:DiddyReturns.png|Artwork of [[Diddy Kong]]. |
||
File:Cranky Returns.png|Artwork of [[Cranky Kong]]. |
File:Cranky Returns.png|Artwork of [[Cranky Kong]]. |
||
| ⚫ | |||
File:Pic dk.jpg|Artwork of Donkey and Diddy Kong. |
File:Pic dk.jpg|Artwork of Donkey and Diddy Kong. |
||
</gallery> |
</gallery> |
||
| Line 350: | Line 384: | ||
File:Thugly.png|[[Thugly]], the sixth boss, as seen in the game. |
File:Thugly.png|[[Thugly]], the sixth boss, as seen in the game. |
||
File:250px-Stompybot3000.png|[[Colonel Pluck]], the seventh boss, piloting the [[Stompybot 3000]], as seen in the game. |
File:250px-Stompybot3000.png|[[Colonel Pluck]], the seventh boss, piloting the [[Stompybot 3000]], as seen in the game. |
||
| − | File:Torre tiki tong3.png|[[Tiki Tong Tower]]. |
+ | File:Torre tiki tong3.png|Artwork of [[Tiki Tong Tower]]. |
| − | File: |
+ | File:Island Animals.png|Conceptual artwork of animals hypnotized by the Tiki Tak Tribe. |
| ⚫ | |||
| ⚫ | |||
File:Screaming Pillar Artwork DKCR.png|[[Screaming Pillar]]'s conceptual art. |
File:Screaming Pillar Artwork DKCR.png|[[Screaming Pillar]]'s conceptual art. |
||
File:Frogoon.png|[[Frogoon]] as seen in the game. |
File:Frogoon.png|[[Frogoon]] as seen in the game. |
||
File:Rawk.png|[[Rawk]] as seen in the game. |
File:Rawk.png|[[Rawk]] as seen in the game. |
||
| − | File:Tiki Zing DKCR.png|[[Tiki Zing]] |
+ | File:Tiki Zing DKCR.png|Artwork of [[Tiki Zing]]. |
File:TikiDoom.png|[[Tiki Doom]] as seen in the game. |
File:TikiDoom.png|[[Tiki Doom]] as seen in the game. |
||
File:HopgoonSS.png|[[Hopgoon]] as seen in the game. |
File:HopgoonSS.png|[[Hopgoon]] as seen in the game. |
||
| Line 377: | Line 409: | ||
===Items=== |
===Items=== |
||
<gallery> |
<gallery> |
||
| ⚫ | |||
File:BananaDKCR.png|Artwork of [[Banana]]. |
File:BananaDKCR.png|Artwork of [[Banana]]. |
||
File:BananabunchReturns.png|Artwork of [[Banana#Banana Bunches|Banana Bunch]]. |
File:BananabunchReturns.png|Artwork of [[Banana#Banana Bunches|Banana Bunch]]. |
||
File:BananaCoinDKCR.png|Artwork of [[Banana Coin]]. |
File:BananaCoinDKCR.png|Artwork of [[Banana Coin]]. |
||
File:ExtralifeballoonReturns.png|Artwork of [[Extra Life Balloon]]. |
File:ExtralifeballoonReturns.png|Artwork of [[Extra Life Balloon]]. |
||
| − | File: |
+ | File:MinecartReturns.png|Artwork of [[Mine Cart]]. |
| ⚫ | |||
</gallery> |
</gallery> |
||
| Line 388: | Line 420: | ||
<gallery> |
<gallery> |
||
File:DKCountryReturnslogo.png|North American logo of ''Donkey Kong Country Returns'' for Wii. |
File:DKCountryReturnslogo.png|North American logo of ''Donkey Kong Country Returns'' for Wii. |
||
| − | File:JP LogoDKCR.png|Japanese logo of ''Donkey Kong |
+ | File:JP LogoDKCR.png|Japanese logo of ''Donkey Kong Returns'' for Wii. |
| + | File:DKCR3D NA Logo.png|North American logo of ''Donkey Kong Country Returns 3D'' for 3DS. |
||
| + | File:DKR3D Japanese Logo.png|Japanese logo of ''Donkey Kong Returns 3D'' for 3DS. |
||
| + | File:DKR Chinese Logo.jpg|Chinese logo of ''Donkey Kong Returns'' for Nvidia Shield TV. |
||
</gallery> |
</gallery> |
||
| Line 396: | Line 431: | ||
File:DKCR boxart 2.jpg|Australian boxart of ''Donkey Kong Country Returns'' for Wii. |
File:DKCR boxart 2.jpg|Australian boxart of ''Donkey Kong Country Returns'' for Wii. |
||
File:pic dk 3.jpg|European boxart of ''Donkey Kong Country Returns'' for Wii. |
File:pic dk 3.jpg|European boxart of ''Donkey Kong Country Returns'' for Wii. |
||
| − | File:DKCR boxart 3.jpg|Japanese boxart of ''Donkey Kong |
+ | File:DKCR boxart 3.jpg|Japanese boxart of ''Donkey Kong Returns'' for Wii. |
File:DKC Returns 3D.jpg|North American boxart of ''Donkey Kong Country Returns 3D'' for 3DS. |
File:DKC Returns 3D.jpg|North American boxart of ''Donkey Kong Country Returns 3D'' for 3DS. |
||
| + | File:DKR3D Japanese Boxart.jpg|Japanese boxart of ''Donkey Kong Returns 3D'' for 3DS. |
||
</gallery> |
</gallery> |
||
===Gameplay=== |
===Gameplay=== |
||
<gallery> |
<gallery> |
||
| − | File:SF8E01-1.png| |
+ | File:SF8E01-1.png|North American main title screen of ''Donkey Kong Country Returns'' for Wii. |
File:Tiki Tong Tower staring into your soul.png|Tiki Tong Tower surfacing from the volcano. |
File:Tiki Tong Tower staring into your soul.png|Tiki Tong Tower surfacing from the volcano. |
||
| − | File:Untitled20120116114223.png| |
+ | File:Untitled20120116114223.png|Elephant witnessing Tiki Tong Tower emerging. |
| − | File:Untitled20120116143737.png|Hypnotized |
+ | File:Untitled20120116143737.png|Hypnotized squirrels stealing Donkey's and Diddy Kong's [[Donkey Kong and Diddy Kong's Banana Hoard|banana hoard]]. |
File:Untitled20120116145122.png|Hypnotized giraffe pulling Donkey's and Diddy Kong's stolen banana hoard. |
File:Untitled20120116145122.png|Hypnotized giraffe pulling Donkey's and Diddy Kong's stolen banana hoard. |
||
| − | File:DKCRBananaHoard.png|A Tiki Pilot stealing the precious banana hoard from Donkey Kong in the Jungle level |
+ | File:DKCRBananaHoard.png|A Tiki Pilot stealing the precious banana hoard from Donkey Kong in the Jungle level [[Jungle Hijinxs (Donkey Kong Country Returns)|Jungle Hijinxs]]. |
| − | File:DKCRSunset.png|Jungle level |
+ | File:DKCRSunset.png|Jungle level [[Sunset Shore]]. |
| − | File:CrazyCartReturns.png|Donkey and Diddy Kong travelling through Jungle level |
+ | File:CrazyCartReturns.png|Donkey and Diddy Kong travelling through Jungle level [[Crazy Cart]]. |
| − | File:DKCRMinecart.png|The mine cart section in the Jungle level |
+ | File:DKCRMinecart.png|The mine cart section in the Jungle level Crazy Cart. |
File:DKandDDReturn.png|Donkey and Diddy Kong confronting Mugly. |
File:DKandDDReturn.png|Donkey and Diddy Kong confronting Mugly. |
||
File:DKPunchingTikiEnemy.png|Donkey Kong punching Krazy Kalimba. |
File:DKPunchingTikiEnemy.png|Donkey Kong punching Krazy Kalimba. |
||
| − | File:DKCRChomps.png|Donkey and Diddy Kong in the Beach level |
+ | File:DKCRChomps.png|Donkey and Diddy Kong in the Beach level [[Poppin' Planks]] standing near [[Snaggles]]. |
| − | File:OctopusDKCReturns.png|Squiddicus pursuing the Kongs in the Beach level |
+ | File:OctopusDKCReturns.png|Squiddicus pursuing the Kongs in the Beach level [[Stormy Shore]]. |
| − | File:Imageofarabit.jpg|Factory level |
+ | File:Imageofarabit.jpg|Factory level [[Foggy Fumes]]. |
File:Donkey Kong Country Returns Final Boss+Diddy Kong's Ending 4-58 screenshot.png|Diddy Kong falling down towards the moon. |
File:Donkey Kong Country Returns Final Boss+Diddy Kong's Ending 4-58 screenshot.png|Diddy Kong falling down towards the moon. |
||
File:DK Country Returns Space.jpg|Donkey and Diddy Kong falling down towards the moon. |
File:DK Country Returns Space.jpg|Donkey and Diddy Kong falling down towards the moon. |
||
| Line 429: | Line 465: | ||
===Trailers=== |
===Trailers=== |
||
<gallery> |
<gallery> |
||
| − | File:Donkey Kong Country Returns OFFICIAL E3 trailer Nintendo Wii|E3 2010 Trailer. |
+ | File:Donkey Kong Country Returns OFFICIAL E3 trailer Nintendo Wii|E3 2010<ref name="E3 2010"/> Trailer. |
| − | File:Donkey Kong Country Returns gameplay trailer (2010) Nintendo Wii|Wii Gameplay Trailer. |
+ | File:Donkey Kong Country Returns gameplay trailer (2010) Nintendo Wii|Nintendo Wii Gameplay Trailer. |
| − | File:Nintendo 3DS - Donkey Kong Country Returns 3D Gameplay Trailer| |
+ | File:Nintendo 3DS - Donkey Kong Country Returns 3D Gameplay Trailer|Nintendo 3DS Gameplay Trailer. |
| − | File:Nintendo 3DS - Donkey Kong Country Returns 3D Trailer|3DS New |
+ | File:Nintendo 3DS - Donkey Kong Country Returns 3D Trailer|Nintendo 3DS New Items and Levels Showcase Trailer. |
</gallery> |
</gallery> |
||
===3DS Exclusive Levels=== |
===3DS Exclusive Levels=== |
||
<gallery> |
<gallery> |
||
| − | File:Donkey Kong Country Returns 3D - Level 9-1 Crushin' Columns 100% Walkthrough (3DS Exclusive Level)|Level 9-1 |
+ | File:Donkey Kong Country Returns 3D - Level 9-1 Crushin' Columns 100% Walkthrough (3DS Exclusive Level)|Level 9-1 [[Crushin' Columns]] (3DS). |
| − | File:Donkey Kong Country Returns 3D - Level 9-2 Gushin' Geysers 100% Walkthrough (3DS Exclusive Level)|Level 9-2 |
+ | File:Donkey Kong Country Returns 3D - Level 9-2 Gushin' Geysers 100% Walkthrough (3DS Exclusive Level)|Level 9-2 [[Gushin' Geysers]] (3DS). |
| − | File:Donkey Kong Country Returns 3D - Level 9-3 Spiky Surprise 100% Walkthrough (3DS Exclusive Level)|Level 9-3 |
+ | File:Donkey Kong Country Returns 3D - Level 9-3 Spiky Surprise 100% Walkthrough (3DS Exclusive Level)|Level 9-3 [[Spiky Surprise]] (3DS). |
| − | File:Donkey Kong Country Returns 3D - Level 9-4 Mischievous Moles 100% Walkthrough (3DS Exclusive Level)|Level 9-4 |
+ | File:Donkey Kong Country Returns 3D - Level 9-4 Mischievous Moles 100% Walkthrough (3DS Exclusive Level)|Level 9-4 [[Mischievous Moles]] (3DS). |
| − | File:Donkey Kong Country Returns 3D - Level 9-5 Topsy Turvy 100% Walkthrough (3DS Exclusive Level)|Level 9-5 |
+ | File:Donkey Kong Country Returns 3D - Level 9-5 Topsy Turvy 100% Walkthrough (3DS Exclusive Level)|Level 9-5 [[Topsy Turvy]] (3DS). |
| − | File:Donkey Kong Country Returns 3D - Level 9-6 Tar Ball Fall 100% Walkthrough (3DS Exclusive Level)|Level 9-6 |
+ | File:Donkey Kong Country Returns 3D - Level 9-6 Tar Ball Fall 100% Walkthrough (3DS Exclusive Level)|Level 9-6 [[Tar Ball Fall]] (3DS). |
| − | File:Donkey Kong Country Returns 3D - Level 9-7 Robo Factory 100% Walkthrough (3DS Exclusive Level)|Level 9-7 |
+ | File:Donkey Kong Country Returns 3D - Level 9-7 Robo Factory 100% Walkthrough (3DS Exclusive Level)|Level 9-7 [[Robo Factory]] (3DS). |
| − | File:Donkey Kong Country Returns 3D - Level 9-8 Lavawheel Volcano 100% Walkthrough (3DS Exclusive Level)|Level 9-8 |
+ | File:Donkey Kong Country Returns 3D - Level 9-8 Lavawheel Volcano 100% Walkthrough (3DS Exclusive Level)|Level 9-8 [[Lavawheel Volcano]] (3DS). |
</gallery> |
</gallery> |
||
===Nvidia Shield TV Version Gameplay=== |
===Nvidia Shield TV Version Gameplay=== |
||
<gallery> |
<gallery> |
||
| − | File:NVIDIA SHIELD Donkey Kong Country Returns World 1 GamePlay| |
+ | File:NVIDIA SHIELD Donkey Kong Country Returns World 1 GamePlay|Jungle World Extended Gameplay of ''Donkey Kong Returns'' for Nvidia Shield TV. |
</gallery> |
</gallery> |
||
| + | ==Original Soundtrack== |
||
| + | [[File:Donkey kong country returns ost|none|thumb|290x290px|Donkey kong country returns music]] |
||
==Glitches== |
==Glitches== |
||
| − | This is a very well made game, and any of the few known glitches are very rare. Here is a list of glitches |
+ | This is a very well made game, and any of the few known glitches are very rare. Here is a list of glitches in the Wii version. |
| − | * |
+ | *In Cranky Kong's Shop, there is a rare glitch where Cranky will be invisible.{{Cite}} |
| − | *There is also a glitch with taking damage where |
+ | *There is also a glitch with taking damage where the main characters may not be hurt by enemies/obstacles.{{Cite}} |
| − | *In the Ruins level |
+ | *In the Ruins level Shifty Smashers, there is a part where the heroes must quickly roll underneath an extended block that rises up and down. This is not particularly difficult, but if the player is in ''Time Attack'' mode, it may occur, on extremely rare occasions, a glitch when the characters jump up on it, because it may send them underneath it when the player tries and jumps onto the next platform, and it will then crush them before they can escape.{{Cite}} |
| − | *Sometimes, at the end of the Cave level |
+ | *Sometimes, at the end of the Cave level Crowded Cavern, if the player crouches very close to the frazzled Mega Squeekly and then rolls, they will be able to go through him, and as far as rock ground extends on extremely rare occasions. The player will soon come to a large crystalline growth (the one that Mega Squeekly bonks his head on). If the player do a flying roll over it (the points will not hurt the Kongs), the heroes will land on the wooden deck. There will probably be large gaps in it from when the primates were dodging Mega Squeekly, because when the player flew too low, the bat smashed through it a little. If it is not cut off completely, the heroes will come to a halt at the large stalagmite with a wooden crane behind it. There is no way to pass beyond it, so the player will have to go back, as there is nothing more to see. The primates cannot go through Mega Squeekly again afterwards.{{Cite}} |
==Trivia== |
==Trivia== |
||
*This game pushes many differences from the other ''Donkey Kong'' series games in many ways: |
*This game pushes many differences from the other ''Donkey Kong'' series games in many ways: |
||
| − | **This is the first ''Donkey Kong Country'' series game that is not made by [[Rare, Ltd.|Rare]]. |
||
**This is the first ''Donkey Kong Country'' series game to not feature [[King K. Rool]] as final boss. There are no [[Kremling]]s whatsoever in the game. |
**This is the first ''Donkey Kong Country'' series game to not feature [[King K. Rool]] as final boss. There are no [[Kremling]]s whatsoever in the game. |
||
| − | **Each character has health as heart containers, feature first seen in the game ''[[DK: King of Swing]]'' for [[Game Boy Advance]]. |
+ | **Each main character has health as heart containers, feature first seen in the game ''[[DK: King of Swing]]'' for [[Game Boy Advance]]. The portrait artworks of the playable Kongs seen in the icons and character bars of the game are also similar to the style used in ''DK: King of Swing''. And the bronze, silver and gold DK Medals, found in some levels of ''DK: King of Swing'', are similar in appearance to the medals earned during the ''Time Attack'' mode in ''Donkey Kong Country Returns''. |
| − | **The characters' |
+ | **The characters' design is similar to the one used in the game ''[[DK: Jungle Climber]]'' for Nintendo DS. The feature of using Diddy Kong as an assist character to Donkey Kong in the single player mode was also first seen in ''DK: Jungle Climber''. And finally, the feature of unlocking extra levels by collecting items in regular levels was also present in ''DK: Jungle Climber''. |
| − | **Many |
+ | **Many music themes present in ''Donkey Kong Country Returns'' are rearranged themes from the original ''Donkey Kong Country'' game. |
**[[Enguarde the Swordfish]] is not featured in this game unlike its predecessors, probably because of the lack of underwater levels. |
**[[Enguarde the Swordfish]] is not featured in this game unlike its predecessors, probably because of the lack of underwater levels. |
||
| − | **[[Funky Kong]] is not present in the game. |
+ | **[[Funky Kong]] is not present in the game though he gets a brief mention. |
| − | **The |
+ | **The overworld map can be accessed without visiting [[Funky's Flights|a]] [[Funky's Flights II|special]] [[Funky's Rentals|area]]. |
| − | **The game autosaves after leaving a level or returning to main title. |
+ | **The game autosaves after leaving a level or returning to the main title screen. |
| − | **The Extra Life Balloons |
+ | **The Extra Life Balloons no longer represent the face of the main protagonist. |
| + | **In the single player mode, if the two Kongs are present when falling into a pit, only Donkey Kong will return to the beginning of the level or latest checkpoint. It is unlike the previous games, where two main characters would still reappear together after falling into pits. |
||
| − | **In multiplayer mode, both players can participate in a level at the same time. But losing both characters spends two extra lives back at a checkpoint. |
||
| + | **Tutorial Pig's stalls replace [[Star Barrel]]s as checkpoint markers, and usually, there are multiple checkpoints inside levels, instead of only one. |
||
| − | ***It is possible to second player character (Diddy) mount the first one (Donkey) and let the first player to control the game. This way, both can share effects from items, like Heart Boost and Banana Juice. Any player also has the option to revive the other one's character spending one extra life balloon at any moment. |
||
| − | **The game |
+ | **The game no longer exits a level automatically after the player is defeated, losing an extra life (or two in multiplayer), and instead, the main character floats down to the beginning or latest active checkpoint using the extra life balloon. But if the player leaves the level, all progress made until any checkpoint is lost, and the player will start the level from the beginning again after returning to it. |
| − | *The game was developed by Retro Studios, the developers of the ''[[w:c:metroid:Metroid Prime (series)|Metroid Prime]]'' series. This is their first non-''[[w:c:metroid:Metroid (series)|Metroid]]'' series game. |
+ | *The game ''Donkey Kong Country Returns'' was developed by Retro Studios, the developers of the ''[[w:c:metroid:Metroid Prime (series)|Metroid Prime]]'' series. This is their first non-''[[w:c:metroid:Metroid (series)|Metroid]]'' series game. |
*This is the first ''Donkey Kong Country'' series game to not feature neither underwater nor ice-based levels. Developers were considering the former enough to where underwater levels were already in development or were already developed, but were excluded due to the slow pace of the levels compared to the rest of the game. |
*This is the first ''Donkey Kong Country'' series game to not feature neither underwater nor ice-based levels. Developers were considering the former enough to where underwater levels were already in development or were already developed, but were excluded due to the slow pace of the levels compared to the rest of the game. |
||
| − | *If the game was pre-ordered from GameStop<ref>[[wikipedia:GameStop|''GameStop'' on Wikipedia]]</ref>, a banana-like case for Wii |
+ | *If the Wii version game was pre-ordered from GameStop<ref>[[wikipedia:GameStop|''GameStop'' on Wikipedia]]</ref>, a banana-like case for Wii Remotes would ship with the game.<ref>[https://www.nintendolife.com/news/2010/09/have_a_banana_when_you_pre_order_donkey_kong_country_returns ''Have a Banana When You Pre-order Donkey Kong Country Returns'' on Nintendo Life]</ref> |
| − | * |
+ | *During levels, if Donkey Kong is left still for a while, he will start to play a Nintendo DS in the Wii version (or an iQue DS Lite in the Nvidia version<ref name="iQue DS Animation"/>). And Diddy Kong, by himself, will start stretching and yawning. |
| − | ** |
+ | **Sometimes, in Donkey Kong's Nintendo DS, it is possible to hear sound effects from the classic ''[[Donkey Kong (game)|Donkey Kong]]'' game. |
| + | *In the multiplayer mode, if the second player, controlling Diddy Kong, defeats Tiki Tong alone, instead of Donkey Kong punching the moon, a similar cutscene occurs<ref>[https://www.youtube.com/watch?v=nUBDTqYe-B4 ''Tiki Tong's final boss battle against Diddy Kong and Ending Cutscene of Donkey Kong Country Returns'' on YouTube]</ref><ref>[https://www.youtube.com/watch?v=8HPuFqonME0 ''Ending Cutscene of Donkey Kong Country Returns featuring Diddy Kong'' on YouTube]</ref>, with Diddy headbutting the moon in similar way to his ''Chimpy Charge'' move from the game ''Donkey Kong 64''. |
||
| + | *The system of spending one extra life to summon a dropping DK Barrel and recovering a defeated character, during the multiplayer mode, is like similar feature in the game ''[[w:c:mario:New Super Mario Bros. Wii|New Super Mario Bros. Wii]]''. |
||
| + | *In the game ''[[w:c:mario:WarioWare: Get It Together!|WarioWare: Get It Together!]]'' for [[Nintendo Switch]], one of the Nintendo Classics microgames is called "Donkey Kong Country Returns"<ref>[https://www.youtube.com/watch?v=C1WTrwYqJfU&t=1544s ''All 200+ Microgames in WarioWare: Get It Together'' on YouTube]</ref>. During the minigame set in the level Jungle Hijinxs, the player must defeat a Tiki Goon walking back and forward over a large red flower located between the two statues resembling the boss Mugly. If the player is successful in defeat the tiki, Donkey Kong will appear and celebrate by beating his chest. |
||
==External Links== |
==External Links== |
||
| − | *[https://www.nintendo.com/games/detail/donkey-kong-country-returns-wii-u/ ''Donkey Kong Country Returns for Wii U'' on Nintendo] |
+ | *[https://www.nintendo.com/games/detail/donkey-kong-country-returns-wii-u/ ''Donkey Kong Country Returns for Wii U'' on Nintendo America] |
| − | *[http://donkeykong.nintendo.com/country-returns/ ''Donkey Kong Country Returns 3D'' on Nintendo] |
+ | *[http://donkeykong.nintendo.com/country-returns/ ''Donkey Kong Country Returns 3D'' on Nintendo America] |
==References== |
==References== |
||
| + | {{Scroll box| |
||
| − | <references/> |
+ | <references/>}} |
| − | |||
{{DK Games}} |
{{DK Games}} |
||
[[de:Donkey Kong Country Returns]] |
[[de:Donkey Kong Country Returns]] |
||
| Line 492: | Line 532: | ||
[[pt:Donkey Kong Country Returns]] |
[[pt:Donkey Kong Country Returns]] |
||
[[Category:Games]] |
[[Category:Games]] |
||
| ⚫ | |||
| ⚫ | |||
| ⚫ | |||
| ⚫ | |||
[[Category:Donkey Kong Country series]] |
[[Category:Donkey Kong Country series]] |
||
[[Category:Donkey Kong Country Returns]] |
[[Category:Donkey Kong Country Returns]] |
||
| ⚫ | |||
| ⚫ | |||
| ⚫ | |||
| ⚫ | |||
| ⚫ | |||
[[Category:Donkey Kong Country Returns 3D]] |
[[Category:Donkey Kong Country Returns 3D]] |
||
Latest revision as of 07:53, 13 November 2023
| Donkey Kong Country Returns (3D) | |
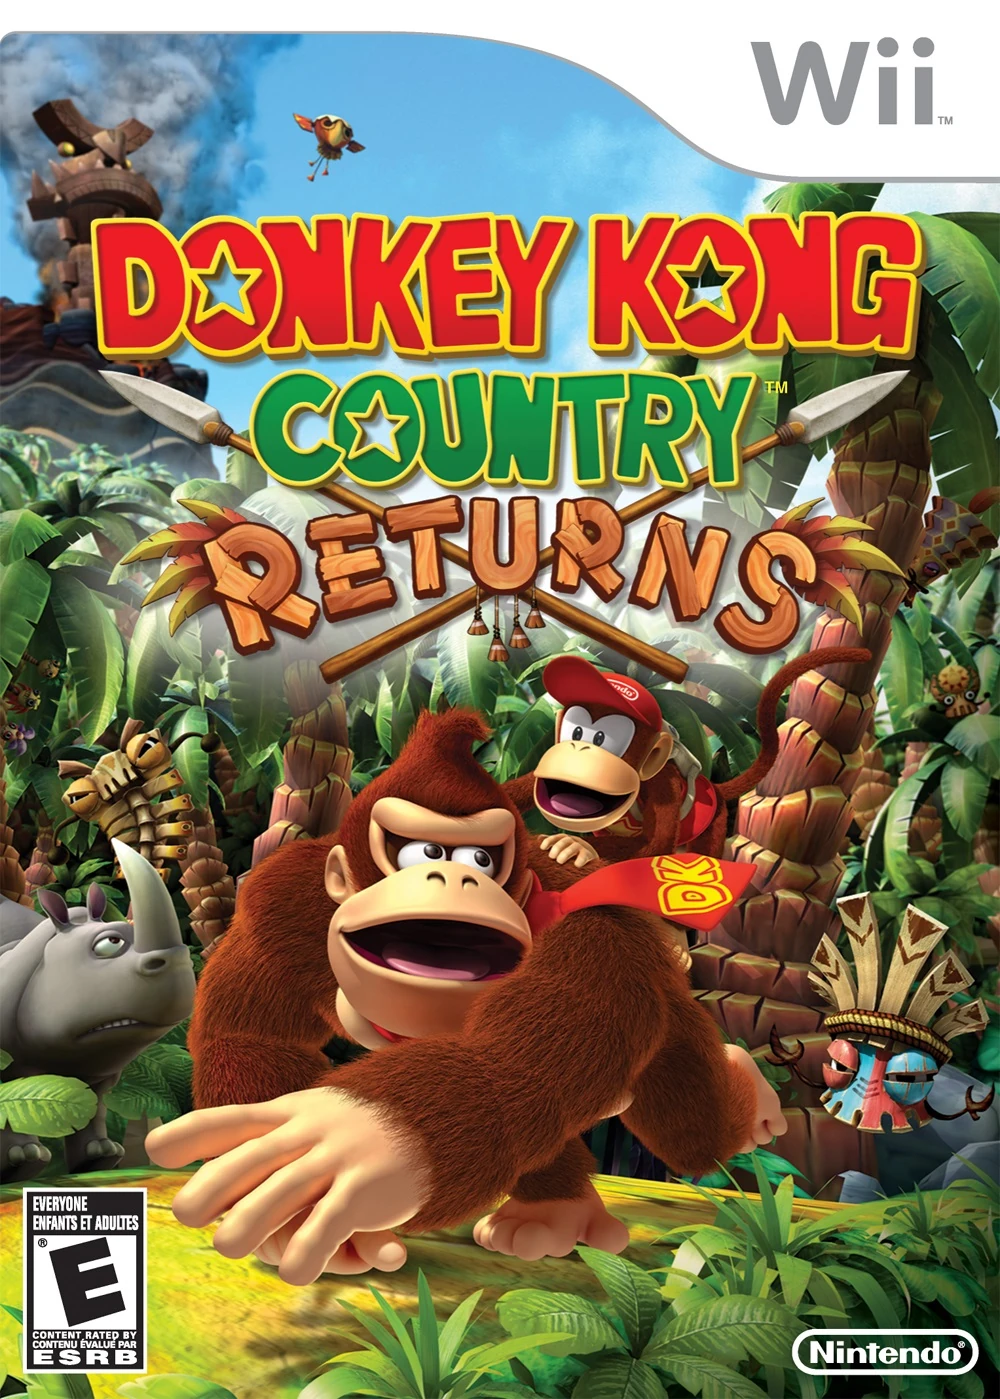 North American boxart of the game Donkey Kong Country Returns for Wii. | |
| Developer(s) | Retro Studios (Wii version) Monster Games, Inc.[1] (3DS version) |
| Publisher(s) | Nintendo |
| Main Development Staff | {{{devteam}}} |
| Platform(s) | Nintendo Wii, Nintendo 3DS, Nintendo Wii U, Nvidia Shield TV[2] |
| Release Date(s) | Nintendo Wii Nintendo 3DS Nintendo Wii U (Nintendo eShop[3]) (Wii version) Nvidia Shield TV (Wii version) |
| Genre(s) | Platformer |
| Ratings | ESRB: |
| Mode(s) | Single player, Multiplayer (2) |
| Media(s) | Wii Optical Disc, 3DS Game Card, Downloadable Media (Nintendo eShop and Nvidia Shield TV) |
| Input(s) | Wii Remote (and Nunchuk)[4], 3DS Buttons (and Touch Screen), Nvidia Shield TV Controller |
Donkey Kong Country Returns is a platformer game developed by Retro Studios and released for the Nintendo Wii by Nintendo in 2010. It is the fourth game in the Donkey Kong Country series. It is the sequel to Donkey Kong Country 3 and it is also the first Donkey Kong Country-line game in over a decade. The game was announced at the E3 2010[5].
A new version of the game, called Donkey Kong Country Returns 3D, was developed by Monster Games[1], and released for the Nintendo 3DS by Nintendo in 2013.
By using the backward compatibility[6] between controllers and media of the Nintendo Wii and Nintendo Wii U, Donkey Kong Country Returns was re-released for the latter via the Nintendo eShop[3] in 2015-2016.
Donkey Kong Country Returns and Donkey Kong Country Returns 3D were followed up with a sequel titled Donkey Kong Country: Tropical Freeze in 2014.
On July 4, 2019, an emulated version of Donkey Kong Country Returns, known as Donkey Kong Returns, was officially released on Nvidia Shield TV[2], exclusively for the Chinese region.[7]
Story[]
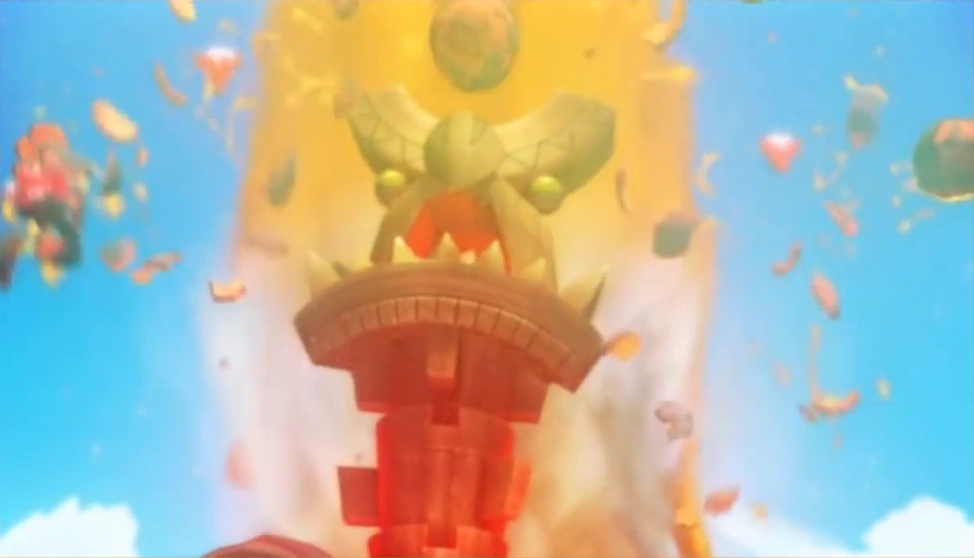

The Tiki Tak Tribe and Tiki Tong Tower emerging from the volcano.
The story begins as the camera locks at a volcano. After a few seconds of observing it, the volcano erupts. Lava and molten rocks shoot out into the sky. The Tiki Tak Tribe awakes and they emerge from the molten rocks that are still airborne. The eruption continues until Tiki Tong Tower bursts out of the volcano and roars.
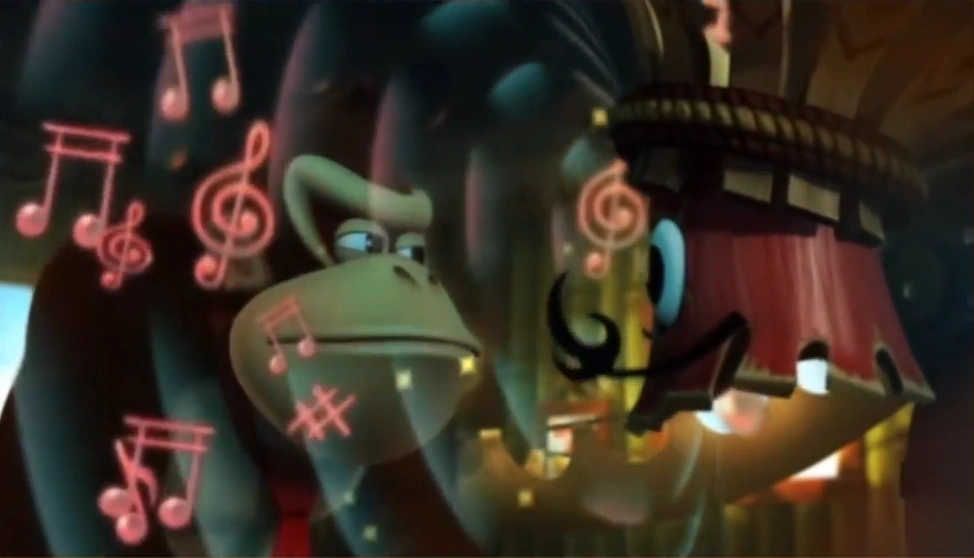

Krazy Kalimba trying to hypnotize Donkey Kong.
The members of the Tiki Tak Tribe then go down to Donkey Kong Island to hypnotize the animals there by playing music (namely elephants, giraffes, zebras, and squirrels). The animals start stealing every banana from Donkey Kong Island, only to come across Donkey Kong and Diddy Kong's hut. Diddy Kong jumps out the window and swings down to the ground. He immediately notices that his and Donkey Kong's banana hoard has been stolen once again, and he scowls before chasing after the animals that stole it. Donkey Kong finally steps out of the treehouse just in time to see the banana hoard being taken away by the native animals just before a tiki, known as Krazy Kalimba, comes along a few seconds later and pushes him back into his hut. The tiki uses its music, trying to hypnotize the ape, but he seems to be immune against the hypnosis. The tiki tries again as Donkey Kong squints his eyes at him and smiles before the cutscene ends.
Donkey Kong punches Krazy Kalimba out of his hut and walks outside (in the multiplayer mode, Diddy Kong can double kick the tiki out instead). The Kongs then begin their quest to take back their banana hoard and rid the tikis of Donkey Kong Island.
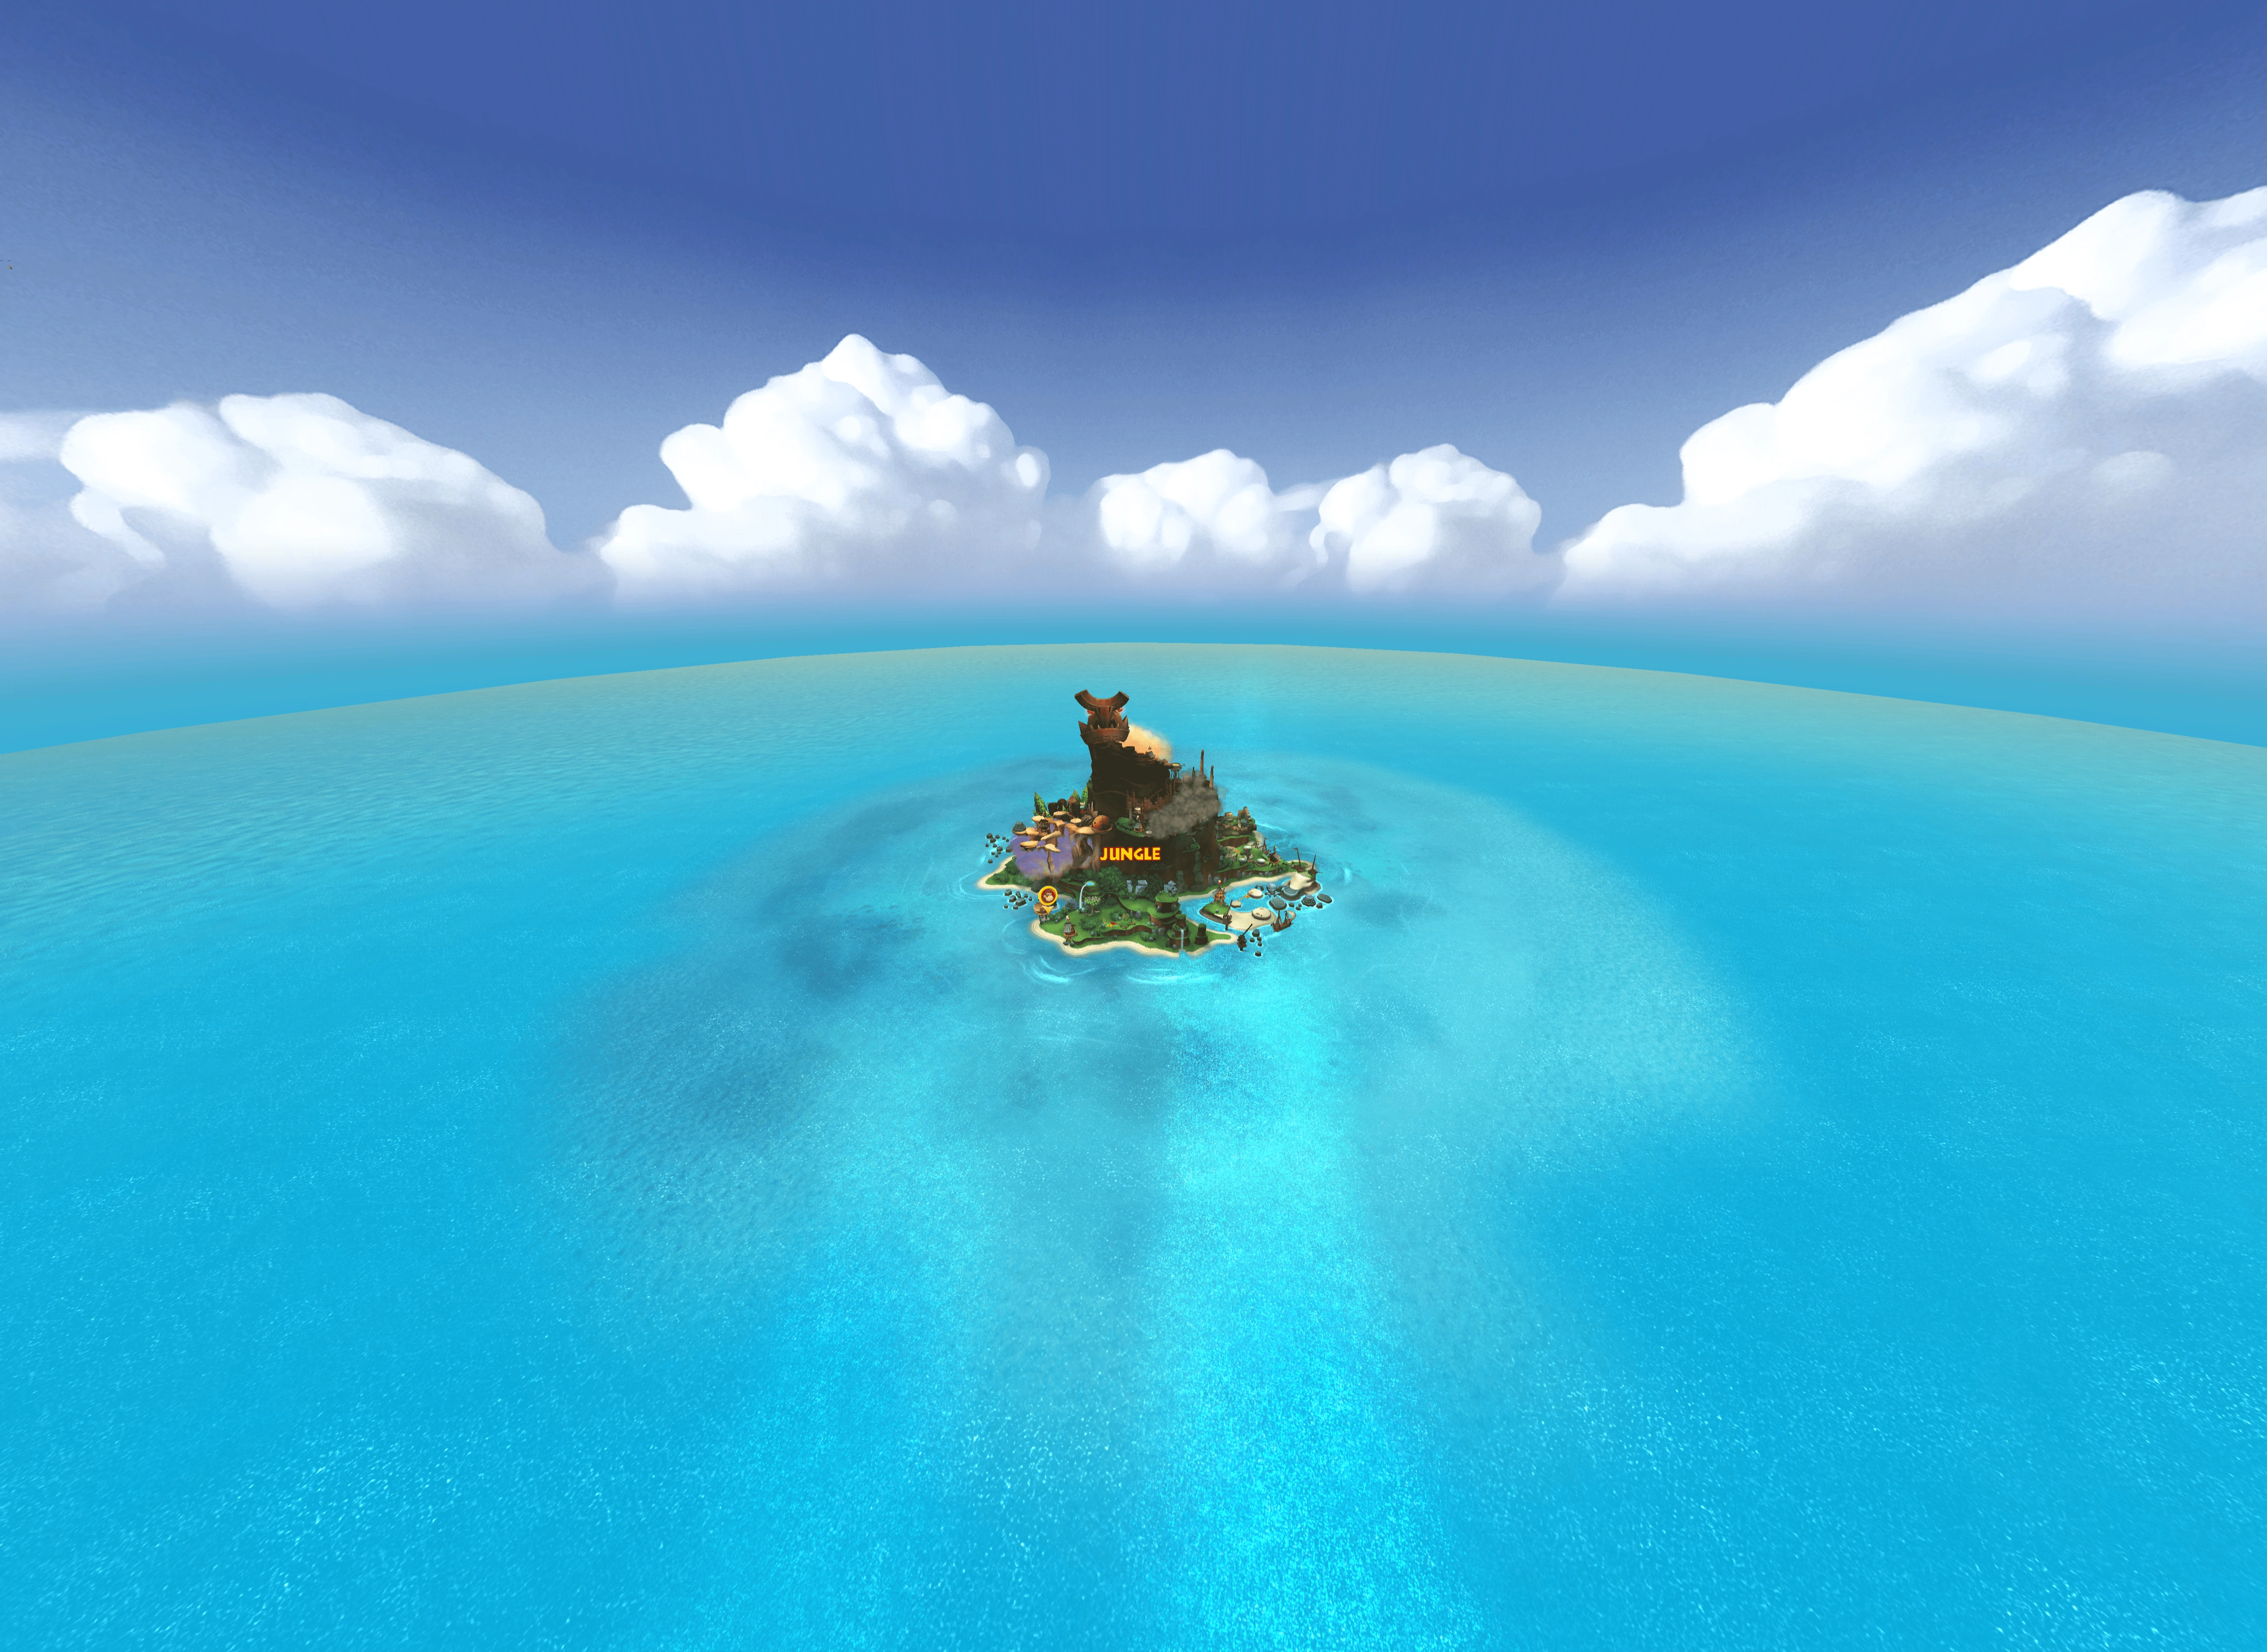
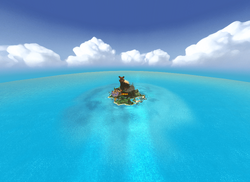
View of Donkey Kong Island from a distance via hacking tools used in the Wii version.
After exploring the Jungle and moving over some obstacles, Donkey and Diddy Kong come across an ancient coliseum arena at the edge of it where Mugly, a large monster, is busy eating some bananas. Kalimba reappears, hypnotizes and possesses the creature in order to fight against the heroes. However, the primates are victorious and are able to push away the Tiki Tak Tribe leader.
Later on in the Beach, the Kongs evade hazards, such as large waves, and many aquatic creatures, including a giant squid called Squiddicus. Eventually, the primates then take on the Maraca Gang, a group of tikis controlling the pirate members of the Scurvy Crew, in order to move past the location, which they succeed in doing.
Donkey and Diddy Kong then follow the Tiki Tak Tribe across the Ruins, where they explore ancient temples full of traps and go through a battle at the sea. At the end of the current world, they discover a big egg sitting next to a golden gong. However, Gong-Oh, other Tiki Tak Tribe leader, also meets them and uses its powers to throw down the primates inside an arena and put the egg inside a golden cauldron. The egg hatches, revealing the large bird Stu which gets possessed by Gong-Oh. The heroes are successful in besting the boss and repelling the tiki.
The Kongs then make their way to the Cave, where they traverse crystal mines by usually riding on Mine Carts while also avoiding bats and mole miners. It is followed by the heroes finding Mole Miner Max and his subordinates loading a steam train with bananas. Banjo Bottom then notices the primates and possesses the large mole boss. After a battle above Mine Carts pulled by the same train on movement, Donkey and Diddy stop Mole Miner Max and defeat the Tiki Tak Tribe leader.
Moving to the Forest, the Kongs traverse over large structures and totems made out of wood. The location also houses flying tikis, carnivorous plants and spiders, including a large swarm of the latter. At the edge of the Forest, the heroes reach a small body of water next to giant wooden wheels. Here, Mangoruby, a large plant-like caterpillar, is rudely awaken and it also becomes another victim of possession by the tiki Wacky Pipes. By avoiding Mangoruby's bites and electric attacks, the primates are able to take down the boss and the Tiki Tak Tribe leader.
At the next location, the Cliff, containing canyons, crumbling terrain and many ancient fossils, Donkey and Diddy face reanimated skeletons of dinosaurs and avoid to sink into tar pits. They are also attacked by cannonballs shot by airships. After a small detour in the way, the Kongs are blasted into Thugly's lair, where the monster is also eating bananas. Then some airships piloted by the Tiki Tak Tribe arrive, and Xylobone uses the opportunity to hypnotize and possess the boss. The heroes are able to defeat Thugly and stop the Tiki Tak Tribe leader.
In the Factory, Donkey and Diddy traverse industrial-themed locations containing smog, many mechanical contraptions and robots. Eventually, they also find three hidden rooms where there are large electric plugs, and the primates activate them in order to reveal a large rocket. In the launch pad, the Kongs ride a Rocket Barrel towards high atmosphere while avoiding colisions against airships, and they reach the final area of the Factory. Here, the heroes realize why the Tiki Tak Tribe are stealing bananas. They witness a bipedal robot, controlled by the chicken Colonel Pluck, mashing bananas and putting them into wooden statues to create new tikis instantly. While the robot ceases of operating briefly, Cordian appears and possesses the pilot. After a battle where the Kongs damage the robot and force a flying vehicle to crash down, Colonel Pluck and Cordian are both bested by the heroes.
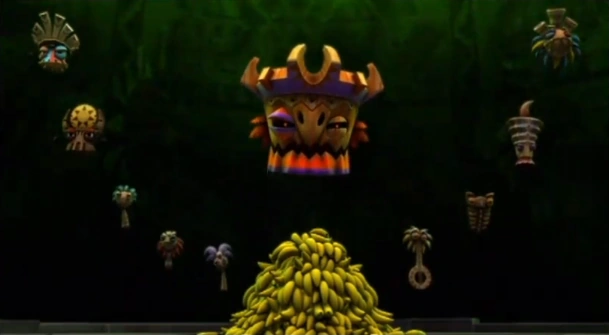

Tiki Tak Tribe Leaders.
At the next world, the Volcano, Donkey and Diddy move across many dangerous hazards involving lava, sinking platforms and fiery enemies. Eventually, after a vertical travel by Rocket Barrel, the heroes are able to reach the top of the Tiki Tong Tower. Upon arriving inside the location, they come face-to-face with Tiki Tong, the ruler of the Tiki Tak Tribe, alongside the tiki leaders defeated previously. The large boss takes and eats some of the Donkey Kong's banana hoard, spins it around himself like a blender, and spits it on to the tribe leaders, much to the Kongs' disgust and confusion. The tribe leaders then merge together to turn into two giant hands for Tiki Tong to use. During the final boss battle, the primates destroy the hands by breaking the gems on the back of each hand, while dodging his slap and chop attacks. Tiki Tong then proceeds to try crushing the heroes with his head and spit fireballs at them. The heroes eventually defeat him by smashing his head, causing the large tiki to explode.
Donkey and Diddy Kong are then blasted to the moon due to Tiki Tong exploding. As all hope seems lost (for a brief moment), Donkey Kong then sees the moon below him, grins and uses his incredible strength to punch the moon towards Tiki Tong Tower (alternatively in the multiplayer mode, by Diddy Kong standing alone, he will headbutt the moon instead). It will smash the tower back into the volcano, causing it to disappear. The moon is comically throw back into orbit as bananas erupt from the volcano, bringing an end to the Tiki Tak Tribe's reign. All the animals on the island are also freed from their mind control, and Donkey and Diddy Kong later celebrate their victory over reclaiming their banana hoard.
At the aftermath, a golden temple appears. After the Kongs gather all Rare Orbs from the eight Key Temples, they unlock the doorway to the temple and have access to its secret: a mysterious Golden Banana.
Gameplay[]

Artwork of Diddy Kong mounted on Donkey Kong's back.
The game uses many of the familiar elements from the previous Donkey Kong Country games and even the Donkey Kong Land trilogy. As the main playable characters, Donkey and Diddy Kong both keep their moves from previous games, but their roll attacks lack the continuous momentum for hitting multiple enemies in succession. They can also both use the ground-pound ability and the blow ability to reveal secret items and open paths, as well as make some enemies on fire become vulnerable. In the Nintendo Wii version, these mentioned abilities can only be activated by motion controls moves[8] on the Wii Remote (and Nunchuk).
For the first time in the Donkey Kong Country series, both Kongs are seen to be working together simultaneously. Diddy Kong can climb on Donkey Kong's back, a throwback to the "team-up" ability since Donkey Kong Country 2 (ironically the official artwork of the Japanese boxart of Donkey Kong Country for Super Famicom showed Diddy Kong riding Donkey Kong's back). Diddy can use his rocket pack to give him a jump boost, however the player cannot switch between them like in previous Donkey Kong Country games. Both main characters can also perform the "roll-jump" move to collect items inside pits or jump across large gaps safely.
The two characters can cling to turf-covered walls and ceilings to get around. Also, there are two heart containers for Donkey Kong, and two more heart containers for Diddy Kong (both characters have three heart containers each in the New Mode of the 3DS game version). The heroes can also pick up barrels and throw at enemies, however, it is no longer possible to put the barrels back on the ground safely after they are grabbed, like in the previous games.
In the multiplayer mode, two players can participate in a level at the same time, with the first player controlling Donkey Kong and the second one controlling Diddy Kong. If both characters are defeated, two extra lives will be always spent, instead of one, when they reappear at the beginning of the level or latest active checkpoint. If a player's Kong moves off screen while it is focused on the other one, after a countdown of three seconds, the character outside will be instantly teleported back next to the current one at the screen. It is possible for the second player's character (Diddy) mount the first player's character (Donkey) and let the first player to control most of the game. The second player controlling Diddy can assist by firing his Peanut Popguns. This way, both players' characters can share effects from items, such as Heart Boosts and Banana Juices. Any player also has the option of summoning their defeated character inside a dropping DK Barrel by spending one Extra Life Balloon at any moment. But the present player's Kong must touch the barrel before it falls below the screen. The dropping DK Barrel will be instantly draw towards the present character by pointing the Wii Remote at the direction of the barrel or by holding the "Y" or "X" button on the 3DS.
After cleared once, every level can also be played in Time Attack mode. In this mode, Donkey and Diddy Kong do not spend extra lives, there are no important items to collect, and Bonus Rooms are inaccessible. Donkey Kong always starts the level without Diddy Kong, but he can find his little friend inside DK Barrels during most of the levels. There are four time rating medals the player can get for each level: Bronze, Silver, Gold, and the elusive Shiny Gold. The times needed for the first three are shown after the the player clears the level, but the time required for the Shiny Gold medal is unknown and can vary as much as one second faster than Gold up to more than twenty seconds faster. It is impossible to play the Time Attack mode in multiplayer.
Collecting Puzzle Pieces and K-O-N-G Letters gives the player bonuses. The Puzzle Pieces unlock game development artwork and dioramas in the Extras menu of the game. After getting all the K-O-N-G letters in each regular level of a world, the player unlocks one secret level in that world called Key Temple. By completing a Key Temple, the player gets a Rare Orb. After all eight Rare Orbs are obtained, the Kongs will able to enter the Golden Temple. Once the Golden Temple level is completed, a mode called Mirror Mode will be unlocked. The Mirror Mode is a harder game mode by allowing to play only with Donkey Kong, having a single heart container, in mirrored versions of the levels and without equippable items. In the same mode, DK Barrels only work as throwable weapons, and hearts inside levels are missing or replaced by bananas. If all the levels in the games are cleared again in the Mirror Mode, the player will unlock more artwork in the gallery. It is impossible to play the Mirror Mode in multiplayer.
The percentage rate of completion of the games displayed in the save files is not affected by collecting Puzzle Pieces nor obtaining Time Attack medals. The rate rises by clearing every single level in the games, including levels locked by Map Keys, and the Key Temple levels, making to collect K-O-N-G Letters in regular levels indirectly required. In all game versions, being in multiplayer or not, by clearing every single level once in the regular difficulty, the percentage rate will reach one hundred percent. By clearing every single level again in the Mirror Mode in single player, the percentage rate will reach two hundred percent.
Characters[]
Kongs and Allies[]
- Donkey Kong: returns as the main protagonist. He can let Diddy ride on his back and can even roll with Diddy on much like a bowling ball continuously (very similar to how Dixie Kong can roll over Kiddy Kong just after she throws him in Donkey Kong Country 3).
- Diddy Kong: returns as a secondary protagonist. He retains his speed, flexibility, and agility as well as his rocket pack and his peanut popguns from the Donkey Kong 64. He is Donkey Kong’s nephew.
- Cranky Kong: is the only other Kong returning in the game. He is a supporting character who runs his shop and often makes cheeky comments about the player's choice of items. He is Donkey Kong's grandfather.

Artwork of Tutorial Pig.
- Tutorial Pig: is a very intelligent pig (much like how pigs are said to be intelligent). He is another supporting character, as he, along his family, are responsible for giving tutorial of game controls for the Kongs in the background during levels. The Tutorial Pig also uses multiple stalls as checkpoint markers inside levels, and he marks the starting and finishing lines during the Time Attack mode. After losing multiple extra lives in the same level, the Tutorial Pig can activate the Super Guide mode if the player prompts it.
- Super Kongs: are counterparts of Donkey and Diddy Kong, with white fur and wearing blue clothes. They only appear in the Super Guide mode after the player loses eight extra lives, or five lives in the New Mode of the 3DS game version, in the same level if the player prompts the mode at any Tutorial Pig's checkpoint stalls. The Super Kongs proceed to complete the current level always from the beginning while the player watches and receives no items collected by the characters. It allows the player to skip levels, including boss levels and Key Temples. Pausing the game also allows the player to take control of the Super Kongs. This mode cannot be activated in the multiplayer.
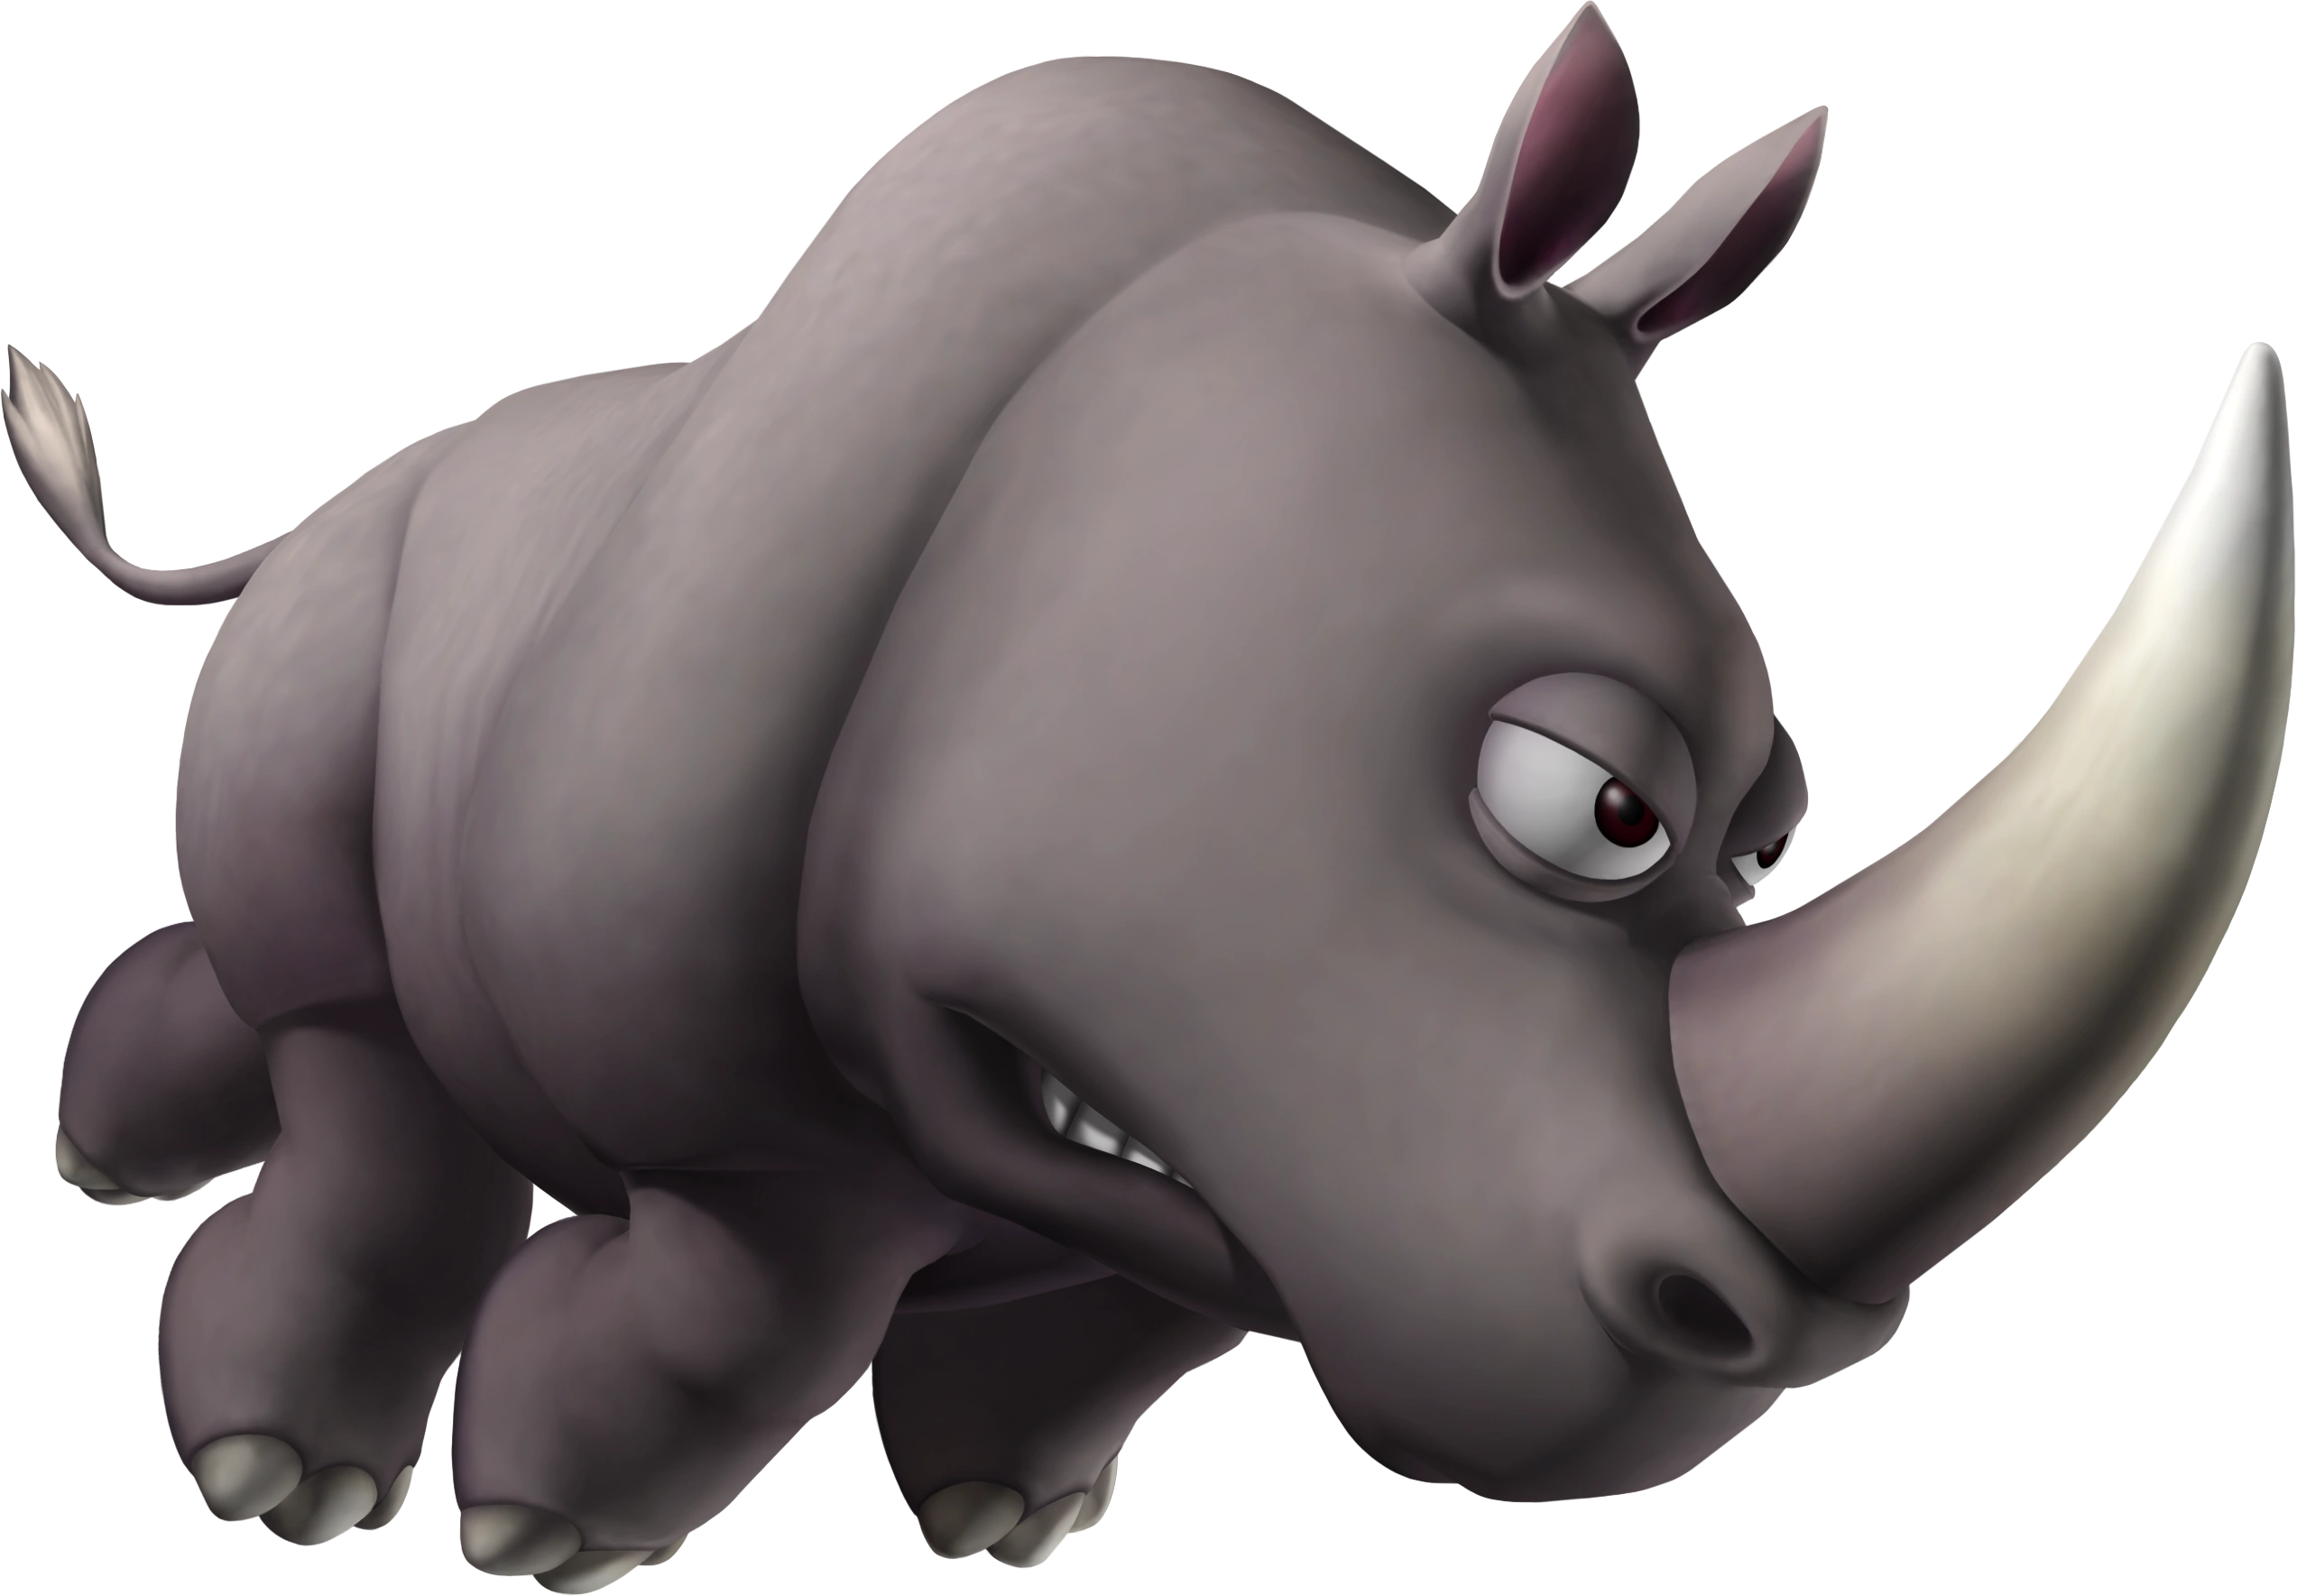
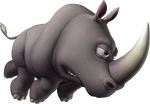
Artwork of Rambi the Rhinoceros.
Animal Buddies[]
- Rambi the Rhinoceros: makes his return as the one of the only two animal buddies of the game. He is found in a large wooden crate that requires pounding or roll attacks to break open. Rambi is very destructive, as he can smash down blocks with his symbol on them and can charge through hordes of enemies and even break wooden spikes. His weakness is fire, which causes him to dismount Donkey Kong and/or Diddy Kong and walk around, waiting to ride again. When it happens, the heroes will also lose a heart by damage.
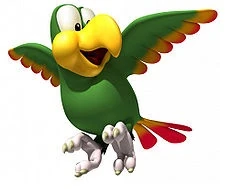

Artwork of Squawks the Parrot.
- Squawks the Parrot: makes an appearance in the Cranky Kong's Shop, where the player can purchase him for fifteen Banana Coins or five coins in the New Mode of the 3DS game version. After he is equipped, Squawks sits on a branch at the lower left corner of the screen during a level. If the Kongs get close to a Puzzle Piece or entrance to a Bonus Room, the parrot will get agitated. The closer the heroes get to a Puzzle Piece or Bonus Room, the more he will get agitated and start to squawk. Squawks also serves as world selection marker in the overworld map.
Enemies[]
Hypnotized/Domestic Enemies[]
Artwork of Awk.
It is assumed that at least most of the non-tiki enemy types have been hypnotized by the Tiki Tak Tribe into serving them. These enemies are listed below, in alphabetical order.
- Acks
- Ackstacks
- Awks
- Blue Squeeklies
- Bobbin' Squeeklies
- Bonehead Jeds
- Bopapodamus
- Bowling Birds
- Buckbots
- Buckbombs
- Buzzbites
- Buzzsaws
- Cageberries
- Chomps
- Cling Cobras
- Electrasquids
- Electroids
- Firehead Neds
- Fire Snakes
- Frogoons
- Green Chomps
- Hopgoons
- Humzees
- Jellybobs
- Kowalees
- Mega Squeekly
- Mimics
- Mole Guards
- Mole Miners
- Munchers
- Pinchlies
- Pogobots
- Purple Squeeklies
- Pyrobots
- Rawks
- Robobī
- Shooting Chomps
- Skellirexes
- Skittlers
- Skullyrexes
- Snaggles
- Snaps
- Squiddicus
- Squidlies
- Stilts
- Toothberries
- Vine Chomps
- Wigglevines
- Yellow Snaggles
Tiki Enemies[]
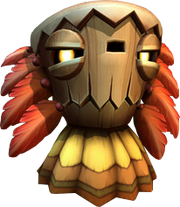
Artwork of Tiki Goon.
All the regular tiki enemies in the Tik Tak Tribe are listed here, in alphabetical order.
- Char-Chars
- Flaming Tiki Buzzes- A blackened Tiki Buzz set on fire. While burning, it can only be defeated with a thrown barrel; touching one in this state is harmful. However, a blow will dissolve its flames, leaving it dizzy and as vulnerable as a standard Tiki Buzz.
- Flaming Tiki Zings
- Screaming Pillars- A stone totem, initially found sleeping. As soon as it hears the Kongs, it wakes up and screams, toppling on the path. Screaming Pillars can crush the protagonists, as well as any other creature standing right below them. However, after collapsing on the ground, they become harmless and can be jumped on and cracked open with a ground pound.
- Tiki Boings
- Tiki Bombers
- Tiki Boulder
- Tiki Buzzes
- Tiki Dooms
- Tiki Goons- Grunt-level enemies, slowly moving back and forth on platforms. Although harmful if simply touched from one side, as they bite, Tiki Goons can be destroyed using any form of attack, such as stomping, rolling, barrel throwing, or Rambi's strike.
- Tiki Pops- A Tiki with a bowl-shaped head, carrying a flashing bomb. Tiki Bombs walk slowly in one direction on the ground; they will self-destruct moments after spawning from Stu's cauldron. They will explode earlier if the Kongs make contact with them, and their combustion is dangerous.
- Tiki Seekers
- Tiki Tanks- A sturdy Tiki reinforced with stone. Roll attacks and normal stomps do not have effect on it. Instead, the Kongs can pound the ground near a Tiki Tank to flip it over, uncovering its bottom side and allowing them to destroy the enemy with a stomp. Alternatively, a Tiki Tank can be immediately defeated with a barrel or with Rambi.
- Tiki Torches
- Tiki Torks
- Tiki Zings
- Ultra Char-Chars
Bosses[]
In a similar way to non-tiki enemies, most of the bosses are creatures hypnotized and controlled by the Tik Tak Tribe leaders. After Donkey and Diddy Kong have defeated a boss, the creature will pass out and the Tik Tak Tribe leader controlling the boss will leave its body, and the tiki will stay dizzy for a few seconds. The player has the opportunity to jump towards the Tiki Tak Tribe leader, wait for a prompt to appear at the left bottom of the screen, and hit the tiki multiple times (about twenty-two times) by using the pounding move (by shaking the Wii Remote (and Nunchuk) vertically in the Wii version, pressing the "X" and "Y" buttons in the 3DS version or pressing the "X" button in the Nvidia Shield TV version). However, it is entirely optional. The player can allow the Tiki Tak Tribe leader to leave, because the number of hit points does not amount for anything beyond their self-achievement.
- Mugly (controlled by Krazy Kalimba)
- The Scurvy Crew (controlled by the Maraca Gang)
- Stu (controlled by Gong-Oh)
- Mole Miner Max (controlled by Banjo Bottom)
- Mangoruby (controlled by Wacky Pipes)
- Thugly (controlled by Xylobone)
- Colonel Pluck (controlled by Cordian)
- Tiki Tong
Items[]
- Background Elements: Background Elements can often contain collectable items in the game, such as Puzzle Pieces, Bananas, Extra Life Balloons and Banana Coins, or hidden means of transportation, such as barrel cannons. The player must ground-pound or blow nearby the elements to reveal their secret contents.
- Bananas: Bananas serve the same purpose they have had in previous games, being items commonly found. One hundred bananas must be collected for earning one extra life. There are also banana bunches, with regular ones that have five bananas, as well as the big variant that has twenty. There are also mysterious flying bananas that trail up to regular floating bananas.
- Banana Coins: Banana Coins reappear from Donkey Kong Country 2, and are used to purchase extra lives and other items that Cranky Kong sells in his shops. During levels, it is possible to receive Banana Coins by jumping and bouncing off three or more consecutive enemies. The player can collect a maximum total of 999 Banana Coins in the game.
- Extra Life Balloons: Extra Life Balloons (or Red Balloons) are the game's main life counters. Oddly, extra life balloons do not have a face on them unlike previous Donkey Kong Country games. There are only red colored balloons that can be collected in levels. If both primates are defeated during a level, Donkey Kong will be dropped by a red balloon at the start or checkpoint. If the player loses all their extra lives, the game will send them to the Game Over screen, where they can pick the option to continue the game from the last saved point or quit the game back to the main title screen. During levels, it is possible to receive extra life balloons by jumping and bouncing off eight or more consecutive enemies. At the Cranky Kong's Shop, the player can also buy one, three or even seven extra life baloons per time. The player can collect a maximum total of ninety-nine extra lives in the game.
- Green Balloons: Green Balloons save the heroes after they fall into a pit once by making them float up temporarily. The player can steer the balloon to reach safe ground. Green Ballons are exclusive items to purchase for three Banana Coins in the New Mode from 3DS game version and they cannot be used in levels with vehicle sections, such as mine carts and Rocket Barrels.
- Hearts: Hearts measure Donkey's and Diddy's health. Each Kong has two heart containers or three in the New Mode of the 3DS version. Once all hearts are lost, an extra life is lost. However, if the player uses a Heart Boost, the Kongs gain a temporary extra heart container during a level. Leaving or completing a level will always restore all Kongs' regular heart containers.
- Heart Boosts: Heart Boosts give an extra heart container to the Kongs only for a single level. It is only one heart container per item, and if the player takes damage and loses a heart, the extra heart container still can be filled during the current level.
- K-O-N-G Letters: K-O-N-G Letters make a more important reappearance, being unseen since the game DK: Jungle Climber. However, unlike in previous games, they do not give the player an extra life. They unlock additional Key Temple levels in most worlds. Collecting all K-O-N-G letters from a level grants a Red Star Emblem to the player.
- Map Keys: Map Keys are purchased at the Cranky Kong's Shop and used to unlock locked levels in worlds. They are usually twenty Banana Coins each.
- Banana Juice: Banana Juice makes the Kongs golden and provides some invincibility in the form of extra hits during a single level. This invincibility being ten extra hits in Donkey Kong Country Returns and the Original Mode of Donkey Kong Country Returns 3D, or five hits in the New Mode of Donkey Kong Country Returns 3D. The effects are instantly lost if both main characters fall into a pit in both game versions, except during the New Mode of Donkey Kong Country Returns 3D.
- Crash Guard: Crash Guard lets a mine cart or Rocket Barrel take two extra hits, instead of it exploding after a single hit. It is an exclusive item to purchase at the Cranky Kong's Shop for ten Banana Coins in the New Mode from 3DS version, and it cannot be used in levels without vehicles, such as Rocket Barrels and mine carts.

Artwork of Puzzle Piece.
- Puzzle Pieces: Puzzle Pieces are a new type of collectable item that unlocks game development artwork and dioramas in the Extras menu. Sometimes, they are hidden inside objects in the background of levels and they are always the reward for collecting all items within thirty seconds inside Bonus Rooms. These items can be well-hidden inside levels, in secret pathways and in the paths of Barrel Cannons. If the player collects a Puzzle Piece, but after, they lose an extra life, the game still will consider it as collected, even without reaching a checkpoint. However, the player must clear the current level and cannot leave it early, or the piece will not be considered as collected either. Puzzle Pieces are entirely optional items to collect. They are not necessary to rise up the percentage rate of completion in the games.
- Animal Crates: Animal Crates house the animal buddy Rambi the Rhinoceros much like the previous Donkey Kong Country games. However, the crate is much larger and requires pounding or roll attacks to be open.
- Mine Carts: Mine Carts are key vehicles needed to get through track-based levels. Mine carts cannot be stopped and are usually found in dangerous locations. Unlike previous games, Mine carts are more fragile - they explode with one single hit, which is instant defeat for both main characters.
- Rare Orbs: Rare Orbs can open the doorway to the Golden Temple once all eight of them are found at the end of each Key Temple level.
- DK Platforms: DK Platforms are large circular platforms displaying a DK insignia on them and found between sections inside most of the levels. These platforms are used to open paths, connect foreground and background areas or reveal new structures. The player must use the ground-pound move to activate the platforms and able to progress. There are two types of DK Platforms in the games. The first type resembles a large button. When the Kongs are positionated over it, the player must keep ground-pounding it until the main structure is completely pushed down. The second type is composed by a large suspended plate, resembling a gong. Each time that the primates pound on it, the plate will make a loud echoing sound, throwing the heroes up and affecting the enviroment. This plate must be pounded by the Kongs for a total of three times to be activated, and after they are finished, the center of the plate will become red.
Barrels[]
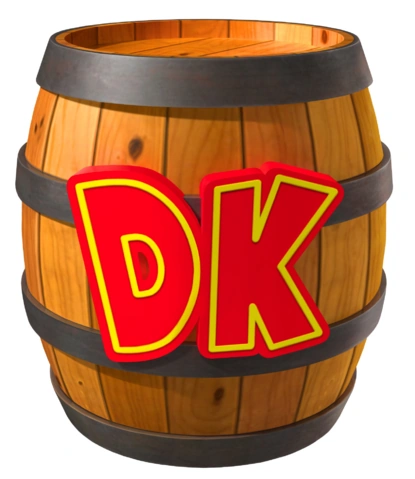

Artwork of DK Barrel.
- DK Barrels: retain their original purpose, summoning a lost Kong, but its usage is different. In the multiplayer mode, once a Kong is out and the player in control confirms to spend an extra life, a DK Barrel will float down from above and the other player's Kong must jump on it to free the lost character. Pointing the Wii Remote at the direction of the dropping barrel or holding the "Y" or "X" button on the 3DS will draw the barrel towards the present player's Kong, even if the barrel is already below the character. DK Barrels can be used as weapons when they are thrown, and they also restore the both Kongs' lost hearts, even in multiplayer. In the New Mode of the 3DS version, portable DK Barrels can be purchased at the Cranky Kong's Shop for five Banana Coins. After losing a character, they can be thrown by touching the 3DS second screen. In the Mirror Mode, DK Barrels do not restore hearts nor summon an assist character. In this mode, they can only be used as throwable weapons.
- Wooden Barrels: are basic weapons, throwable against most enemies. They are few and far between compared to previous games, however. They are necessary to open secret entrances for Bonus Rooms and break hanging bags holding items. After they are thrown, wooden barrels will roll across the ground. Defeating multiple enemies in succession will earn Banana Coins and Extra Life Balloons. Unlike the previous Donkey Kong Country games, it is no longer possible to put barrels back on the ground after they are pick up by the Kongs.
- Barrel Cannons: make their prominent reimagination being used exactly as before, as transportation methods. They demand the player's input to shoot the Kongs. In most of the occasions, the player must use good timing to avoid shoot the heroes at obstacles and enemies, which would make the primates to fall down into pits below, losing an extra life. Barrel cannons displaying skull signs on them explode as soon as the primates are shot, making these barrels for one time use, and the heroes usually unable to return to the section of the levels before the same barrel type. If the player also misses the intended target when shooting, they will not have a second chance to use the barrel cannon again, and the Kongs will probably drop inside some abyss.
- Autofire Barrels: automatically launch the Kongs at certain direction like regular barrel cannons, but they are capable of launch the heroes in the background and foreground environments. Some autofire barrels will also allow the primates to reach Bonus Rooms.
- Slot Machine Barrels: are located at the end of regular levels and must be hit to complete the said levels. Similar to Donkey Kong Country 2's End of Stage Target, the barrels will circle through multiple prizes to the player get. The prizes are: banana bunch, Extra Life Balloon, Banana Coin or "DK". In case of picking "DK", the player will get a random prize and can also pound the barrel quickly to multiply their prize until fifteen times.
- Rocket Barrels: Rocket Barrels are also vehicles used by the heroes to traverse specific levels while avoiding enemies and obstacles. Usually, by hitting any obstacle, the Rocket Barrel will instantly explode and the player will lose an extra life. In horizontal levels, the player can press the "Jump" button to make the rocket to ascend or release the button to make it to descend. In vertical levels, the player can also control the rocket's movement by pressing the "Left" and "Right" buttons, and holding the "Jump" button will make the Rocket Barrel to quickly ascend.
Worlds and Levels[]

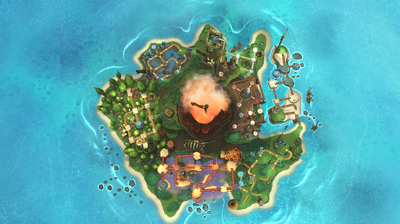
Freelook view of the overworld map of Donkey Kong Island, without depicting the Tiki Tong Tower, as seen in the Wii version.
In Donkey Kong Country Returns, there are eight worlds in total, and one extra world with one level, the Golden Temple, which is unlocked after completing the main game once and collecting all eight Rare Orbs from the Key Temple levels. Donkey Kong Country Returns 3D features the Cloud world, an extra world including eight exclusive levels and the Golden Temple level. This final world is also unlocked by completing the main game once and collecting all eight Rare Orbs. In the world maps of both games, locations are marked by buttons. Red buttons with glowing effects indicate uncleared levels. Blue buttons indicate cleared levels. Hexagonal-shaped buttons indicate the initial level in a world. Star-shaped buttons indicate the boss level in a world. Red flags with the "DK" insignia next to the boss level indicate cleared worlds, except in the Cloud world.

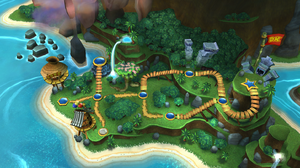
Map of the Jungle in the Wii version.
Jungle[]
- 1-1 Jungle Hijinxs
- 1-2 King of Cling
- 1-3 Tree Top Bop
- 1-4 Sunset Shore (level unlocked by buying the Map Key from Cranky Kong's Shop in this world for twenty Banana Coins)
- 1-5 Canopy Cannons
- 1-6 Crazy Cart
- 1-B Mugly's Mound
- 1-K Platform Panic (secret level unlocked by collecting all K-O-N-G Letters in this world)
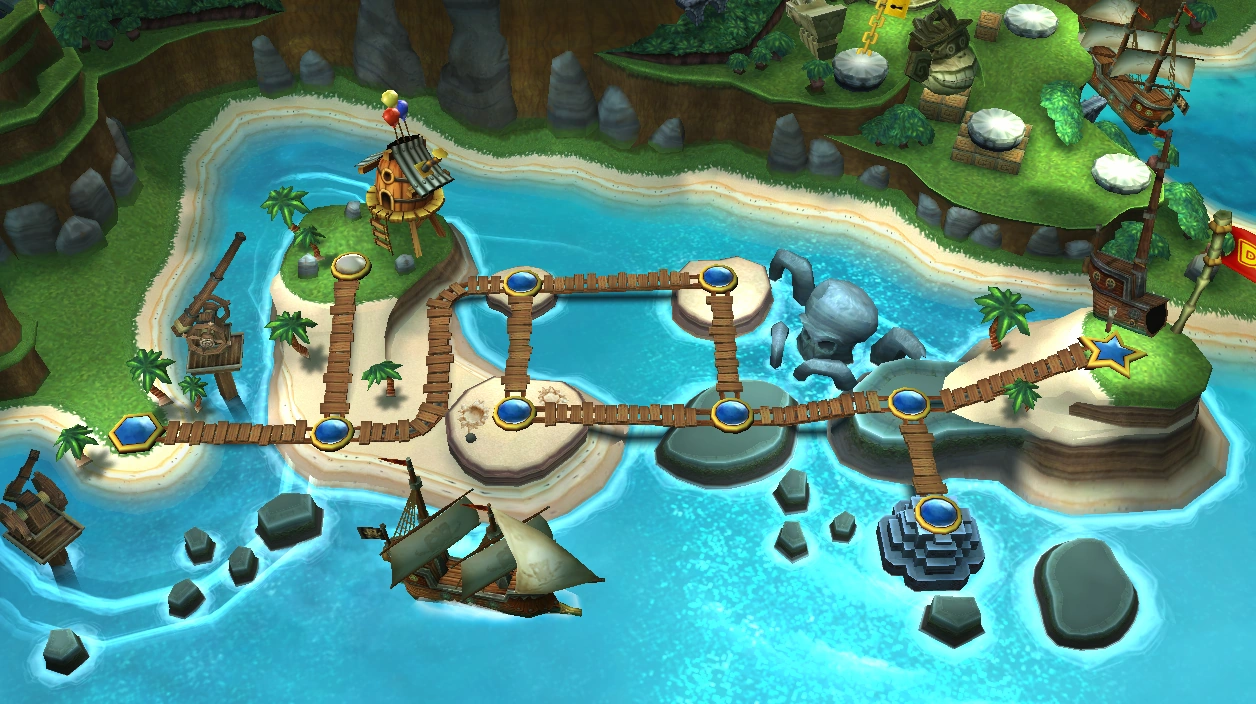

Map of the Beach in the Wii version.
Beach[]
- 2-1 Poppin' Planks
- 2-2 Sloppy Sands
- 2-3 Peaceful Pier
- 2-4 Cannon Cluster
- 2-5 Stormy Shore
- 2-6 Blowhole Bound (level unlocked by buying the Map Key from Cranky Kong's Shop in this world for twenty Banana Coins)
- 2-7 Tidal Terror
- 2-B Pinchin' Pirates
- 2-K Tumblin' Temple (secret level unlocked by collecting all K-O-N-G Letters in this world)

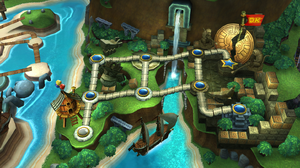
Map of the Ruins in the Wii version.
Ruins[]
- 3-1 Wonky Waterway
- 3-2 Button Bash
- 3-3 Mast Blast
- 3-4 Damp Dungeon (level unlocked by buying the Map Key from Cranky Kong's Shop in this world for twenty Banana Coins)
- 3-5 Itty Bitty Biters
- 3-6 Temple Topple
- 3-B Ruined Roost
- 3-K Shifty Smashers (secret level unlocked by collecting all K-O-N-G Letters in this world)
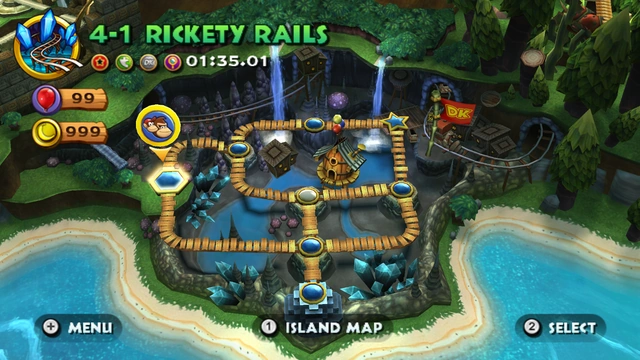

Map of the Cave in the Wii version.
Cave[]
- 4-1 Rickety Rails
- 4-2 Grip 'n' Trip
- 4-3 Bombs Away
- 4-4 Mole Patrol (level unlocked by buying the Map Key from Cranky Kong's Shop in this world for twenty Banana Coins)
- 4-5 Crowded Cavern
- 4-B The Mole Train
- 4-K Jagged Jewels (secret level unlocked by collecting all K-O-N-G Letters in this world)
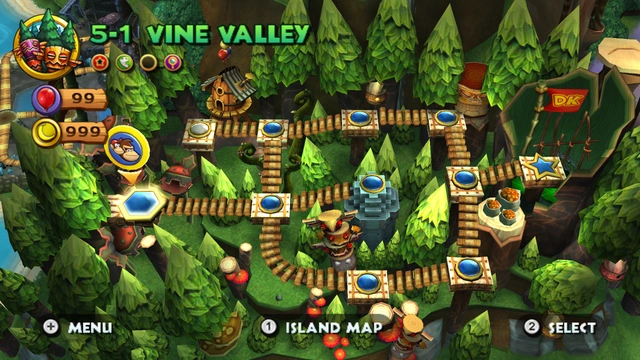

Map of the Forest in the Wii version.
Forest[]
- 5-1 Vine Valley
- 5-2 Clingy Swingy
- 5-3 Flutter Flyaway
- 5-4 Tippin' Totems
- 5-5 Longshot Launch
- 5-6 Springy Spores (level unlocked by buying the Map Key from Cranky Kong's Shop in this world for twenty Banana Coins)
- 5-7 Wigglevine Wonders
- 5-8 Muncher Marathon
- 5-B Mangoruby Run
- 5-K Blast 'n' Bounce (secret level unlocked by collecting all K-O-N-G Letters in this world)

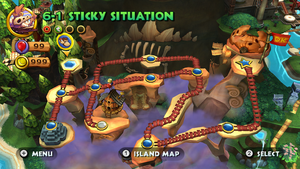
Map of the Cliff in the Wii version.
Cliff[]
- 6-1 Sticky Situation
- 6-2 Prehistoric Path
- 6-3 Weighty Way
- 6-4 Boulder Roller
- 6-5 Precarious Plateau (level unlocked by buying the Map Key from Cranky Kong's Shop in this world for twenty Banana Coins)
- 6-6 Crumble Canyon
- 6-7 Tippy Shippy
- 6-8 Clifftop Climb
- 6-B Thugly's Highrise
- 6-K Perilous Passage (secret level unlocked by collecting all K-O-N-G Letters in this world)
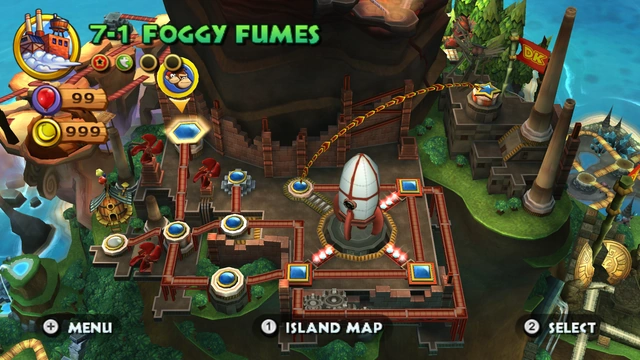

Map of the Factory in the Wii version.
Factory[]
- 7-1 Foggy Fumes
- 7-2 Slammin' Steel
- 7-3 Handy Hazards (level unlocked by buying the Map Key from Cranky Kong's Shop in this world for twenty Banana Coins)
- 7-4 Gear Getaway
- 7-5 Cog Jog
- 7-6 Switcheroo
- 7-7 Music Madness
- 7-R Lift-Off Launch
- 7-B Feather Fiend
- 7-K Treacherous Track (secret level unlocked by collecting all K-O-N-G Letters in this world)
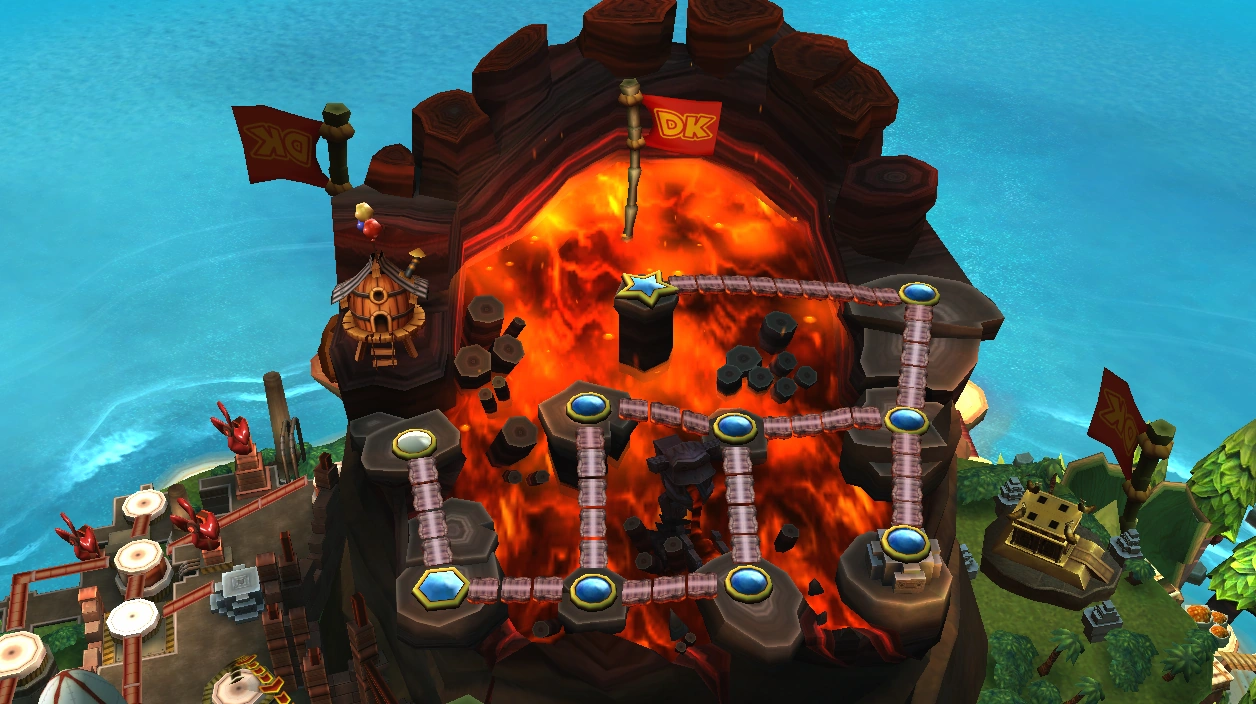

Map of the Volcano in the Wii version.
Volcano[]
- 8-1 Furious Fire
- 8-2 Hot Rocket
- 8-3 Roasting Rails
- 8-4 Smokey Peak (level unlocked by buying the Map Key from Cranky Kong's Shop in this world for twenty Banana Coins)
- 8-5 Bobbing Basalt
- 8-6 Moving Melters
- 8-7 Red Red Rising
- 8-B Tiki Tong Terror
- 8-K Five Monkey Trial (secret level unlocked by collecting all K-O-N-G Letters in this world)
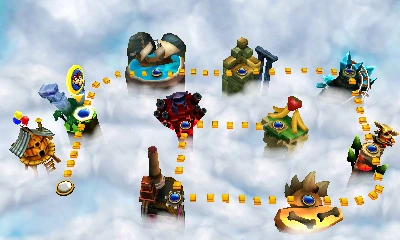
Cloud (3DS version only)[]
- 9-1 Crushin' Columns (level unlocked by completing the game once and collecting all eight Rare Orbs in the previous worlds of the 3DS version)
- 9-2 Gushin' Geysers
- 9-3 Spiky Surprise
- 9-4 Mischievous Moles
- 9-5 Topsy Turvy
- 9-6 Tar Ball Fall
- 9-7 Robo Factory
- 9-8 Lavawheel Volcano
- 9-9 (or 9-1) Golden Temple (level unlocked by completing the game once and collecting all eight Rare Orbs in the previous worlds of the Wii and Nvidia versions) (level present in the Wii, 3DS and Nvidia versions)
Differences between the Nintendo Wii, 3DS and Nvidia versions[]
Nintendo 3DS[]
- All game inputs are made through 3DS buttons (and touch screen). There is no support to motion controls[8].
- To characters' movement, the player has the option of using the 3DS circle pad or control pad.
- Similar to Wii Remote and Nunchuk control scheme (but different to horizontal Wii Remote), there is no dedicated run button. Both Donkey and Diddy Kong always move themselves at running speed.
- This version possesses two difficulty modes: Original Mode and New Mode. After starting a new game and picking a difficulty mode, the player cannot change it.
- The Original Mode is not different from the Wii version.
- The New Mode adds one permanent extra heart container (to the two original ones from the Original Mode, resulting in three in total) for each character (Donkey and Diddy Kong).
- In single player or multiplayer, each player can equip until three items per level. It also makes prices cheaper and adds new exclusive items to purchase at the Cranky Kong's Shop: Green Balloons, Crash Guards and portable DK Barrels (see Items and Barrels sections above) (see Trailers in the Videos section below).
- The Super Guide mode can be activated after the player loses five extra lives (rather than eight) in the same level. And all game menus are highlighted in green color instead of yellow.
- It is no longer possible to add a second player in the game maps. After picking a game file, the player using Donkey Kong must use their file and be the host. The second player must use Diddy Kong and the same player is not capable of interacting with menus and maps.
- After each thirty minutes of gameplay and clearing any level, the player will receive a message at the result screen advising to take a break. It is due to health concerns regarding the prolonged use of stereoscopic 3D effects[9]. In fact, the operations manual of the Nintendo 3DS states that the player must to take breaks of ten or fifteen minutes for each hour of gameplay sessions even if they do not feel tired.[10]
- The Nintendo 3DS lower screen has some dedicated functions:
- At the game files screen, the menu Options appears at the lower screen and they can also be accessed by using touch controls, including the multiple galleries of the Extras menu.
- In the world maps of the game, the lower screen displays the player's current number of extra life balloons and Banana Coins, and some game controls to interact with the maps.
- Inside levels, the lower screen displays numbers of player's items: totals of bananas, extra life balloons and Banana Coins, as well as Puzzles Pieces and K-O-N-G Letters collected in the current level.
- And by the player pausing the game, inside or outside levels, the lower screen will display menu options which the player can also use touch controls to interact with them.
- At the Cranky Kong's Shop, in the Original Mode of the 3DS version, the Banana Juice item costs only ten Banana Coins, instead of twenty coins like in the Wii version. During the New Mode, the Banana Juice allows the characters to take only five extra hits of damage, instead of ten hits, but its effects will now last even if the Kongs fall into pits. In the same mode, unused Banana Juices equipped during a level are not wasted, and they return to the Inventory menu after the primates leaving the said level. When the item is used inside a level, the Kongs will start to blink between their golden and regular forms after taking three hits of damage in the New Mode, instead of five hits in the Wii version or the Original Mode of the 3DS version.
- In the Cliff boss level Thugly's Highrise, during the boss fight third phase (Thugly with red-colored skin), it is no longer possible to skip Thugly's "big fireball" attack by taking it as damage. In Time Attack mode, it makes get Gold and Shiny Gold medals even harder.
- After defeating Tiki Tong, it is possible to rewatch the game credits in the Options menu.
- There is the Cloud world, an extra world with eight exclusive levels, all based in the previous worlds (see Cloud world in the Worlds and Levels section above) (see 3DS Exclusive Levels in the Videos section below).
- The Cloud world exclusive levels now precede the Golden Temple level.
- After going through the door of the Golden Temple and accessing the Cloud world once, the exterior area of the Golden Temple can no longer be revisited.
- In the Extras menu, there is a Movie Gallery section containing all movie cutscenes (in lower definition compared to the Wii version): game opening, prebattle with Tiki Tong, ending, Golden Temple rising and access to the temple, including all different versions featuring Donkey Kong and/or Diddy Kong.
- These movie cutscenes are unlocked by collecting Puzzle Pieces in the exclusive levels of the 3DS version.
- In the Mirror Mode, if the player collected all K-O-N-G Letters again in any level, they will receive a Blue Star Emblem replacing the red one.
- Music is rearranged, and game graphics and sound effects are scaled down due to the Nintendo 3DS' hardware limitations, when compared to the Nintendo Wii. This game version also runs at thirty frames per second[11], instead of sixty frames per second like in the Wii version.
- This version can display three-dimensional effects during gameplay which the player can adjust the depth or turn off on the Nintendo 3DS itself.
- There is a new animation for the puzzle emblem at the result screens of levels. After the player collecting all Puzzle Pieces inside a level once and clearing it, all pieces will assemble at the result screen forming a fruit emblem. The fruit emblem will soon jump, spin twice, return to its original place and turn into a green puzzle emblem. In the Wii version, after all puzzle pieces are assembled at the result screens, the fruit emblems just instantly turn into the green puzzle emblems, instead.
- Some animations were cut.
- The loading screen to start or continue a game file from the main menu screen mostly features static clouds.
- At the loading screen when entering or getting out levels, the background does not have a scrolling effect. There are also five circles that light up, signifying that the next location is loading.
- Donkey and Diddy Kong no longer stare at interest points and incoming hazards above and below the screen or in the background.
- The Kongs no longer have idle animations: Diddy, by himself, stretching and yawning or Donkey playing his Nintendo DS while Diddy watches when mounted on his back.
- Rambi the Rhinoceros no longer tries to catch his breath after being dismounted by the primates.
- There is no shaking effects on the wooden planks of suspended bridges when the heroes are rolling over or pounding on them, but the weight effects when the Kongs are standing on them remain. The same shaking effects are also missing during the second phase of the battle against Thugly, when the boss moves over similar planks in his arena. However, the shaking effects mentioned are still present on platforms made of wooden planks attached to the background in some levels.
Nvidia Shield TV[2][]
- This version is known in China as Donkey Kong Returns, the same name used in Japan.
- The emulated version is very similar to the original Wii version, but the game resolution is upscaled to 1080 pixels (see Nvidia Shield TV Version Gameplay in the Videos section below).
- The game inputs are made through Nvidia Shield TV controller. There is no motion controls.
- This version is available only in the Chinese language.
- Donkey Kong's idle animation displays him playing an iQue DS Lite, instead of a Nintendo DS.[12]
Gallery[]
Kongs[]
")
")
")
")
Animal Buddies[]
")
Enemies[]
")
")
")
")
")
")
")
")
")
")
")
")
")
")
")
")
")
")
")
")
")
")
")
")
")
")
")
")
")
")
")
")
")
")
")
")
Items[]
")
")
")
")
")
")
Logos[]
")
")
Boxarts[]
")
")
")
")
")
")
Gameplay[]
")
")
")
")
")
")
")
")
")
")
")
")
")
")
")
")
")
")
")
")
")
")
Videos[]
Trailers[]
![E3 2010[5] Trailer.](https://static.wikia.nocookie.net/donkeykong/images/6/62/Donkey_Kong_Country_Returns_OFFICIAL_E3_trailer_Nintendo_Wii/revision/latest/scale-to-width-down/185?cb=20200706101535 "Donkey Kong Country Returns OFFICIAL E3 trailer Nintendo Wii (17 KB)")
 Nintendo Wii (27 KB)")
")
")
3DS Exclusive Levels[]
 (24 KB)")
 (25 KB)")
 (22 KB)")
 (23 KB)")
 (23 KB)")
 (26 KB)")
 (25 KB)")
 (20 KB)")
Nvidia Shield TV Version Gameplay[]
")
Original Soundtrack[]

Donkey kong country returns ost
Donkey kong country returns music
Glitches[]
This is a very well made game, and any of the few known glitches are very rare. Here is a list of glitches in the Wii version.
- In Cranky Kong's Shop, there is a rare glitch where Cranky will be invisible.[citation needed]
- There is also a glitch with taking damage where the main characters may not be hurt by enemies/obstacles.[citation needed]
- In the Ruins level Shifty Smashers, there is a part where the heroes must quickly roll underneath an extended block that rises up and down. This is not particularly difficult, but if the player is in Time Attack mode, it may occur, on extremely rare occasions, a glitch when the characters jump up on it, because it may send them underneath it when the player tries and jumps onto the next platform, and it will then crush them before they can escape.[citation needed]
- Sometimes, at the end of the Cave level Crowded Cavern, if the player crouches very close to the frazzled Mega Squeekly and then rolls, they will be able to go through him, and as far as rock ground extends on extremely rare occasions. The player will soon come to a large crystalline growth (the one that Mega Squeekly bonks his head on). If the player do a flying roll over it (the points will not hurt the Kongs), the heroes will land on the wooden deck. There will probably be large gaps in it from when the primates were dodging Mega Squeekly, because when the player flew too low, the bat smashed through it a little. If it is not cut off completely, the heroes will come to a halt at the large stalagmite with a wooden crane behind it. There is no way to pass beyond it, so the player will have to go back, as there is nothing more to see. The primates cannot go through Mega Squeekly again afterwards.[citation needed]
Trivia[]
- This game pushes many differences from the other Donkey Kong series games in many ways:
- This is the first Donkey Kong Country series game to not feature King K. Rool as final boss. There are no Kremlings whatsoever in the game.
- Each main character has health as heart containers, feature first seen in the game DK: King of Swing for Game Boy Advance. The portrait artworks of the playable Kongs seen in the icons and character bars of the game are also similar to the style used in DK: King of Swing. And the bronze, silver and gold DK Medals, found in some levels of DK: King of Swing, are similar in appearance to the medals earned during the Time Attack mode in Donkey Kong Country Returns.
- The characters' design is similar to the one used in the game DK: Jungle Climber for Nintendo DS. The feature of using Diddy Kong as an assist character to Donkey Kong in the single player mode was also first seen in DK: Jungle Climber. And finally, the feature of unlocking extra levels by collecting items in regular levels was also present in DK: Jungle Climber.
- Many music themes present in Donkey Kong Country Returns are rearranged themes from the original Donkey Kong Country game.
- Enguarde the Swordfish is not featured in this game unlike its predecessors, probably because of the lack of underwater levels.
- Funky Kong is not present in the game though he gets a brief mention.
- The overworld map can be accessed without visiting a special area.
- The game autosaves after leaving a level or returning to the main title screen.
- The Extra Life Balloons no longer represent the face of the main protagonist.
- In the single player mode, if the two Kongs are present when falling into a pit, only Donkey Kong will return to the beginning of the level or latest checkpoint. It is unlike the previous games, where two main characters would still reappear together after falling into pits.
- Tutorial Pig's stalls replace Star Barrels as checkpoint markers, and usually, there are multiple checkpoints inside levels, instead of only one.
- The game no longer exits a level automatically after the player is defeated, losing an extra life (or two in multiplayer), and instead, the main character floats down to the beginning or latest active checkpoint using the extra life balloon. But if the player leaves the level, all progress made until any checkpoint is lost, and the player will start the level from the beginning again after returning to it.
- The game Donkey Kong Country Returns was developed by Retro Studios, the developers of the Metroid Prime series. This is their first non-Metroid series game.
- This is the first Donkey Kong Country series game to not feature neither underwater nor ice-based levels. Developers were considering the former enough to where underwater levels were already in development or were already developed, but were excluded due to the slow pace of the levels compared to the rest of the game.
- If the Wii version game was pre-ordered from GameStop[13], a banana-like case for Wii Remotes would ship with the game.[14]
- During levels, if Donkey Kong is left still for a while, he will start to play a Nintendo DS in the Wii version (or an iQue DS Lite in the Nvidia version[12]). And Diddy Kong, by himself, will start stretching and yawning.
- Sometimes, in Donkey Kong's Nintendo DS, it is possible to hear sound effects from the classic Donkey Kong game.
- In the multiplayer mode, if the second player, controlling Diddy Kong, defeats Tiki Tong alone, instead of Donkey Kong punching the moon, a similar cutscene occurs[15][16], with Diddy headbutting the moon in similar way to his Chimpy Charge move from the game Donkey Kong 64.
- The system of spending one extra life to summon a dropping DK Barrel and recovering a defeated character, during the multiplayer mode, is like similar feature in the game New Super Mario Bros. Wii.
- In the game WarioWare: Get It Together! for Nintendo Switch, one of the Nintendo Classics microgames is called "Donkey Kong Country Returns"[17]. During the minigame set in the level Jungle Hijinxs, the player must defeat a Tiki Goon walking back and forward over a large red flower located between the two statues resembling the boss Mugly. If the player is successful in defeat the tiki, Donkey Kong will appear and celebrate by beating his chest.
External Links[]
- Donkey Kong Country Returns for Wii U on Nintendo America
- Donkey Kong Country Returns 3D on Nintendo America