| |
| World(s) | Forest |
| Type | Key Temple |
| Music Theme(s) | Mystery of the Key |
| Animal Buddies | None |
| Bonus Room(s) | None |
| Puzzle Pieces | 5 |
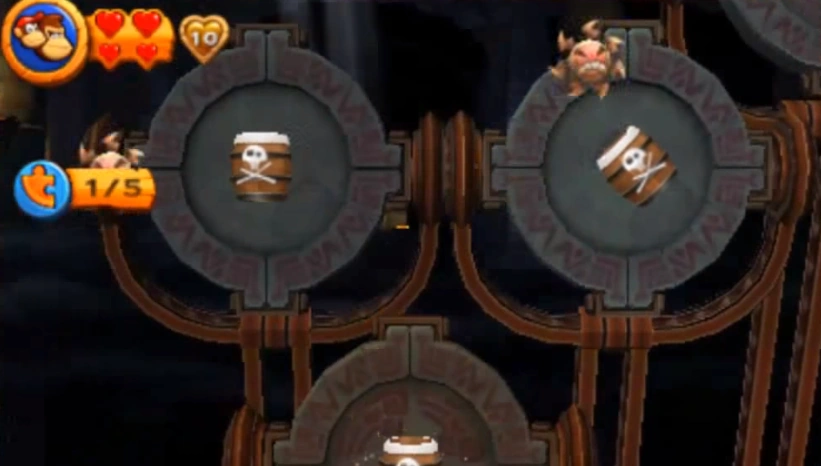
| Notable Feature(s) | Most of the progress through this level is made by the Kongs using barrel cannons and bouncy tires, demanding very good timing while avoiding many Tiki Zings. |
| Enemies Encountered | Tiki Buzzes, Tiki Zings |
| Game(s) | Donkey Kong Country Returns, Donkey Kong Country Returns 3D |
| First Appearance | Donkey Kong Country Returns (2010) |
| Latest Appearance | Donkey Kong Country Returns 3D (2013)
|
Blast 'n' Bounce (or Blast & Bounce) is the fortieth-second level in the games Donkey Kong Country Returns and Donkey Kong Country Returns 3D, as well as the tenth and final level in the Forest world of Donkey Kong Island. It is the fifth secret Key Temple level in the games, and all of the fifth world's K-O-N-G Letters must be collected to unlock it.
Overview[]
The temple has a few platforms, but the bulk of it requires bouncing off Tiki Buzzes and using barrel cannons. The Kongs need to get good aerial gain from the Tiki Buzzes if they want to jump from one to the other. The barrel cannons are also surrounded by many Tiki Zings. If Donkey or Diddy Kong are to hit one of these while blasting through the air, they are likely to fall into the pit below. There are also many bouncy tires in the level, demanding very good timing to progress and avoid enemies. At many occasions, Diddy Kong's rocket pack can help to avoid obstacles and collect items easily, but the level does not possess any DK Barrels to summon a second Kong.
Walkthrough[]
The Kongs begin this level leading to three Tiki Buzzes hovering above some Tiki Zings. The primates must bounce off all three Tiki Buzzes and bounce off higher from the third one to gain height and fall down in the abyss between the first two barrel cannons over the first Puzzle Piece at the bottom. Using Diddy Kong's rocket pack makes easier to reach the Puzzle Piece. After that, they will fall into a barrel cannon that can be used once. The primates can shoot up and to right while avoiding the Tiki Zing circling around the barrel at the right (they can also shoot up and to left to land safety into the left barrel and shoot to next one). Then they need to shoot to the next one that has two Tiki Zings orbiting it, then to the right to a barrel that has three Tiki Zings around it. Then they have to shoot up to another barrel with two Tiki Zings, and to the right to another barrel, but this time with just one Tiki Zing. After that, the Kongs must shoot to a barrel that rotates every ninety degrees that is orbiting a massive Tiki Zing. They must time right to land into the next barrel and continue until they reach another barrel that has two Tiki Zings circling it. The Kongs must then shoot down to the right for the next orbiting barrel, and then to the upper right to the penultimate barrel rotating around another massive Tiki Zing. Here, the heroes must blindly shoot the barrel when it is pointing towards at the upper right to land into a hidden barrel. After shooting this barrel the Kongs will able to collect the second Puzzle Piece and some bananas. After that, the next barrel will shoot them into barrel of the next section of the level.
Now the Kongs must shoot out of the barrel onto two Tiki Buzzes that are hovering over Tiki Zings. They must continue right into another barrel that shoots them straight up. They need to maneuver to the right and land on a bouncy tire. They must use the tire to jump over the moving Tiki Zing into the next barrel. Then they need to repeat the latter cycle for the next three to avoid three moving Tiki Zings, one being massive. Then the Kongs need to use the next eight Tiki Buzzes to bounce and avoid the Tiki Zings and land into the next barrel. Shooting out of the barrel, they need to bounce high off the two Tiki Buzzes hovering above the barrel cannon to collect the third Puzzle Piece and fall into the barrel. The barrel shots them through some DK stone barriers into the next section of the level.
Here, the Kongs need to use many moving tires to bounce safely to the next barrel. The first three tires are next to each other, with the third and fourth being intercepted by a massive Tiki Zing with a Tiki Buzz over it. Then between tires four and five, there is a massive Tiki Zing with two regular-sized Tiki Zings above it. Then tire five and six have a massive Tiki Zing in between them. Tires seven through nine are next to each other, but if the Kongs bounce high enough, they could possibly be hit by the two Tiki Zings high above the tires and rotating around a Puzzle Piece. The primates must use good timing to bounce off the tires, avoid the two Tiki Zings and collect the fourth Puzzle Piece without harm themselves. Between tires nine and ten is another massive Tiki Zing, followed by another two regular-sized Tiki Zings above it. Between tires ten and eleven, and tires eleven and twelve, there also a massive Tiki Zing and two regular Tiki Zings. And after the tire twelve, there are also a large Tiki Zing and two regular Tiki Zings. Yet, there is massive Tiki Zings above tires eleven and twelve, which could hurt the Kongs if they bounce off the tire too high. After the twelfth tire and Tiki Zings, there is a Tiki Buzz which helps the heroes to bounce and reach the next barrel cannon. After landing into barrel, they are shoot through the next few autofire barrels and reach the next section.
After blasting out of the last barrel in the background, many Tiki Zings fly out along with Donkey and Diddy Kong. Landing in the next barrel, the Kongs need to shoot out and land into the next barrel right below it. Then they need to shoot to the next barrel to the bottom left, yet there is a Tiki Zing floating back and forth above it. The primates need to time right to avoid it and reach the next barrel. The next barrel is to the bottom right, with a Tiki Zing above that barrel, plus the Tiki Zing above the barrel the heroes are currently in. The best way is to wait for the Tiki Zing above to be to the right of the Kongs so that they can avoid both the enemies. For reaching the next barrel, they must do the same as the previous barrel. Then they have to avoid the last Tiki Zing to reach the next barrel which leads them to the penultimate section of the level.
There are three tires after the barrel cannon, with massive Tiki Zings after the second and third one. Then after the tires, there are barrels that move up and down this spoon-like platform in the background. Around the spoon platforms are Tiki Zings, and the Kongs need to avoid them as they shoot away. The player needs to have Donkey and Diddy Kong shot near the bottom, which leads them to the next barrel, causing the spoon platform to fall over. The next one has to be at the highest point to avoid the two massive Tiki Zings, collect the fifth and final Puzzle Piece and fall into the next barrel. The barrel must be almost in the middle to reach the next barrel. Then they need to shoot near the bottom, yet not at the bottom, to reach the next barrel. After that, they end up automatically shooting through barrels into the last section of the level.
After the last autofire barrel they land in a barrel that moves in in an oval-like path that trails behind three Tiki Zings. They need to shoot to the next barrel that is also following the path yet backwards when the Tiki Zings are not blocking the path. They need to do that for the next five times, while avoiding three trios of Tiki Zings to reach more autofire barrels. After four autofire barrels, they are shoot onto safe ground to where the Yellow Rare Orb lies. The Kongs need to collect the orb in order to finish the level.
Enemies[]
Items[]
- Banana Coins: 1 (does not count three or more consecutive jumps on enemies)
Puzzle Pieces[]
- 1: The first Puzzle Piece is right at the beginning of the level. The player needs to bounce on the three Tiki Buzzes, with the last one they must perform a high bounce. They need to avoid the first barrel cannon, and fall in the abyss between the first two barrels. Diddy Kong's rocket pack can help. When this is done, they fall over the Puzzle Piece at the bottom of the screen and land into a hidden barrel cannon, which can shoot them upward once.
- 2: The second Puzzle Piece is hidden within the area beyond ninety degrees rotating barrels around massive Tiki Zings. The player needs to shoot the Kongs through all the barrel cannons until reach the fourth ninety degrees rotating barrel. There, they need to shoot the primates towards the upper right blindly, which leads them to a new barrel cannon. The new barrel propels the heroes through some bananas and the Puzzle Piece. The next barrel leads them back to main path.
- 3: The third Puzzle Piece is in the section with many Tiki Zings moving up and down and between bouncy tires, barrel cannons and Tiki Buzzes, that the Kongs need to bounce on the latter ones to progress. While bouncing some Tiki Buzzes, it possible to notice the Puzzle Piece at the top of the screen and above two Tiki Buzzes and a barrel cannon. The primates must bounce high on the penultimate Tiki Buzz in order to reach the third Puzzle Piece.
- 4: The fourth Puzzle Piece is in the section with many tires moving up and down between Tiki Zings. Moving forward, the player will soon see the Puzzle Piece floating in the air and orbited by two Tiki Zings. Careful timing is necessary to bounce high the tire under the Puzzle Piece and reach it without touching the Tiki Zings.
- 5: The final Puzzle Piece is above some massive Tiki Zings in the section with barrel cannons moving up and down. After see the Puzzle Piece at the right side of the screen, the player needs to shoot the Kongs out of the barrel cannon when it is at its highest point in order to harmlessly make to the Puzzle Piece and land into next barrel.
Puzzle[]
The puzzle of Blast 'n' Bounce is of a strawberry on a light green background. When all fifty-seven Puzzle Pieces in Forest world are found and Mangoruby is defeated in the boss level Mangoruby Run, the Forest diorama is added to the Diorama Gallery in the Extras menu.
Time Attack Medals[]
- Shiny Gold: 01:36.00
- Gold: 01:39.00
- Silver: 01:41.00
- Bronze: 01:55.00
Gallery[]
")
")
")
")
")
")
")
Videos[]
 (19 KB)")
 (15 KB)")
Trivia[]
- In some Nintendo Wii copies and Nintendo 3DS version, this level is called Blast & Bounce instead of Blast 'n' Bounce.